How To Fix Monitor Light Bar Mounting Clip Spring Weakening?
Does your monitor light bar feel loose or wobbly? You are not alone.
Many users notice their light bar starts sliding down over time. The clip just does not grip like it used to.
This happens because of spring weakening. The mounting clip loses tension after months of use. It simply cannot hold on tight anymore.
Thin monitors make this problem worse. There is not enough surface area for the clip to grab onto. So the light bar slips, tilts, or falls off completely.
The good news? You can fix this without buying a new light bar.
In a Nutshell
- The main cause is a weak spring clip that no longer grips your monitor tightly. This makes the light bar slide or wobble.
- Thin monitors make this worse. They don’t give the clip enough surface to hold onto.
- The best fix is to remove the spring and use double sided tape instead. This creates a permanent, stable mount.
- Placement matters. Always attach the clip or tape on the black bezel area. Never place it on the active screen.
- Check your monitor thickness before buying any light bar. This helps you avoid clip problems later.
- Avoid relying on old, weakened springs for long term use. They will keep failing over time.
Simple swaps like tape can save you money. You won’t need a new light bar at all. Just follow these steps and your setup will feel secure again.
Why Mounting Clip Springs Weaken Over Time
Metal springs lose their tension through repeated use and age. Every time you adjust your light bar or move it slightly, the spring compresses and extends. Over months and years, this constant flexing causes the metal to fatigue and lose its original strength.
Heat also plays a role in spring degradation. Your monitor generates warmth during operation. This heat transfers to the mounting clip, causing the metal to expand and contract. These temperature changes weaken the spring’s ability to maintain grip pressure.
The material itself becomes brittle over time. Metal springs are designed to bend thousands of times, but they eventually reach their limit. Once a spring starts losing tension, it accelerates the weakening process. The clip can no longer press firmly against your monitor edge.
Monitor design contributes to this issue too. Modern monitors have thinner bezels and lighter frames. The spring clip was designed for older, thicker monitor models. When you mount a light bar on a thin bezel, the clip has less surface area to grip. This creates uneven pressure that stresses the spring even more.
Dust and debris also accumulate inside the spring mechanism. Particles get trapped between the coils, preventing the spring from fully compressing and extending. This buildup reduces the clip’s holding force significantly.
The counterweight design becomes ineffective as springs weaken. A light bar’s weight pulls downward constantly. A strong spring counteracts this force. When the spring weakens, gravity wins. Your light bar slides down slowly over time.
Understanding these causes helps you choose better solutions. Knowing why springs fail means you can prevent future problems. You now see why temporary fixes fail and why permanent mounting methods work better.
Signs Your Light Bar Clip Is Losing Grip
Your monitor light bar clip shows several clear warning signs when the spring starts to fail. The most obvious signal is visible slippage. If your light bar gradually slides down your monitor throughout the day, the spring has lost its gripping power.
Pay attention to how easily the clip moves. A healthy spring should resist movement when you adjust it. If the clip shifts with minimal pressure from your fingers, the tension is gone.
Listen for clicking or rattling sounds. These noises mean the clip is no longer holding firmly against your monitor edge. Movement inside the mechanism indicates spring fatigue.
Check if your light bar tilts to one side. Uneven pressure suggests one side of the spring has weakened more than the other. This creates an unstable, lopsided setup.
Look at the physical gap between the clip and your monitor. A growing space means the spring cannot maintain contact anymore. The clip should sit flush against the bezel.
Test the grip by gently pulling on your light bar. A weak clip will shift or lift away from the monitor. Strong springs keep the bar locked in place regardless of gentle tugging.
Notice if the problem worsens in warm conditions. Heat makes metal springs lose tension faster. Your light bar may slip more on hot days.
Feel the spring itself if you can access it. A weakened spring feels less rigid and may appear slightly bent or deformed. Compare it to how it felt when new.
These signs appear gradually, so catching them early helps you avoid sudden light bar drops. Once you spot even one of these warnings, it is time to explore alternative mounting methods before failure becomes worse.
Tools and Materials Needed for the Fix
Before you start fixing your monitor light bar mounting clip, gather the right items. Having everything ready makes the job faster and safer.
First, you need basic hand tools. A small flathead screwdriver helps you remove the spring clip from your light bar. A Phillips head screwdriver works for any screws holding the mounting mechanism together. Keep both types nearby.
Next, consider adhesive options if you choose the tape mounting method. Double sided tape is the most common choice for replacing a weakened spring. Make sure it’s strong enough to hold your light bar’s weight. You may also want rubbing alcohol and a clean cloth to prepare your monitor surface before applying tape.
Protective items matter too. Wear work gloves to protect your hands while handling metal springs and clips. Safety glasses help if you’re working near your monitor screen. A small flashlight lets you see inside the clip mechanism clearly.
Gather cleaning supplies as well. Dust and debris weaken springs over time, so you’ll want a soft brush or compressed air to clean the clip area. A microfiber cloth prevents scratches on your monitor.
Finally, have a workspace ready. Use a soft mat or towel to place your light bar while you work. This prevents damage to the device and your desk surface.
Organization is key here. Lay out all your tools before starting. Small springs and screws can get lost easily, so use a small container to hold these pieces. Take photos of the original setup before disassembly. This reference helps you reassemble everything correctly.
Step-by-Step: Replacing the Spring Clip with Double-Sided Tape
Replacing your spring clip with double-sided tape gives you a permanent solution that actually works. This method removes the failing spring entirely and secures your light bar using adhesive strength instead.
Start by carefully removing the light bar from your monitor. Gently pull the clip away from the edge. If the spring still has some tension, wiggle it slowly to avoid sudden movement. Set the light bar on a soft surface to prevent scratches.
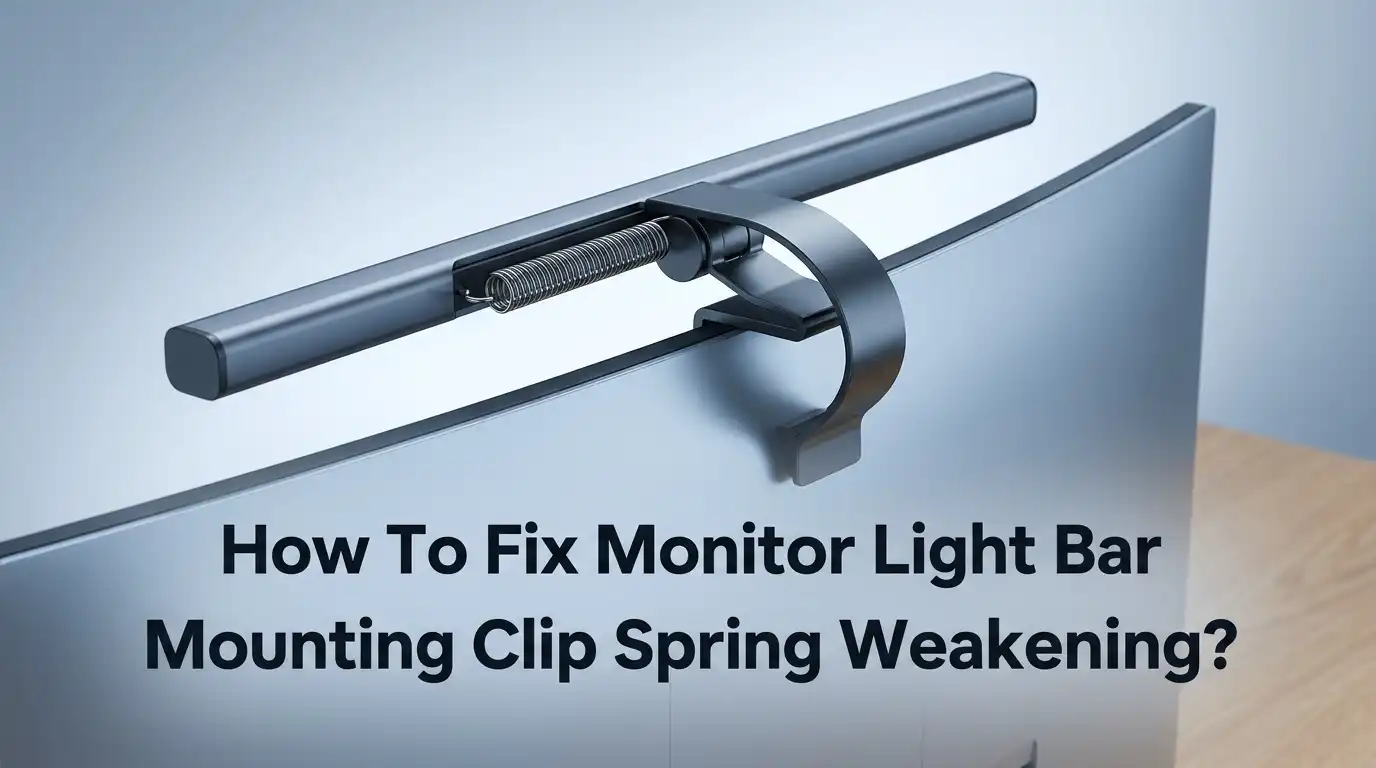
Next, locate the spring mechanism inside the clip. You’ll see a metal coil that’s lost its grip. Remove this spring by unclipping or unscrewing it from the mounting bracket. Keep the spring in case you need it later. The bracket itself stays attached to your light bar.
Clean both surfaces thoroughly before applying tape. Wipe the back of the mounting bracket with a dry cloth. Then clean the top edge of your monitor where the tape will stick. Remove any dust, fingerprints, or residue. A clean surface makes the adhesive bond much stronger.
Apply double-sided tape to the back of the mounting bracket. Use a tape width that matches your bracket size. Press it firmly onto the tape roll to ensure good contact.
Now position your light bar on your monitor’s top edge. Align it carefully in the center for balanced weight distribution. Press down hard for 30 seconds to activate the adhesive bond. Wait at least 24 hours before moving or adjusting your light bar.
This tape method holds better than weakened springs ever could. Your light bar stays secure without any moving parts to fail. The adhesive creates a permanent connection that lasts for years.
Finding the Safe Placement Zone on Your Monitor
Finding the right spot on your monitor matters more than you think. A poorly placed light bar can damage your screen or fall off unexpectedly.
Start by examining your monitor’s top edge carefully. Look for the black bezel area that surrounds your actual display. This is your safe zone. The bezel is the plastic or metal frame that doesn’t show any picture or text. This area can handle clip pressure without affecting your screen.
Avoid placing clips directly on the active display area. This is where your screen actually shows images and colors. Even slight pressure here can cause dead pixels or damage the LCD panel underneath.
Check your monitor’s thickness next. Thin monitors have smaller bezels, which limits where you can safely attach clips. Measure the bezel width on all sides. Some monitors have thicker bezels on top than on the sides.
Position your clip between the outer edge and the black bezel area. This placement gives maximum grip without risking screen damage. Make sure the clip sits flush against the surface. Any gaps mean weak contact and potential slipping.
Test the placement before committing to adhesive tape. Hold your light bar in position for a few minutes. Does it feel stable? Does the weight pull evenly? Adjust slightly if needed.
Mark your chosen spot with a small piece of tape first. This helps you visualize the final position. Step back and look at the overall balance. Your light bar should sit level, not tilted to one side.
Once you confirm the safe placement zone, you’re ready to apply your permanent mounting solution. A secure location prevents accidents and protects your monitor investment.
Tips for a Secure, Long-Lasting Mount
A secure, long-lasting mount starts with understanding why springs fail. Metal springs lose tension over time due to repeated use and temperature changes. Your best defense is prevention and smart maintenance.
First, check your spring tension regularly. Gently pull your light bar to see if it moves or slips. If you notice any movement, address it immediately before the problem gets worse. Catching weakness early prevents sudden drops.
Second, clean the contact surfaces where your clip grips your monitor. Dust and debris reduce friction and make springs work harder. Use a soft, dry cloth to wipe both the clip and your monitor’s top edge. This simple step restores grip without replacing anything.
Third, consider your monitor’s thickness before installation. Thinner monitors provide less surface area for clips to grip. If your monitor is slim, a weakened spring won’t hold as well as it did on thicker models. Verify compatibility upfront.
Fourth, explore adhesive mounting as a permanent solution. Double-sided tape creates a stronger hold than any spring mechanism. Remove the old clip carefully, clean the surfaces, and apply quality tape to secure your light bar. This method eliminates spring failure entirely.
Fifth, avoid mounting in areas that experience extreme temperature swings. Heat causes metal to expand and contract, which weakens springs faster. Keep your light bar away from direct sunlight and heat sources.
Finally, inspect your mounting setup every few months. Look for gaps between the clip and monitor edge. Listen for clicking or rattling sounds during use. These signs tell you when maintenance is needed.
The key is staying proactive. Regular checks and timely maintenance keep your light bar secure and stable for years.
Common Mistakes to Avoid When Fixing the Clip
When fixing your monitor light bar mounting clip, several mistakes can make your situation worse. Understanding what not to do helps you succeed.
Don’t assume your monitor works with standard counterweight clips. Monitor bezels vary in thickness and material. A clip designed for thick bezels won’t grip thin monitors properly. Check your monitor’s specifications before attempting any fix. Measure your monitor’s top edge thickness yourself to verify compatibility.
Avoid clipping directly on the active display area. This mistake damages your screen over time. The black bezel area exists for a reason. Place your clip only on the non-display portion of your monitor’s top edge. When in doubt, position the clip further toward the outer edge.
Don’t rely solely on weakened springs for long-term mounting. Springs lose tension gradually. If your spring already feels loose, it will only get worse. Continuing to use a failing spring wastes your time and risks dropping your light bar onto your monitor.
Never skip the cleaning step before applying adhesive tape. Dust and debris prevent proper adhesion. Your mounting will fail within days if surfaces aren’t clean. Wipe both the monitor edge and the clip bracket with a dry cloth.
Avoid extreme temperature areas for mounting. Heat and cold affect adhesive performance. Don’t place your light bar near vents, radiators, or direct sunlight.
Don’t rush the placement decision. Take time to test different positions before committing to permanent adhesive. Mark spots with temporary tape first. This simple step prevents mounting mistakes that require removal and repositioning.
Finally, avoid ignoring maintenance after installation. Check your mounting monthly to catch problems early before your light bar falls.
Troubleshooting Persistent Slippage Issues
Persistent slippage happens when your monitor light bar won’t stay in place no matter how tight you adjust the clip. This frustration usually means your spring has lost its gripping power over time.
The main culprit is metal fatigue. Springs compress and release thousands of times. Eventually, they stop bouncing back to their original tension. Your clip can’t hold as firmly against your monitor’s edge anymore.
Start by testing your current setup. Remove the light bar and examine the spring mechanism closely. Press it with your finger. Does it feel loose or mushy? A healthy spring should have noticeable resistance. If it feels weak, that’s your problem.
Next, clean both the spring and your monitor’s bezel thoroughly. Dust and grime reduce grip significantly. Use a soft, dry cloth to wipe away buildup. Sometimes this simple step restores enough friction to stop minor slippage.
If cleaning doesn’t help, you need a different approach. The most effective solution is switching to adhesive mounting. Double-sided tape or adhesive strips replace the failing spring entirely. They bond directly to your monitor’s top surface, creating a permanent hold that never weakens.
Before applying adhesive, dry both surfaces completely. Let any cleaning solution evaporate fully. Position your light bar exactly where you want it. Double-sided tape doesn’t allow repositioning once applied.
Another option involves modifying your clip mechanism. Some users add rubber padding or shims to increase friction. These materials grip better than worn metal springs. They’re inexpensive and reversible, so you can experiment without permanent changes.
Monitor the situation after your fix. Check monthly to ensure stability. Persistent slippage usually means adhesive mounting is your best long-term answer.
Final Thoughts
Fixing a weak spring clip does not need to be complicated. Most monitor light bar problems come down to two things: worn springs and wrong placement.
You now know how to spot both issues. You also know how to fix them for good.
Double sided tape remains your best long term solution. It skips the spring problem entirely. Your light bar stays put, even on thin monitor bezels where clips struggle most.
Regular checks matter too. A five minute inspection every few months catches problems early. This saves you from sudden light bar drops later.
Remember to always test clip placement first. Place it on the black bezel area, away from your screen. This keeps your display safe from damage.
Thin monitors need special attention. Standard clips often fail on slim designs. Adhesive mounting solves this problem completely.
Don’t ignore small warning signs. A slightly loose clip today becomes a bigger issue tomorrow. Address slippage as soon as you notice it.
Cleaning your contact surfaces takes little time. Yet it makes a big difference in grip strength. Do this before every mounting attempt.
Your light bar setup should feel stable and secure. If it doesn’t, something needs fixing right away. Trust the signs your equipment gives you.
With these fixes in place, you can enjoy your workspace lighting without worry. No more midday clip failures. No more constant readjustments during your workday.
Take action now if your spring shows weakness. A few simple steps today prevent bigger headaches later. Your monitor light bar deserves a stable, lasting mount.
Frequently Asked Questions
Is it safe to clip the light bar on the monitor’s black bezel?
Yes, it is safe to clip on the black bezel area. The key is positioning your clip on the non-active screen portion. Make sure you place it between the outer frame and the black bezel area, away from any display pixels.
Before you secure anything, verify the exact placement. Take time to test the clip position without adhesive first. This simple step prevents accidental damage to your screen.
Why does my monitor light bar keep slipping even when I tighten the clip?
Your spring has likely lost tension over time. Metal fatigue causes springs to weaken gradually, reducing their gripping force. Even tight adjustments won’t help a fatigued spring hold your light bar securely.
The solution is to replace the spring mechanism entirely with a permanent adhesive mount. Double sided tape adhesive provides stable, long term support that springs cannot match.
Can I use double sided tape on any monitor?
Double sided tape works on most monitors, but preparation matters. Clean both your monitor’s surface and the light bar mount thoroughly before application.
Dry both surfaces completely to ensure the adhesive bonds properly. Avoid applying tape in extreme temperature areas of your workspace. The adhesive performs best in stable, moderate conditions.
What’s the best permanent fix for a weakened spring clip?
Double sided tape adhesive mounting is your most reliable option. This approach eliminates spring dependency entirely and provides consistent holding power.
Apply the tape directly to your monitor’s top surface on the non display bezel area. The adhesive creates a permanent bond that won’t weaken like springs do over time.
Should I modify my mounting clip instead of replacing it?
Modification is possible but requires careful planning. You can hack the clip mechanism to improve grip on thin monitor bezels.
However, adhesive mounting often proves simpler and more effective. Consider your monitor’s thickness and bezel design before attempting modifications. When in doubt, the tape solution offers the most straightforward path forward.

Hi, I’m Sonny Dawson, the creator and voice behind ConvertResizeGen. 👋 I’m a passionate tech enthusiast who loves exploring the latest gadgets, devices, and electronics that shape the way we live and work. Through my website, I share honest, hands-on reviews of trending Amazon products to help you make smarter buying decisions.