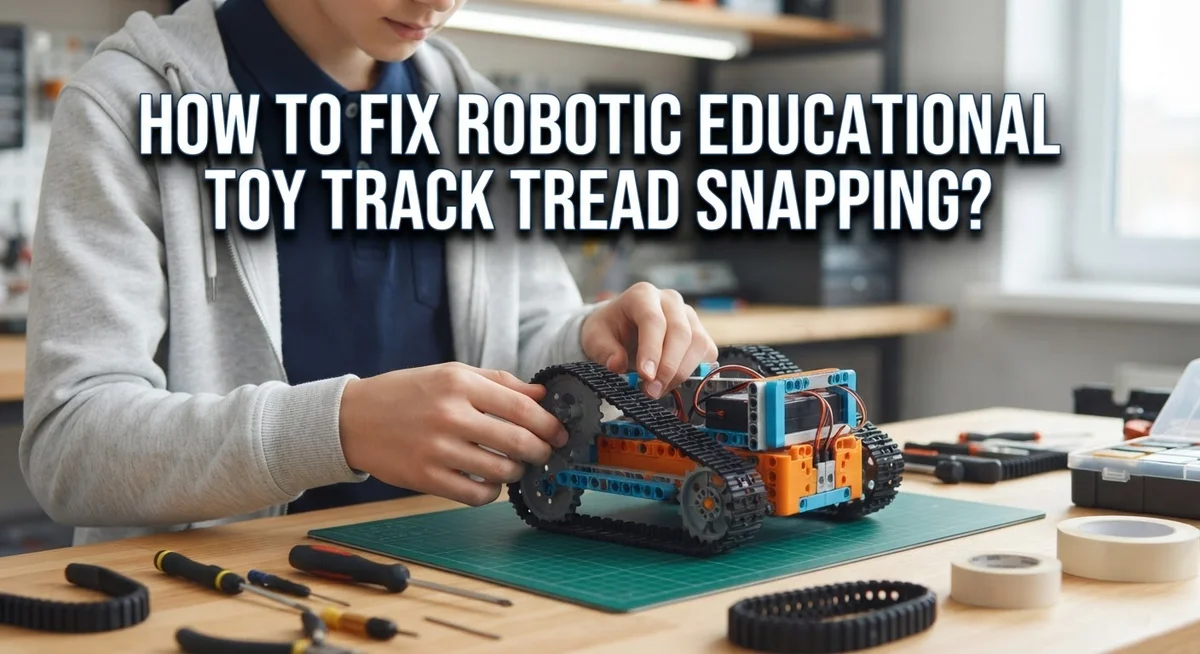
How To Fix Robotic Educational Toy Track Tread Snapping?
Your child’s robotic toy suddenly stops moving. You check the tracks and see a snapped tread. This can feel frustrating, especially when the toy is brand new.
Track tread snapping is a common issue in educational robot toys. Many failures happen within the first ten minutes of use. This usually points to wheel misalignment or manufacturing stress, not poor handling.
The good news? You can fix this problem at home. You don’t need special tools or expert skills.
In a Nutshell
- Check wheel alignment first. Misaligned wheels put extra stress on the tread and cause it to snap early.
- Inspect the motor cables. Loose cables often rub against the track and create friction damage over time.
- Apply rubber specific glue for a temporary fix. This holds the tread together until you can make permanent repairs.
- Avoid overtightening screws during adjustments. Too much tension pulls the tread apart and leads to more breaks.
- Never power on the toy while you adjust mechanical parts. This keeps your fingers safe and prevents further damage.
- Follow the assembly guide closely. Skipping steps often causes improper fits that snap the tread again.
- Replace the track completely if damage looks severe. Realigning parts helps, but sometimes a fresh track is the only real fix.
Why Robotic Toy Track Treads Snap
Robotic toy track treads snap for several specific reasons. Understanding these causes helps you prevent future breaks and fix current problems.
Stress and tension are the main culprits. When wheels don’t align properly, they create uneven pressure on the rubber track. This pressure builds up until the tread suddenly snaps. The track material itself can only handle so much force before it fails.
Manufacturing defects also play a role. Some tracks come out of the factory with weak spots or thin areas. These weak points fail quickly, sometimes within the first ten minutes of use. Check your track carefully when you first unbox the toy.
Overtightening fasteners causes serious problems. When you tighten the screws too much, you squeeze the track between components. This crushing pressure damages the rubber and causes snapping. Gentle tension is always better than forcing things tight.
Poor cable routing creates friction issues. Motor cables that rub against the track or gears generate heat and wear. This friction weakens the rubber until it breaks. Cables should run away from moving parts.
Wheel misalignment puts the track in awkward positions. When wheels sit at wrong angles, they pull and twist the track unevenly. This twisting stress eventually snaps the tread.
Assembly mistakes contribute significantly. Skipping steps or ignoring the instruction guide leads to improper setup. Components sit wrong, creating mechanical problems that damage the track.
The good news? Most of these issues are fixable. By checking alignment, adjusting tension carefully, and routing cables properly, you can prevent snapping. If snapping happens anyway, you now know exactly where to look for the problem.
Signs Your Track Tread Is About to Fail
Your robotic toy’s track tread may fail soon if you notice certain warning signs. Learning to spot these signs helps you catch problems before they become serious.
Listen for unusual sounds first. If your toy makes grinding, clicking, or squeaking noises when moving, the track tread is under stress. These sounds mean friction is building between components. Stop using the toy immediately and inspect the track.
Watch for visible cracks or splits. Examine the rubber track closely under good lighting. Small cracks appear before complete snapping occurs. If you see any damage, even tiny lines, the tread is weakening. Don’t wait for it to break completely.
Check if the toy moves unevenly. A failing track often causes one side to move slower than the other. The toy may pull to one direction or hesitate during turns. This uneven movement indicates the track is losing grip or alignment.
Feel for loose or wobbly parts. Gently press on the track while the toy is powered off. If the track moves side to side easily, it’s not properly seated. Excessive movement puts stress on the tread material.
Notice if the toy stops suddenly. A snapping track often causes immediate power loss or complete stoppage. If your toy works fine one moment then stops the next, internal track damage likely occurred.
Look for rubber pieces near the toy. Small rubber fragments or dust around the track area signal deterioration. The tread material is breaking down internally.
Act quickly when you spot these signs. Early intervention prevents complete track failure and keeps your educational toy working properly.
Step-by-Step Guide to Diagnosing the Problem
Start by powering off your toy completely. Set it on a flat surface where you can see all sides clearly. Good lighting helps you spot problems that might hide in shadows.
Look at the track alignment first. Spin each wheel by hand slowly. The track should move smoothly without catching or binding. If it hesitates at certain points, the wheels are likely misaligned. Mark those spots with a small piece of tape so you remember where the problem occurs.
Inspect the wheels next. Check if they sit straight on their axles. Wheels that tilt sideways will pull the track unevenly and cause snapping. Look for dirt, sand, or debris wrapped around the wheel edges. Clean these areas gently with a dry cloth.
Examine motor cables carefully. Trace each wire from the motor to the battery connection. Cables that rub against the track or gears create friction that damages rubber treads. Cables should route away from moving parts completely.
Check screw tightness. Feel each fastener by hand without using tools yet. Overtightened screws compress the track mounting points and create stress. Loose screws allow the track to shift and slip during movement.
Look for visible damage. Scan the entire track surface for cracks, splits, or worn spots. Small cracks often spread quickly into complete breaks. Note any areas where the rubber looks thinner than others.
Test track tension. Gently press the track midway between wheels. It should give slightly but not feel loose or floppy. Excessive tension or slack both cause snapping problems.
Take photos of problem areas before proceeding to repairs. These images help you remember exactly what needs fixing.
How to Realign Wheels and Fix Track Tension
Start by turning off your toy completely. Never adjust mechanical parts while power is on.
Inspect how the wheels sit on their axles. Spin each wheel slowly by hand. Both wheels should rotate smoothly without wobbling or tilting. If one wheel tilts inward or outward, it’s misaligned and needs adjustment.
Check the axle bolts carefully. Locate the screw or bolt holding each wheel in place. Loosen it slightly, but don’t remove it completely. The wheel should move freely on the axle without excessive play.
Realign the wheel so it sits perpendicular to the track. The wheel face should be parallel to the track surface. Tighten the bolt gradually while checking alignment. Stop when the wheel is snug but still spins freely.
Test the track tension next. Press the track midway between the two wheels. It should have slight give, roughly one quarter inch of movement. If it’s too tight, the track strains constantly. If it’s too loose, the track slips off the wheels.
Adjust tension by loosening the wheel mounting bolts slightly. Slide each wheel forward or backward to change track tightness. Move wheels closer together to tighten the track. Move them apart to loosen it.
Route all motor cables away from the track and gears. Cables rubbing against moving parts cause friction and premature failure. Use cable ties to secure wires safely.
After adjusting, spin the wheels by hand again. They should turn smoothly without resistance. The track should sit evenly on both wheels without sagging or bunching.
Power on the toy briefly to test movement. Stop immediately if you hear grinding sounds or notice uneven motion. These signs mean further adjustment is needed.
Temporary Repairs Using Rubber Adhesive
Rubber adhesive offers a quick fix when your toy’s track tread snaps. This method works best for small cracks or partial breaks that haven’t completely separated the track pieces.
Start by powering off your toy completely. Remove the battery to prevent accidental activation while you work. Let the toy sit for a few minutes so any moving parts stop completely.
Inspect the snapped area closely. Clean away any dirt, dust, or debris using a soft dry cloth. Wipe both surfaces that need to bond together. A clean surface helps the adhesive stick much better and last longer.
Apply rubber adhesive to both sides of the break. Use a small amount at first. Press the track pieces together firmly and hold them for the time recommended on your adhesive packaging, usually between 30 seconds and 2 minutes.
Wipe away any excess adhesive with a cloth before it dries completely. Once the bond sets, test the track by spinning the wheels by hand. The track should move smoothly without cracking again at the repair point.
This temporary fix typically lasts for several hours of play time. For longer lasting results, you’ll eventually need to replace the track or realign the mechanical components causing the stress.
Keep in mind that rubber adhesive works best on fresh breaks. Older cracks with dried rubber dust won’t bond as effectively. If the track continues snapping in the same spot after repair, the underlying cause (misaligned wheels or overtightened screws) still needs attention to prevent future failures.
Proper Cable Routing to Prevent Future Snapping
Motor cables running loose near your track create friction that causes premature snapping. Proper cable routing prevents this damage before it starts. Begin by identifying every cable connected to your motor.
Trace each wire from the motor housing to the battery pack. Look for cables that hang near the track or gears. These wires rub against moving parts and wear through the rubber tread quickly.
Route cables away from all moving components. Press cables against the toy’s frame or body instead of letting them dangle. Use small clips or cable ties to hold wires in fixed positions. Secure cables so they cannot shift toward the track during operation.
Check cable tension carefully. Wires should not pull tight or create strain on motor connections. Loose cables that shift position are just as problematic as tight ones. Find the middle ground where cables stay put without stress.
Inspect cable insulation regularly. Look for worn spots, cracks, or exposed wire. Damaged insulation allows wires to contact metal parts and create short circuits that damage your toy.
Before reassembly, spin each wheel by hand to verify cables don’t interfere. The track should rotate smoothly without catching on any wires. If you feel resistance, reposition the cables again.
Test your toy briefly after routing cables. Power it on for just a few seconds to confirm smooth movement. Listen for grinding sounds or unusual noises that indicate cable contact with gears.
This preventive step takes only minutes but saves your track from future damage. Proper cable management protects both your toy’s lifespan and your investment in educational play.
Common Mistakes to Avoid During Repair
When repairing your robotic toy’s track tread, certain mistakes can make things worse. Understanding what to avoid saves you time and prevents additional damage.
Overtightening fasteners is the most common error. Many people assume tighter bolts mean better repairs. This actually crushes rubber components and warps metal parts. Tighten screws firmly but stop when you feel resistance. Your fingers should turn the wrench without straining.
Never power on your toy while adjusting mechanical parts. This causes injuries and damages internal circuits. Always turn it completely off before touching wheels, tracks, or cables.
Ignoring assembly instructions leads to misalignment problems. Your toy’s manual shows the correct wheel positioning and track tension. Skip these details and your track will snap again quickly. Spend a few minutes reviewing the original assembly steps.
Don’t assume all adhesives work the same way. Regular glue or super glue won’t hold rubber properly. You need rubber specific adhesive for temporary fixes. Other products fail within minutes of use.
Poor cable routing causes repeated snapping. Wires rubbing against moving tracks create friction that damages treads. Route cables away from all spinning components before reassembly.
Skipping the hand spin test before powering on is risky. Spin each wheel manually to confirm nothing interferes with track movement. This quick check prevents immediate re snapping.
Failing to inspect for internal damage wastes your repair effort. Look inside the track housing for broken gears or bent axles. Reassembling without fixing these issues means your track will snap again.
Don’t rush the repair process. Take your time inspecting each component. Document problem areas with photos before starting work. This approach prevents costly mistakes and keeps your toy working longer.
Troubleshooting Persistent Track Failures
When your robotic toy’s track tread snaps repeatedly, the problem usually goes deeper than just the visible break. Persistent track failures signal that something in your toy’s mechanical system needs attention. Start by examining wheel alignment carefully.
Misaligned wheels create uneven pressure on the track. This pressure builds up over time and causes the tread to snap again and again. Check that each wheel sits perfectly straight and level. Spin each wheel by hand to feel for resistance or grinding sounds.
Next, inspect the track tension itself. A track that’s too loose will slip and snap. A track that’s too tight strains the material until it breaks. Find the adjustment screws on your toy’s frame. Loosen them slightly, then tighten them just until the track moves smoothly without slipping.
Look for internal damage inside the track housing. Broken gears or bent metal parts create friction that destroys new treads quickly. If you spot damage, the part may need replacement rather than repair.
Check your motor cables again. Even after routing them away from the track, they can shift during play. Verify cables stay clear of all moving parts.
Pay attention to how your toy behaves before failure. Does it pull to one side? Does it make grinding noises? These signs point to specific problems. A toy that pulls left suggests the right wheel needs adjustment.
If snapping continues after these checks, your track material itself may be defective. Some batches have manufacturing flaws that cause early failure. Consider replacing the entire track assembly as a permanent solution rather than applying temporary fixes repeatedly.
Final Thoughts
Fixing a snapped track tread does not need to feel overwhelming. Most breaks happen because of simple mechanical issues. Misaligned wheels, loose cables, or tight screws often cause the damage.
Start with the basics every time. Check wheel alignment first. Then look at cable routing and screw tension.
A rubber specific adhesive works well for quick repairs. It holds treads together while you test the toy. This works as a temporary fix, not a permanent solution.
For lasting results, focus on the root cause. Track material may wear out from repeated stress. Realigning components fixes most problems permanently.
Patience matters during this process. Rushing through repairs often leads to new mistakes. Take your time with each screw and wire.
Always test your toy after every adjustment. Spin the wheels by hand first. Then power it on briefly to check movement.
If tracks keep snapping despite your best efforts, the material itself might be defective. This happens sometimes with manufacturing defects. Replacement tracks solve this issue completely.
Educational robotic toys teach children valuable lessons. They also teach us patience during repairs. Every fix you make builds your mechanical skills.
Keep your toy’s manual nearby during any repair. It shows exact wheel positions and assembly steps. This reference prevents many common errors.
Small fixes today prevent bigger problems tomorrow. A few minutes of careful inspection saves hours of frustration later. Your robotic toy can run smoothly again with the right approach.
Remember that practice improves your repair skills over time. Each successful fix teaches you something new. Soon these repairs will feel simple and quick.
Frequently Asked Questions
Why does my robotic toy’s track tread snap within the first few minutes of use?
Early snapping usually points to wheel misalignment or incorrect track tension. When wheels sit at wrong angles, they create uneven pressure on the rubber track. This pressure builds quickly and causes sudden breaks.
Check your assembly instructions carefully. The manual shows exactly where each wheel should sit. Spin the track by hand before powering on. If it feels stiff or catches, wheels need adjustment.
What’s the quickest temporary fix for a snapped track?
Rubber specific adhesive works well for quick repairs. Clean both broken ends thoroughly first. Apply the adhesive according to package directions and let it cure fully before use.
This fix buys you time, but it’s not permanent. The track will likely snap again at the same spot if you don’t fix the root cause. Use this method while you investigate why the track broke.
How do motor cables cause track snapping?
Cables routed too close to gears or treads create friction. As the track moves, cables get caught or pinched. This friction adds extra stress to the rubber material.
During assembly, route all cables away from moving parts. Keep them loose and secure with clips if your toy has them. Poor cable routing is one of the easiest problems to fix and prevents repeated failures.
When should I replace the track instead of repairing it?
If snapping happens repeatedly even after fixing alignment and cable routing, your track material may be defective. Some educational toys have manufacturing defects in the rubber compound.
Contact the manufacturer about replacement parts. Document when snapping occurs and what adjustments you’ve already made. This information helps them understand if it’s a product issue.

Hi, I’m Sonny Dawson, the creator and voice behind ConvertResizeGen. 👋 I’m a passionate tech enthusiast who loves exploring the latest gadgets, devices, and electronics that shape the way we live and work. Through my website, I share honest, hands-on reviews of trending Amazon products to help you make smarter buying decisions.