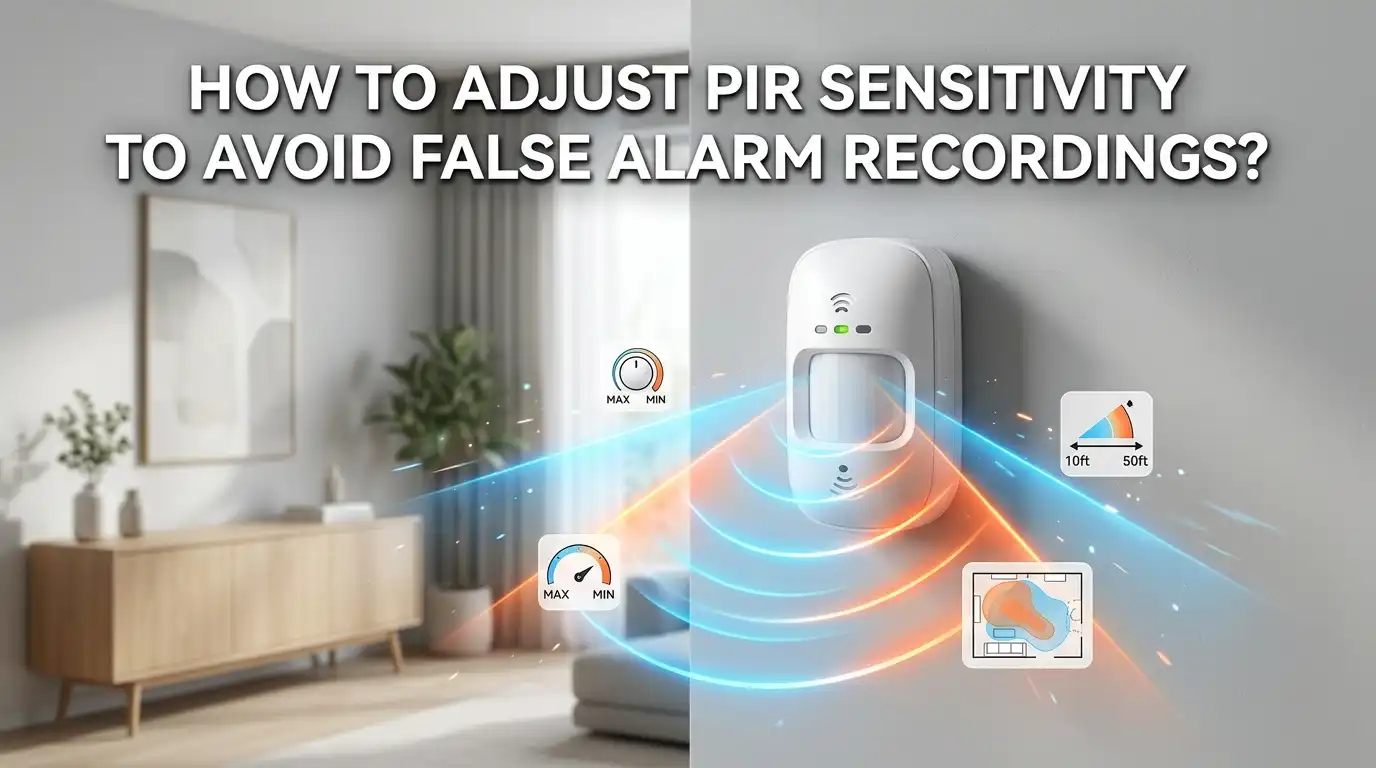
How To Adjust PIR Sensor Sensitivity To Avoid False Alarm Recordings?
Your phone buzzes again. You open the security app expecting an intruder. Instead, you see a leaf blowing across the lawn. Sound familiar?
False alarm recordings waste your storage, drain your battery, and train you to ignore real alerts. The good news is that most of these false triggers come from one fixable thing: sensitivity that is set too high.
This guide shows you exactly how to adjust PIR sensor sensitivity so your camera records what matters and skips the noise. You will learn how the sensor works, what causes false alarms, and the simple steps to fix them. Let’s get your alerts back under control.
Key Takeaways
- PIR sensors detect heat changes, not motion itself. A PIR (Passive Infrared) sensor reacts to shifts in infrared heat. Warm air, sunlight, and pets all create those shifts, which is why they trigger false recordings.
- Start at medium sensitivity, then test in real conditions. A medium setting gives you a safe baseline. You raise or lower it based on what your camera actually records over a day or two.
- Lower sensitivity stops most false alarms fast. Turning sensitivity down is the single quickest fix. It tells the sensor to ignore small or distant heat changes.
- Placement matters as much as settings. Mount the sensor 8 to 10 feet high, angle it slightly down, and keep it away from vents, sunlight, and busy roads.
- Use detection zones and pulse count for fine control. These features let you ignore specific areas and small animals without missing real intruders.
- Test, review, and repeat every season. Hot and cold weather both change sensor behavior. A quick seasonal check keeps your system accurate all year.
What A PIR Sensor Actually Detects
A PIR sensor does not see motion the way your eyes do. It detects infrared radiation, which is heat given off by warm objects like people, animals, and engines.
Inside the sensor sits a small element split into two halves. When the scene is still, both halves read the same heat level. When a warm body moves across the view, one half gets more heat than the other. That difference triggers the alarm.
This is the key thing to understand. The sensor reacts to heat change, not movement. That is why a gust of warm air or a sunlit wall can trigger it even when nothing is really there.
Knowing this changes how you fix false alarms. You are not blocking movement. You are controlling how much heat change the sensor needs before it fires. Once you grasp that, every setting below makes sense.
Why High Sensitivity Causes False Alarm Recordings
Sensitivity controls how small a heat change the sensor will react to. At a high setting, the sensor fires on tiny shifts. At a low setting, it needs a large, clear shift before it acts.
When sensitivity sits too high, your camera records almost anything. A bird flying past, a shadow moving over a warm path, or heat rising from a driveway can all trigger it. These are your false alarm recordings.
Think of it like a microphone turned up too loud. It picks up every whisper and rustle along with the words you actually want to hear. You cannot tell the signal from the noise.
Lowering sensitivity raises the bar. The sensor now ignores small heat changes and waits for something bigger, like a person walking through. This is why reducing sensitivity is the first move most experts recommend when false alarms pile up.
Find The Sensitivity Adjustment On Your Device
Before you change anything, you need to know where the control lives. The location depends on your sensor type.
On app based cameras like Wi Fi security cameras, you find the setting inside the mobile app. Look under a menu named “Motion Detection,” “PIR Settings,” or “Sensitivity.” Most apps show a slider or a low, medium, high choice.
On DIY modules like the popular HC SR501, the control is a physical part. You will see two small orange dials called potentiometers on the back. The one labeled Sx controls sensitivity. Turning it clockwise increases detection distance, and counter clockwise decreases it.
On alarm panel systems, the setting may live in the panel software or as a tiny jumper or dial inside the sensor housing. Check the manual for the exact spot.
Tip: Always note your current setting before you change it. That way you can return to it if a new setting works worse.
Step By Step: Set Your Baseline Sensitivity
Now let’s set a starting point. A good baseline saves you from guessing later.
First, set sensitivity to medium. This is the safe middle ground. It catches real movement without firing on every small change.
Second, wait for the warm up period. Many sensors, including the HC SR501, need 30 to 60 seconds after power on to settle. During this window the output can fire randomly, which is normal. Ignore any alerts in this time.
Third, walk a normal test path. Have someone walk across the detection area at walking speed, at the distance you want to cover. Watch whether the camera records.
Fourth, check the result. If it catches the walk cleanly, your baseline is good. If it misses the walk, nudge sensitivity up a little. If it fires on tiny things nearby, nudge it down.
Pros: A medium baseline is reliable and fast to set. Cons: It may still need fine tuning for your exact environment, which the next steps cover.
Lower Sensitivity To Cut Out Small Triggers
If false alarms continue after setting a baseline, the most direct fix is to turn sensitivity down.
On an app, drag the slider toward the low end one step at a time. On an HC SR501 module, rotate the Sx dial slightly counter clockwise. Make small changes, then test after each one.
The goal is simple. You want the highest sensitivity that still avoids false alarms. Go too low and you risk missing a real person. Go too high and the false recordings return. The sweet spot sits between those two.
After each adjustment, leave the system running for a few hours. Review the recordings. Did the leaf, the bird, or the shadow stop triggering it? If yes, you found a better setting.
Pros: This is the quickest and easiest method, and it needs no extra hardware. Cons: Set it too low and the sensor may miss slow or distant movement, so test real walking paths after every change.
Adjust The Time Delay To Reduce Repeat Recordings
Sometimes the problem is not too many different triggers. It is the same event recorded over and over. Time delay settings fix this.
Time delay controls how long the sensor stays active after it detects motion. A short delay means the sensor resets fast and can fire again right away. A long delay means it waits before it can trigger a new recording.
On the HC SR501, the Tx dial sets this. Turning it clockwise increases the delay, up to around five minutes. App based cameras often call this “cooldown” or “retrigger interval.”
For most security use, a delay of a few seconds to a minute works well. It captures a real visit but stops the camera from making ten clips of one person walking around.
Pros: This slashes repeat clips and saves storage and battery. Cons: Too long a delay can miss a second, separate event, so balance it with how busy your area is.
Use Detection Zones To Ignore Problem Areas
Many modern cameras let you draw detection zones. This is a powerful tool for false alarm control.
A detection zone is a section of the camera view where motion counts. Anything outside that zone is ignored. You draw these zones right in your app, usually by shading a grid over the live image.
Say a busy road sits at the top of your view. Cars there trigger endless recordings. With zones, you exclude the road and keep only your driveway and door. The sensor stops caring about traffic.
This method works alongside sensitivity, not instead of it. You lower sensitivity to cut small triggers, then use zones to cut entire areas that cause trouble.
Pros: Zones give precise control and stop location based false alarms like roads, trees, and neighbor yards. Cons: Not every sensor supports them, and badly drawn zones can create blind spots where you do want coverage, so map them with care.
Set Pulse Count And Pet Modes For Animals
Pets are one of the top causes of false alarm recordings. Two features help you keep them out of your clips.
The first is pulse count. This setting decides how many detection zones inside the lens must trigger at the same time before the alarm fires. Set it higher, and a small animal that crosses only one zone gets ignored. A full size person crossing several zones still triggers it.
The second is pet immune mode. Some sensors ignore heat signatures below a weight limit, often around 40 to 80 pounds. A cat or small dog stays under the radar while a human does not.
To use these, find the pulse count dial or the pet mode toggle in your settings. Raise pulse count one step and test with your pet loose in the room.
Pros: These let pet owners keep cameras armed without constant false alerts. Cons: A large dog may still trigger the sensor, and very high pulse counts can slow detection of fast moving people.
Fix Placement Problems That Sensitivity Cannot Solve
No setting can fix a badly placed sensor. Where you mount it matters as much as how you tune it.
Mount residential PIR sensors 8 to 10 feet high and angle them slightly downward. This points the view at walking height and away from ground level heat that small animals give off.
Aim the sensor so movement crosses it sideways, not straight at it. PIR sensors detect side to side motion far better than motion coming toward them. A hallway sensor works best on the side wall, not the end wall.
Keep the sensor away from heat sources. Avoid pointing it at HVAC vents, radiators, sunlit windows, and reflective surfaces. These all create heat changes the sensor reads as motion.
Pros: Good placement removes whole categories of false alarms at the source. Cons: Moving a mounted sensor takes effort and may need new screws or adhesive, but it pays off with far cleaner recordings.
Block Sunlight And Heat With Shields And Angles
Sunlight is a sneaky troublemaker. Direct sun, reflected glare, and sun heated surfaces all shift the infrared scene and trigger false recordings.
If you cannot move the sensor, add a shade or snoot. A small hood over the lens blocks direct sun and narrows the trigger area to where you want it. Some people use a short tube or a printed cap to do this.
You can also re angle the sensor away from where the sun sits during the day. Track where light hits the lens in the morning and evening, then tilt the sensor to avoid it.
For outdoor units, fit a weather shield or housing. This protects against sun, rain, and UV damage all at once, which also extends the sensor’s life.
Pros: Shields are cheap, simple, and stop sun based false alarms without lowering sensitivity. Cons: A poorly placed shade can block part of your real coverage, so check your view after fitting one.
Account For Weather And Seasonal Temperature
Temperature changes how your PIR sensor behaves, and many people forget this. The same setting can act very different in winter and summer.
In cold weather, the gap between body heat and the cold background is large. The sensor detects people easily, and you may even need to lower sensitivity to avoid noise from heating sources.
In hot weather, the air gets close to body temperature. That shrinks the heat contrast and makes real movement harder to detect. You may need to raise sensitivity slightly so you do not miss people.
This is why a setting that worked in March can fail in July. The fix is a seasonal check. Twice a year, run a quick walk test and adjust if needed.
Pros: Seasonal tuning keeps detection accurate all year. Cons: It takes a few minutes each season, but skipping it leads to either missed events or a flood of summer false alarms.
Clean The Lens And Maintain The Sensor
A dirty or aging lens causes both false alarms and missed detections. Maintenance is the cheapest fix on this list.
Clean the Fresnel lens monthly. Dust, cobwebs, and water spots scatter the infrared signal and confuse the sensor. Wipe the lens gently with a lint free cloth. Avoid harsh chemicals that can cloud the plastic.
Check the lens for yellowing. A yellow tint is a sign the sensor is old and degrading. Most PIR sensors last 5 to 7 years before age reduces their accuracy and reliability.
Also confirm the power supply is healthy. On battery units, a weak battery causes erratic firing. Replace it when voltage drops. On wired units, loose connections create the same problem.
Pros: Regular cleaning is free and prevents many odd, hard to trace false alarms. Cons: It needs a routine you have to remember, so set a monthly phone reminder to stay on top of it.
Test, Review, And Repeat Until It Is Right
Tuning a PIR sensor is not a one time job. It is a short loop you repeat until the recordings look clean.
Here is the loop. Change one setting. Wait. Review the recordings. If false alarms dropped and you still catch real movement, keep the change. If not, adjust again.
Change only one thing at a time. If you lower sensitivity, add a zone, and move the sensor all at once, you will not know which fix worked. Single changes give clear answers.
Keep a simple note of what you tried and what happened. After two or three rounds, most people land on a setting that catches real events and skips the noise.
Pros: This patient method gives the most reliable long term result. Cons: It takes a day or two of testing, but the payoff is alerts you can finally trust again.
When To Call A Professional
Most PIR tuning is a job you can do yourself. But some problems point to deeper issues that need expert help.
Call a professional if you see unexplained false alarms that no setting fixes. Random firing with no clear heat source can mean electrical interference, a wiring fault, or a defective unit. These need test gear most homes do not have.
Get help too if your sensor is part of a complex alarm or smart home system. Professionals understand how panels, hubs, and protocols interact, and they can configure options that DIY setups miss.
Persistent intermittent failures, where the sensor works sometimes and not others, are another sign. This often points to a hardware fault that is hard to spot without proper tools.
Pros: A pro can solve faults you cannot reach and protect a system you rely on. Cons: It costs money, so try the DIY steps above first and call in help only when they fall short.
Frequently Asked Questions
What is the best sensitivity setting to avoid false alarms?
Start at medium and adjust from there. The best setting is the highest sensitivity that still avoids false alarms in your space. Lower it step by step if false recordings continue, and test a real walking path after each change to make sure you do not miss true motion.
Why does my PIR sensor record when nothing is there?
It is reacting to heat change, not visible motion. Common hidden causes include sunlight, warm air from vents, sun heated surfaces, small animals, and moving plants. Lower the sensitivity, move the sensor away from heat sources, and add detection zones or a sun shade to stop these triggers.
Will lowering sensitivity make me miss real intruders?
It can if you go too low. That is why you test. After each reduction, have someone walk through at the distance you want to cover. If the camera still catches them clearly, you are safe. If it misses them, raise the sensitivity back up one step.
How do I stop my pet from triggering false alarms?
Use pet immune mode if your sensor has it, since it ignores heat below a set weight. You can also raise the pulse count so a small animal crossing one zone does not fire the alarm. Mounting the sensor higher and angling it down helps too, because pets stay below the main detection field.
Does weather really change PIR sensor behavior?
Yes. In cold weather the heat contrast is strong and detection is easy. In hot weather the air nears body temperature, which weakens contrast and can cause missed events. Run a quick walk test each season and adjust sensitivity slightly to match the temperature.
How often should I clean and check my sensor?
Clean the lens once a month with a lint free cloth to clear dust and cobwebs. Run a full walk test and review settings each season. Plan to replace the sensor every 5 to 7 years, especially if the lens looks yellow, since age reduces accuracy and adds false alarms.

Hi, I’m Sonny Dawson, the creator and voice behind ConvertResizeGen. 👋 I’m a passionate tech enthusiast who loves exploring the latest gadgets, devices, and electronics that shape the way we live and work. Through my website, I share honest, hands-on reviews of trending Amazon products to help you make smarter buying decisions.