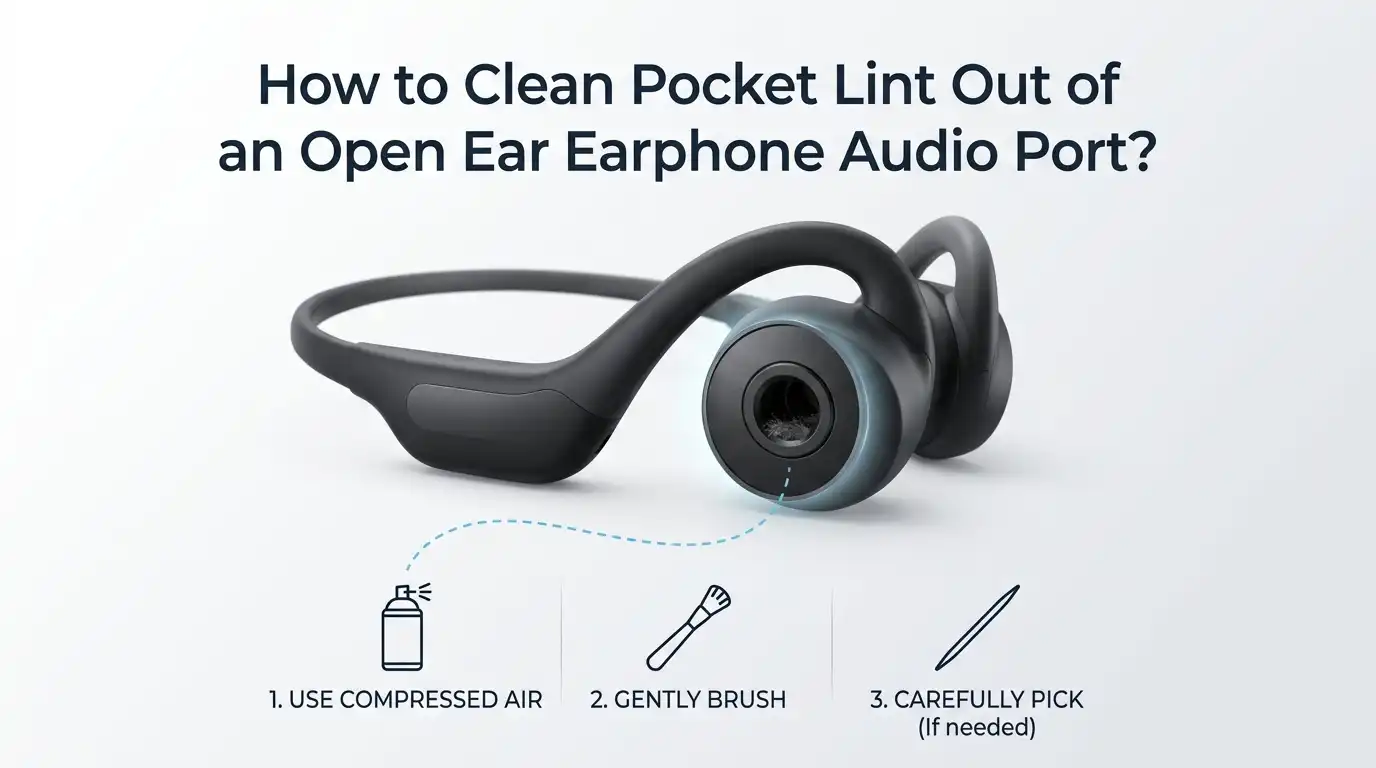
How to Clean Pocket Lint Out of an Open Ear Earphone Audio Port?
Pocket lint is a sneaky troublemaker. It slips into your open ear earphones without warning. One day your audio sounds crisp and full.
The next day, the sound feels muffled, scratchy, or one sided. Most people blame the earphones themselves. The real culprit is often a tiny pile of fluff packed deep inside the audio port or speaker mesh.
Open ear earphones sit just outside the ear canal. This design pulls in dust, fabric fibers, and pocket lint over time. The buildup blocks sound waves and reduces volume. The good news is you can fix this at home in minutes.
In a Nutshell:
- Pocket lint causes muffled sound, weak bass, and uneven volume in open ear earphones. Cleaning the port restores audio quality fast and extends the life of your device.
- Soft tools work best for delicate audio ports. A dry toothbrush, wooden toothpick, or sticky tack removes lint without scratching the mesh. Avoid metal pins and sharp objects.
- Stay dry first, wet second. Always try dry cleaning methods before using any liquid. Isopropyl alcohol should be used sparingly and only on a cloth, never poured in.
- Compressed air can help or hurt. A gentle puff lifts loose lint. A strong blast can push debris deeper or damage the driver. Hold the can upright and short distance away.
- Clean once every two weeks if you use your earphones daily. Regular care prevents stubborn buildup and keeps your sound sharp.
- Never insert metal objects like safety pins, needles, or paper clips. They scratch the mesh and can short the internal contacts.
Why Pocket Lint Builds Up in Open Ear Earphones
Open ear earphones have an exposed design. They do not seal inside the ear canal like in ear models. This open shape leaves the speaker mesh facing outward. Lint, dust, and skin flakes settle on the mesh every time you wear them.
When you slide your earphones into a pocket, the fabric rubs against the audio port. Tiny fibers break off and stick to the mesh. Static electricity pulls even more lint inside. Over weeks, this layer thickens and blocks sound output.
Sweat and ear wax also play a role. They turn loose lint into sticky clumps. Once that happens, simple brushing will not fix it. You need a deeper clean. Understanding the cause helps you prevent future buildup with smart storage habits.
Signs Your Earphone Audio Port Needs Cleaning
Your ears notice the problem before your eyes do. Listen for clear warning signs. Muffled sound is the most common signal. Music feels distant, like it is playing in another room.
Volume may drop on one side only. Bass loses punch and highs sound flat. You might hear crackling or popping noises during playback. Sometimes the earphone stops working entirely until you wiggle it.
Look at the port under good light. A grey or white film on the mesh confirms lint buildup. If you tap the earphone against your palm, dust may fall out. These signs mean it is time to clean. Acting early prevents permanent damage to the driver.
Pros of catching it early: Quick clean, full sound recovery, no risk of driver damage.
Cons of waiting: Lint hardens, may need deeper cleaning, possible permanent sound loss.
Gather the Right Tools Before You Begin
Good tools make the job easy. You probably have most items at home already. Start with a soft bristled brush like a clean toothbrush or a small paintbrush. These lift loose lint without scratching.
Add a wooden or plastic toothpick for picking out stubborn bits. Cotton swabs help with the outer shell. Microfiber cloths grab fine dust and oils. Keep a small bowl nearby to collect debris.
For deeper cleaning, you may want isopropyl alcohol at 70 to 90 percent strength. A can of compressed air is useful but optional. Some people use sticky tack or putty for delicate mesh cleaning. Avoid metal tools, water, and household cleaners. These cause more harm than good.
Method One: Gentle Tapping to Loosen Lint
The simplest method costs nothing and takes seconds. Hold the earphone with the audio port facing down. Tap the back gently against your palm five to ten times. Gravity and movement shake loose lint free.
This method works best for fresh buildup. Lint that has not hardened falls out easily. Do not slam the earphone against hard surfaces. That can damage the driver inside. Soft palm taps are enough.
After tapping, check the port under light. You should see less fluff on the mesh. Repeat the process two or three times if needed. Wipe away any debris that lands on your palm.
Pros: Free, fast, no tools needed, zero risk of damage.
Cons: Only works on loose lint, will not remove stuck or oily buildup.
Method Two: Using a Soft Bristled Brush
A clean toothbrush is your best friend for earphone care. Pick one with soft bristles only. Medium and hard brushes can scratch the mesh. A baby toothbrush works even better.
Hold the earphone steady in one hand. Brush the audio port in small circular motions. Work from the edges toward the center. Lint will gather on the bristles as you go. Tap the brush clean and continue.
For tight corners, try a small makeup brush or paintbrush. These reach spots a toothbrush cannot. Brush for about thirty seconds per earbud. Check your progress often. Stop once the mesh looks clear and even in color.
Pros: Effective for most lint, safe for the mesh, reusable tool.
Cons: May not reach deep inside the port, takes patience for heavy buildup.
Method Three: The Wooden Toothpick Trick
Wooden toothpicks reach where brushes cannot. They are firm enough to scrape but soft enough to spare the mesh. Never use metal needles or pins for this job.
Hold the toothpick at a slight angle. Gently slide the tip around the edge of the audio port. Lift the lint up and out rather than pushing it down. Pick at the mesh carefully if you see stuck fibers.
Some people break the toothpick to create a sharper angled tip. This helps pull tangled lint loose. Work in good lighting so you can see what you are doing. Stop immediately if you feel resistance. Pushing too hard can puncture the mesh.
Pros: Reaches tight spots, removes stubborn lint, cheap and disposable.
Cons: Risk of mesh damage if used roughly, requires steady hands.
Method Four: Sticky Tack or Putty for Delicate Cleaning
Sticky tack is a brilliant trick for open ear earphones. It lifts lint without any scraping. Reusable adhesive putty works perfectly for this. You can find it at most office or craft stores.
Roll a small ball of putty between your fingers. Press it gently onto the audio port mesh. Hold for two or three seconds, then pull away slowly. Lint sticks to the putty and lifts out cleanly.
Repeat with a fresh section of putty until it stops picking up debris. This method is safe for even the most delicate meshes. It also removes dust from the outer shell. Make sure the putty is clean and not greasy before use.
Pros: Very gentle, removes fine lint, no scratching risk, reusable.
Cons: May leave residue if the putty is low quality, slow for heavy buildup.
Method Five: Compressed Air for Loose Debris
Compressed air blows lint out without touching the mesh. Buy a can made for electronics cleaning. Avoid blowing with your mouth. Saliva droplets can damage the driver.
Hold the can upright at all times. Keep the nozzle at least three inches from the port. Use short bursts of one second each. Long blasts push lint deeper and may harm the speaker. Aim across the port, not straight into it.
This method works best after brushing or picking. It clears the last bits of loose dust. Some open ear earphones have sensitive drivers. Check your user manual before using compressed air. Skip this step if the brand warns against it.
Pros: No physical contact, reaches deep areas, quick.
Cons: Can push lint deeper if misused, may damage delicate drivers, costs money.
Method Six: Isopropyl Alcohol for Stuck Grime
When lint mixes with sweat or earwax, it sticks fast. Dry methods will not clear it. Isopropyl alcohol at 70 to 90 percent breaks down oily residue. It also dries quickly without leaving moisture behind.
Dip a cotton swab lightly in alcohol. Squeeze out the excess so it is barely damp. Wipe the audio port mesh in soft circles. Never pour alcohol directly onto the earphone. Liquid inside the driver causes permanent damage.
Let the earphone air dry for at least fifteen minutes before use. Check the mesh under light. Repeat with a fresh swab if grime remains. This method also disinfects the surface, killing bacteria and germs.
Pros: Removes sticky buildup, disinfects, dries fast.
Cons: Risk of liquid damage if overused, may affect coatings on some earphones.
Method Seven: Vacuum Suction for Deep Lint Removal
A vacuum cleaner pulls lint out instead of pushing it deeper. Use the smallest nozzle attachment you have. A handheld vacuum works better than a full sized one. Lower the suction setting if possible.
Hold the nozzle close to the audio port without touching it. Run the vacuum for ten to fifteen seconds. Move the earphone slightly so suction reaches every angle. You may hear or feel lint pulling free.
This method pairs well with brushing. Brush first to loosen lint, then vacuum to remove it. Some specialty cleaning kits include mini vacuums made for electronics. These offer safer, gentler suction. Check results often and stop once the mesh looks clean.
Pros: Pulls debris outward, deep cleaning power, no liquid risk.
Cons: Strong suction may damage drivers, requires the right attachment.
How to Prevent Pocket Lint Buildup in the Future
Prevention saves you cleaning time later. Store your earphones in a case whenever you are not using them. A hard shell case keeps pockets and bags from rubbing against the mesh.
Wipe your earphones with a dry microfiber cloth after each use. This removes sweat and skin oils before they trap lint. Empty pocket lint from your clothes regularly. Lint rollers help with this.
Avoid placing earphones in pockets full of tissues, coins, or keys. These items grind debris into the mesh. Wash your hands before handling your earphones. Clean hands reduce oil transfer. Following these habits cuts cleaning frequency in half.
Pros of prevention: Less cleaning, longer earphone life, consistent sound quality.
Cons of skipping it: Faster buildup, repeated cleaning sessions, possible permanent damage.
Common Mistakes to Avoid While Cleaning
Many people damage their earphones during cleaning. Never use metal objects like safety pins or needles. They scratch the mesh and short the internal wiring. Avoid sharp tools that pierce easily.
Do not submerge open ear earphones in water. Most are not waterproof, even if labeled water resistant. Skip household cleaners like bleach, vinegar, or window spray. These chemicals corrode the materials inside.
Avoid blowing into the port with your mouth. Moisture from breath damages the driver. Do not use hot air from a hairdryer. Heat warps plastic and weakens adhesive. Patience and gentle tools always beat force and harsh chemicals.
Pros of careful cleaning: Preserves earphone quality, avoids costly replacements.
Cons of rough cleaning: Permanent sound damage, voided warranties, wasted money.
When to Seek Professional Help or Replace Your Earphones
Sometimes cleaning is not enough. If sound stays muffled after every method, the driver may be damaged. Lint pressed against the speaker for too long can permanently dent the diaphragm.
Contact the manufacturer if your earphones are still under warranty. Many brands offer cleaning or replacement services. Professional repair shops can open the earphone and clean the driver directly. This costs less than buying new ones in many cases.
If repair costs more than half the price of new earphones, replacement makes sense. Look for models with replaceable mesh filters next time. These designs make future cleaning much easier. Treat your new pair with better storage habits from day one.
Frequently Asked Questions
How often should I clean my open ear earphones?
Clean them every two weeks if you use them daily. Light users can clean once a month. Heavy gym users or commuters should wipe them after every session. Regular care prevents stubborn buildup.
Can I use water to clean the audio port?
No, water can damage the internal driver. Use a slightly damp cloth for the outer shell only. For the port itself, stick with dry methods or a tiny amount of isopropyl alcohol on a swab.
Will compressed air damage my earphones?
It can, if used incorrectly. Hold the can upright and keep it three inches away. Use short bursts only. Check your earphone manual first, as some brands advise against compressed air.
Why does my sound stay muffled after cleaning?
The driver may be damaged, or lint may be lodged deeper inside. Try the sticky tack method or contact the manufacturer. Sometimes the issue is the audio source, not the earphone itself.
Is it safe to use a toothpick on the speaker mesh?
Yes, if you use a wooden or plastic toothpick gently. Work at an angle and lift lint outward. Never press hard or push the toothpick straight into the mesh. That risks tearing it.
Can pocket lint permanently damage my earphones?
Yes, over time. Lint blocks airflow and traps moisture against the driver. This weakens sound quality and can cause permanent muffling. Cleaning early prevents lasting harm.
What is the safest method for delicate open ear earphones?
The sticky tack method is the gentlest option. It lifts lint without any scraping or liquid. Pair it with a soft brush for a complete clean. This combo works for almost every brand.

Hi, I’m Sonny Dawson, the creator and voice behind ConvertResizeGen. 👋 I’m a passionate tech enthusiast who loves exploring the latest gadgets, devices, and electronics that shape the way we live and work. Through my website, I share honest, hands-on reviews of trending Amazon products to help you make smarter buying decisions.