How To Fix Mechanical Keyboard Hot-Swappable Sockets Bending Pins?
Have you ever popped a new switch into your hot-swap board, only to feel it wobble or refuse to light up? That sinking feeling usually means one thing. A bent pin inside your socket.
Hot-swappable sockets make building keyboards fun and easy. But they come with a small risk. Their delicate pins can bend if a switch goes in at the wrong angle.
The good news is this problem rarely means disaster. In most cases, your socket is not broken. It just needs a little care and patience.
In a Nutshell
- Check pins first. Always inspect switch pins before you insert them. A bent pin will never make contact, no matter how hard you push.
- Straighten with tweezers. Most bent pins fix in about 5 seconds using tweezers or fine pliers. Gently bend the pin back to its original straight position.
- Fix socket leaves too. If the socket itself looks bent, use tweezers or a small exacto knife. Carefully guide the metal leaf back into place.
- Work on a soft surface. Install your switches on something soft, like a mat or cloth. This reduces the force needed and protects your PCB.
- Angle tricky switches. If a socket still feels stubborn, try inserting the switch pin at a slight angle. This can help it slide past minor damage without more bending.
- Never force it. Forcing a bent pin risks damaging the socket or solder pad. Repeated bending also weakens the metal, and it can snap completely.
Understanding Hot-Swappable Sockets and Why Pins Bend
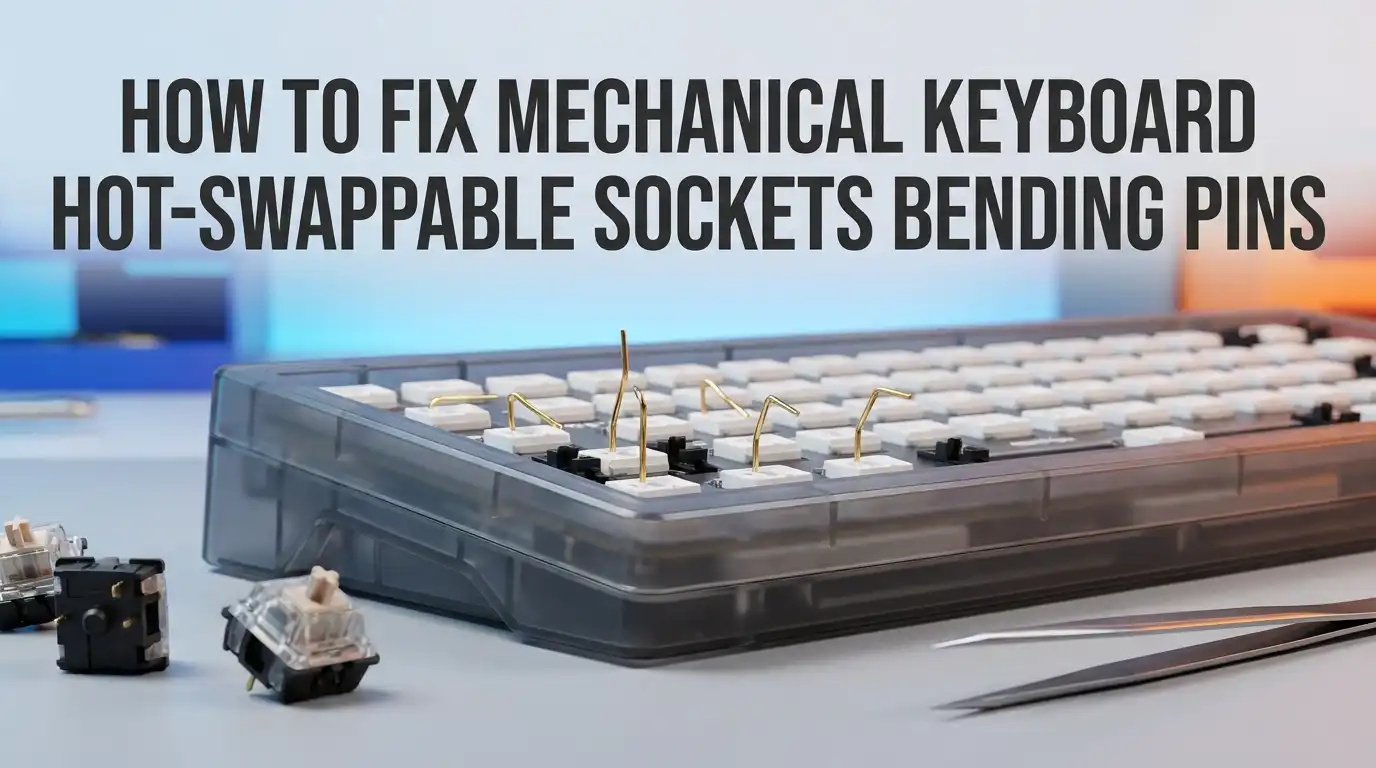
Hot-swappable sockets are the small metal components built into your keyboard’s circuit board. They hold your switch stems in place and create the electrical connection that makes your keys work. Each socket contains two tiny metal leaves that grip the switch pin when you press it down.
Pins bend for a few common reasons. Forcing a switch in at the wrong angle puts pressure on the pin. Sometimes the socket itself becomes slightly misaligned during manufacturing or shipping. Dust or debris can also get stuck inside, making insertion harder and causing you to push with more force than needed.
Why bent pins matter so much is simple: they break the electrical connection. Your key won’t register when you press it. A bent pin can also slip past the socket leaves entirely, which risks pushing the entire socket off the circuit board. Once that happens, you face serious repair work that may require soldering.
The metal in these pins is soft by design. This helps them fit smoothly into sockets, but it also means they bend easily. Repeated bending weakens the metal structure. Keep bending the same pin back and forth, and it will eventually snap off completely, leaving you with a broken switch you cannot use.
Understanding this damage chain helps you act fast. Spotting a bent pin early means you can fix it before it causes socket damage. A five-second straightening job now prevents hours of frustration later. This is why inspection before insertion matters so much for keeping your keyboard in perfect working condition.
Tools You’ll Need Before Starting Repairs
Before you start straightening bent pins or fixing socket leaves, gather the right tools. Having everything ready saves time and prevents frustration.
Tweezers are your main tool. Fine tipped tweezers work best for bending socket leaves back into position. They give you precision control without slipping. Straight tweezers are easier to use than curved ones for this job.
Needle nose pliers help with stubborn pins. These pliers let you grip switch pins firmly and bend them back straight. Use gentle pressure since the metal is soft and breaks easily if you squeeze too hard.
An exacto knife or hobby knife serves a specific purpose. You use it to lift and adjust socket leaves that sit too far inward. The thin blade slides under the leaf without damaging surrounding components.
A magnifying glass or desk lamp improves visibility. Bent pins are small. Better lighting helps you spot exactly where the bend sits. You can work more accurately when you see the damage clearly.
A soft work surface protects your board. Use a keyboard mat, cloth, or foam pad under your keyboard while you work. This cushioning reduces accidental force when you insert switches during testing.
A small flashlight or headlamp is surprisingly useful. It illuminates the socket area from different angles. You can see bent pins and socket damage that overhead light might miss.
Optional but helpful: a small ruler or calipers. These let you check if pins are truly straight. They help you verify your straightening work actually fixed the alignment.
Keep all these tools in one spot before you begin repairs. This setup makes the whole process smoother and faster.
How To Inspect Switch Pins Before Insertion
Before you insert any switch into a hot-swappable socket, take a moment to examine the pins carefully. This simple step prevents major problems down the road.
Look at each pin closely. Use a magnifying glass or bright desk lamp to see the metal pins on your switch stem. The pins should be perfectly straight and aligned. Bent pins look visibly crooked or tilted compared to straight ones.
Check both pins if your switch has two. Some switches have dual pins for extra stability. Inspect each one separately. A single bent pin can still cause connection issues, so don’t skip this step.
Examine the socket opening too. Before inserting the switch, peek into the socket hole on your keyboard’s PCB. The socket leaves inside should look aligned and symmetrical. If they appear bent outward or misaligned, the socket itself may need repair first.
Feel for resistance gently. When you start inserting a switch, it should slide in smoothly with light pressure. If you feel unusual resistance or grinding, stop immediately. A bent pin or damaged socket is likely causing the problem.
Take your time with the inspection. Spend 30 seconds examining each switch before installation. This beats spending 10 minutes fixing damage later. Bent pins are easier to straighten before they enter the socket than after forcing them in.
Mark problem switches. If you find bent pins, set those switches aside in a separate pile. This keeps you from accidentally installing them and damaging your keyboard further. You can straighten these pins using tweezers or pliers once you’ve finished your inspection.
Step-by-Step: Straightening Bent Switch Pins
Straightening bent switch pins requires patience and the right technique. Start by removing the affected switch from your keyboard’s hot-swappable socket. Place it on your soft work surface to prevent any additional damage during the repair process.
Use tweezers as your primary tool for this task. Grip the pin gently but firmly near its base, where it connects to the switch stem. Apply slow, steady pressure to bend the pin back into its correct vertical position. This process typically takes just 5 seconds per pin.
For pins that resist straightening, needle-nose pliers offer better leverage. Position the pliers carefully around the pin shaft, avoiding the delicate tip. Bend slowly and deliberately. Rushing this step risks snapping the pin completely, which means replacing the entire switch.
Check your progress frequently. Hold the switch up to a bright light or use your magnifying glass to confirm the pin aligns properly with its neighbor. Both pins should be perfectly parallel and straight.
Avoid bending the same pin multiple times. Metal weakens with repeated bending and can snap without warning. If a pin resists straightening after two gentle attempts, consider replacing the switch instead of risking permanent damage.
Once the pins look straight, insert the switch into its socket at a slight angle. This reduces insertion force and prevents pushing the socket leaves out of alignment. Slide the switch in smoothly with light pressure only.
Test the switch by pressing the key on your keyboard. It should register consistently without any missed inputs. If the switch still doesn’t work, the socket leaves may need adjustment instead of the pins themselves.
Step-by-Step: Repairing Bent Socket Leaves on the PCB
When socket leaves bend inward or outward on your PCB, the switch won’t make proper contact. This happens from repeated insertions or accidental pressure. You can fix most bent socket leaves without replacing the entire socket.
Start by examining the socket opening closely. Use a magnifying glass or bright lamp to see exactly which direction the leaves bent. Socket leaves are the small metal pieces inside the hole that grip your switch pins.
Use fine tipped tweezers to gently bend the leaves back into their original position. Insert the tweezers into the socket opening carefully. Apply slow, steady pressure rather than quick jerking motions. Work on one leaf at a time.
For stubborn leaves, an exacto knife helps lift them slightly. Slide the knife blade under the bent leaf and gently pry it back to center. This takes patience. Move the blade slowly to avoid damaging the PCB around the socket.
Test your progress by inserting a switch partway. The pins should slide in smoothly without resistance. If you still feel friction, the leaves need more adjustment.
Avoid forcing switches into partially repaired sockets. Repeated pressure can damage the socket permanently or lift solder pads from the PCB.
Once the leaves look straight and centered, insert your switch fully. Press down with gentle, even pressure. The switch should click into place without any grinding or scraping sounds.
If a socket remains damaged after straightening, you may need professional repair. Some damaged sockets require wire jumpers soldered to the PCB to restore function. This prevents the switch from working properly until fixed.
Best Practices for Reinserting Switches Safely
Reinserting switches safely into hot-swappable sockets requires a calm, methodical approach. The key is understanding that bent pins and damaged sockets need care before you push any switch back into place.
Start by positioning your keyboard on a soft surface like a mousepad or cloth. This reduces the force needed during insertion and protects your PCB from accidental drops. A soft workspace also gives you better control over the switch.
Hold the switch straight and aligned with the socket opening. Look directly down at both the switch pins and the socket hole. They should form a perfect vertical line before you apply any downward pressure.
Insert the switch slowly using gentle, consistent pressure. You should feel slight resistance as the pins enter the socket leaves. If you encounter strong resistance, stop immediately and check for misalignment or remaining bent pins.
Never force a switch into a socket. Forcing causes socket leaves to bend further or lift away from the PCB. This damage becomes permanent and may require wire jumps or professional repair.
If resistance appears during insertion, remove the switch and inspect again. Look for bent pins that need straightening or socket leaves that need adjustment. Take your time with this inspection step.
For slightly damaged sockets, try inserting the switch at a subtle angle. Tilt the switch about five degrees and insert one pin first, then gradually straighten it. This technique sometimes helps the pins find proper contact with damaged leaves.
After full insertion, press the key several times to confirm the switch responds. The keystroke should feel smooth and register every time. If the key doesn’t register consistently, remove the switch and repeat your inspection process.
Common Mistakes That Make Pin Damage Worse
Forcing bent pins into sockets is the biggest mistake you can make. When you push a bent pin into a socket, the pin doesn’t align properly with the socket leaves. This causes the leaves to bend further outward or inward. The socket becomes permanently damaged and may not hold future switches correctly.
Repeated bending weakens the metal structure of pins. Each time you bend a pin back and forth, the metal loses strength. Eventually, the pin snaps completely and becomes unusable. A snapped pin means you need to replace the entire switch, which costs more than straightening it once.
Inserting misaligned pins can push the socket off the PCB entirely. Hot-swappable sockets sit on top of the circuit board with delicate solder connections. When you force a bent pin into the socket at an angle, the socket experiences sideways pressure. This sideways force can lift the socket away from its solder pads. Once the socket lifts, it may not work at all, and repairing it requires professional help or complete replacement.
Using too much force during insertion damages both the pin and the socket. Your fingers should apply gentle, steady pressure only. If you feel significant resistance, stop immediately. Remove the switch and inspect both the pin and socket again before trying again.
Many people also ignore small bends, thinking they’ll work anyway. Even tiny bends prevent proper electrical contact. The switch may feel like it clicks, but the key won’t register on your computer. Always straighten pins completely before reinsertion, no matter how small the bend appears to be.
Troubleshooting Persistent Contact Issues After Repair
After you repair bent pins and socket leaves, your switch might still have contact issues. This happens when the metal parts don’t align perfectly or when damage runs deeper than expected.
Start by testing the switch in different sockets on your keyboard. If it works in another socket, your repair was successful. If it fails everywhere, the pin itself may have internal damage you can’t see. Metal loses strength each time you bend it, so repeated straightening weakens the structure.
Check for partial contact problems. Press the key and listen for a click. A mushy or inconsistent response means the pin touches the socket leaf only sometimes. This requires another inspection and gentle repositioning.
Sometimes the socket leaf sits too far inward or outward even after straightening. Use your tweezers to make micro adjustments. Move the leaf just a tiny bit at a time. Test after each small change.
If contact remains poor, examine the solder joints. Bent pins can damage the connection points where the socket attaches to your PCB. Look for lifted or cracked solder. Professional repair becomes necessary if solder damage exists.
For persistent issues, try inserting the switch at different angles. Slight pressure from one side can help the pin find the socket leaf contact point. Never force the switch. Gentle exploration works better than aggressive insertion.
If nothing improves after these steps, the socket or pin may need replacement. Document what you’ve tried so a repair technician understands the history. This information helps them decide between socket replacement or complete PCB repair.
Final Thoughts
Fixing bent pins in hot swappable sockets is a simple skill. You don’t need special tools or professional experience.
A pair of tweezers and some patience solve most problems. Small, careful movements make a big difference.
Remember that bent pins are common. They happen to almost everyone who builds keyboards.
The key is catching the problem early. Always inspect switches before you insert them.
If you spot a bent pin, straighten it first. Never force it into the socket and hope it works.
Socket leaves can bend too. Use tweezers or a small blade to guide them back into position.
This process takes seconds when done right. Rushing it often leads to bigger issues.
Working on a soft surface protects your keyboard. It reduces pressure on delicate pins and sockets.
Sometimes sockets stay slightly damaged even after straightening. Inserting the switch at a gentle angle can still create contact.
If problems continue, don’t panic. Some sockets need wire repairs or professional help.
Most bent pin issues are fixable with basic care. You just need the right technique and a steady hand.
Take your time with each switch. Quick fixes now prevent bigger headaches later.
Building keyboards means learning as you go. Bent pins are just part of that learning curve.
With practice, you’ll spot problems faster. You’ll also fix them with more confidence.
Trust the process outlined here. Inspect, straighten, and insert with care every single time.
Your keyboard will thank you. Smooth typing comes from small details done right.
Frequently Asked Questions
Can I straighten a bent pin without removing the switch?
No, you need to remove the switch first. Trying to straighten pins while the switch sits in the socket risks damaging both parts. Remove the switch carefully, then inspect the pins under good light. Use tweezers to gently bend pins back into their original position. This takes about 5 seconds per pin.
What tool works best for straightening bent socket leaves?
An exacto knife or small flathead tool works well for socket leaves on the PCB. Gently slide the tool under each leaf and lift it back into place. Work slowly and avoid applying sudden pressure. If the leaf feels stiff, stop and try a different angle.
How many times can I bend a pin before it snaps?
Metal pins weaken with each bend. Repeated bending causes the material to fatigue and break. Aim to straighten pins only once or twice. If a pin bends again after straightening, the switch may have a manufacturing defect and could need replacement.
Why does my switch still not work after I straightened the pins?
Several reasons could cause this. The socket leaf might sit too far inward or outward. Test the switch in a different socket to see if the problem follows it. Check for solder joint damage around the socket area. If the switch works in another socket, your original socket needs repair or replacement.
Is it normal for hot swappable sockets to bend easily?
Sockets can bend from repeated insertions or rough handling. Quality varies between keyboard models. Gentle insertion prevents most bending issues. Always insert switches straight down without twisting or angling them during the initial push.

Hi, I’m Sonny Dawson, the creator and voice behind ConvertResizeGen. 👋 I’m a passionate tech enthusiast who loves exploring the latest gadgets, devices, and electronics that shape the way we live and work. Through my website, I share honest, hands-on reviews of trending Amazon products to help you make smarter buying decisions.