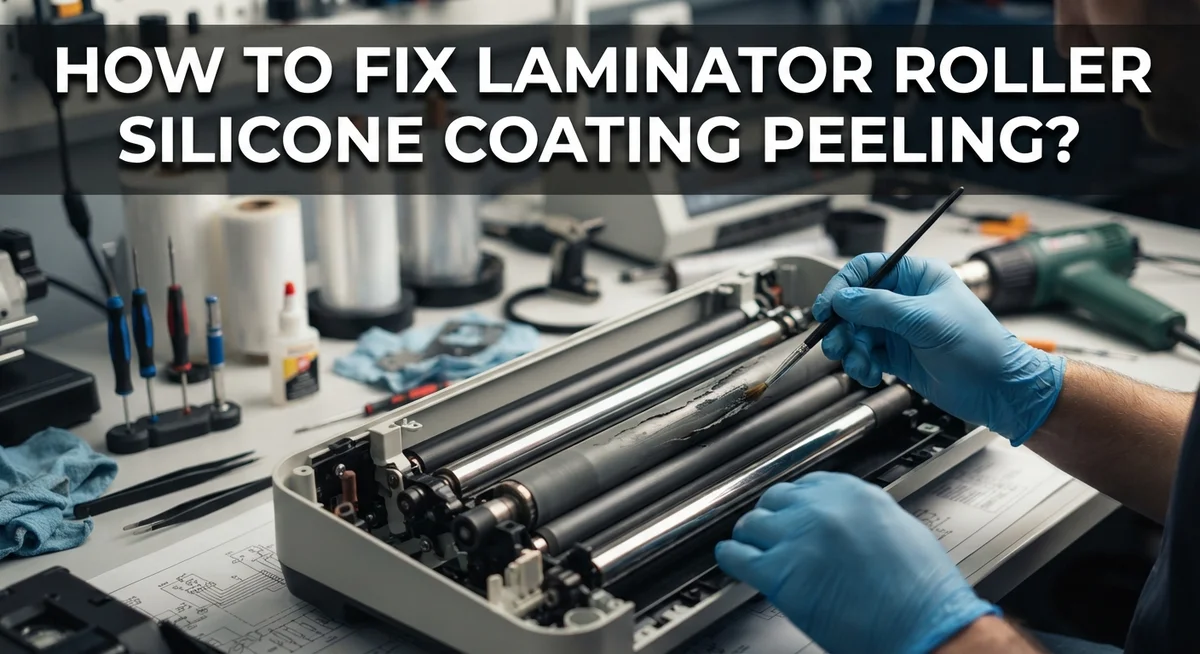
How To Fix Laminator Roller Silicone Coating Peeling?
Does your laminator leave bubbles or wrinkles on every sheet? Peeling silicone coating on your roller could be the problem.
This issue is more common than you think. Heat, film jams, and misaligned feeds all wear down that smooth silicone layer over time.
The good news? You can spot the warning signs early. You can also stop small damage from turning into a bigger machine problem.
In a Nutshell
- Peeling silicone coating cannot be repaired in the field. The only real fix is replacing the roller. Any other attempt only delays the problem.
- Stop the laminator right away if you notice peeling. Cut the power and let the machine cool for 20 to 45 minutes. Skipping this step can cause more damage.
- Once cool, lower the temperature by 20 to 30°C below your normal setting. Preheat for a minute or two to soften stuck residue.
- Use a microfiber cloth or cleaning sheet on the spinning rollers to lift away softened gunk. Run a few test sheets afterward to check for wrinkles or flat spots.
- Most peeling starts with simple mistakes. Improper feeding, misaligned documents, or a crooked film roll all stress the coating over time.
- Regular cleaning with isopropyl alcohol and checking roller alignment can prevent future peeling. A little maintenance goes a long way in extending roller life.
What Causes Silicone Roller Coating to Peel
Your laminator’s silicone coating peels for specific reasons. Understanding these causes helps you prevent future damage and spot problems early.
Film wrapping is the most common culprit. When you feed material incorrectly, the film can bunch up and wrap around the roller. This creates friction and stress on the coating. The heat and pressure then force the film deeper into the roller surface, pulling the silicone away in strips.
Misaligned document feed causes uneven pressure. If your paper or material doesn’t enter the laminator square, one side of the roller bears more weight than the other. This imbalance damages the coating faster on that stressed area. Over time, small peeling spots grow larger.
A crooked film roll creates similar problems. When your lamination film doesn’t sit straight on the supply roll, it pulls at an angle through the rollers. This sideways tension weakens the silicone coating and causes it to separate from the rubber base underneath.
Heat and time break down the adhesive bond. Silicone coatings stick to rollers using special adhesives. Repeated heating cycles gradually weaken this bond. If your laminator runs at high temperatures constantly, the coating fails faster.
Debris buildup accelerates peeling. Dust, paper fibers, and dried adhesive stick to rollers. These particles scratch and lift the coating edges. Once edges start lifting, the peeling spreads quickly.
Poor maintenance speeds up all these problems. Dirty rollers with unaligned positioning create multiple stress points. Each stress point weakens the coating further. Regular cleaning and alignment checks catch these issues before serious peeling starts.
Emergency Steps When You Notice Peeling
When you first spot peeling silicone coating, your immediate actions matter. Stop the machine right now and cut the power if you can reach the switch safely. Do not try to peel away loose coating while the rollers are hot or spinning.
Let the laminator cool completely. This takes 20 to 45 minutes depending on your machine size. Cooling is not optional. Hot silicone becomes sticky and messy, making the problem worse. You need room temperature conditions before you touch anything.
Once cooled, reduce your temperature setting by 20 to 30 degrees Celsius below what you normally use. This lower heat softens any adhesive residue stuck to the rollers without damaging what remains of the coating.
Preheat the machine for 1 to 2 minutes at this reduced temperature. This warming step prepares the rollers for cleaning.
Now use a soft microfiber cloth or a cleaning sheet while the rollers spin slowly. Let the spinning rollers do the work. Gently press your cloth against each roller to lift away softened debris and loose coating bits. Never use rough materials or metal tools.
Run 3 to 5 test documents through the machine. Watch for wrinkles, flat spots, or uneven lamination. These signs tell you if the rollers need replacement.
Document your observations. Note which roller shows damage, how much peeling exists, and whether cleaning helped. This information helps you decide if you need a replacement roller.
If peeling continues after cleaning, replacement becomes your only real option. Field repairs do not work on silicone coatings. Replacement rollers restore proper function and prevent future document damage.
Cooling Down Your Laminator Safely
Cooling your laminator properly after noticing peeling is critical for safety and machine health. A hot machine can cause burns and damage internal components further. Stop using the laminator immediately when you spot peeling silicone coating.
Unplug the machine or cut power if possible. This prevents accidental activation while you work. Do not attempt to touch the rollers while they are hot.
Wait 20 to 45 minutes for the machine to reach room temperature. The cooling time depends on your machine size and how long it ran. Check the exterior casing with your hand. It should feel cool to the touch before you proceed.
Do not rush this step. Many people skip cooling and risk burns or cause additional damage to the rollers. The adhesive holding the silicone coating needs time to harden again as temperatures drop.
While cooling, open the laminator cover or access panel if your model allows it. This helps heat escape faster and improves air circulation. Never force open sealed panels or covers.
Once fully cooled, inspect the rollers visually from a safe distance. Look for the extent of peeling, wrinkled areas, or flat spots. Take photos or notes describing what you see.
Check that the machine sits on a stable, level surface. Uneven placement can stress rollers during cooling and cause additional peeling.
After cooling is complete, you can proceed to temperature reduction and cleaning. Rushing from hot to active use without proper cooling risks operator injury and worsens coating damage. Patience during this phase saves you money and keeps you safe.
Step-By-Step Recovery Process to Remove Residue
Once your laminator has cooled completely, you’re ready to start the residue removal process. This step focuses on cleaning away softened adhesive and debris that cling to the rollers.
Begin by reducing your temperature setting by 20 to 30 degrees Celsius below your normal operating temperature. This lower heat softens the remaining adhesive without causing additional damage. Preheat the machine for 1 to 2 minutes at this reduced setting.
While the rollers spin slowly, use a soft microfiber cloth or a cleaning sheet designed for laminators. Press the cloth gently against each roller as it rotates. Work methodically across the entire roller surface. The softened adhesive should come away more easily at this lower temperature.
Pay special attention to areas where peeling has already started. These spots often trap more debris and dried film. Make several passes if needed, but avoid applying excessive pressure.
Run 3 to 5 test documents through the machine after cleaning. Use plain paper or scrap lamination sheets. Watch for wrinkles, flat spots, or uneven lamination in your test output. These signs tell you whether cleaning solved the problem or if deeper damage exists.
Document what you observe. Note which roller still shows peeling, how much residue remains, and whether the test documents came out clean. If peeling continues after this cleaning process, the roller coating damage has progressed beyond surface residue.
At this point, replacement becomes your only realistic solution. Field repairs to silicone coatings don’t work long term. A new roller restores your machine to proper working condition and prevents future lamination problems.
Testing the Roller After Recovery
After you’ve cleaned your laminator rollers, testing comes next. This step tells you whether the recovery worked or if replacement is necessary.
Start by running 3 to 5 test documents through the machine at the reduced temperature. Use plain paper or inexpensive laminating sheets for this. Feed each document straight and centered into the machine. Watch how the document moves through the rollers.
Look for these specific issues as documents exit. Check for wrinkles across the laminated surface. Feel the document to see if it has flat spots or uneven pressure marks. Notice whether the coating sticks evenly to the paper. Any bumps or ridges mean the roller still has damage.
Pay attention to the document’s speed as it moves through. A document that moves too slowly or stops briefly suggests a roller problem. A document that moves unevenly points to misalignment or coating damage.
Write down what you observe after each test run. Note which roller (top or bottom) shows issues. Record whether peeling is still visible on the rollers themselves. Document any changes compared to your initial inspection.
If your test documents come out smooth and flat, the recovery worked. The coating damage may have been only surface level, and cleaning removed trapped residue.
If wrinkles, flat spots, or uneven lamination still appear, the coating damage goes deeper. This means replacement is your only real option. Field repair on peeling silicone coating simply doesn’t work long term. Continuing to use a damaged roller will worsen the problem and eventually damage documents.
Ongoing Roller Maintenance to Prevent Future Peeling
Regular maintenance stops peeling before it starts. Clean your rollers every two weeks using a soft cloth and isopropyl alcohol. Wipe gently across the entire roller surface while the machine is unplugged and cool.
Check roller alignment monthly. Misaligned rollers cause uneven pressure and film wrapping. Most laminators have adjustment bolts on the roller housing. Consult your manual to locate these. Spin each roller by hand to ensure smooth, free movement with no resistance or grinding sounds.
Verify that documents feed perfectly square into the machine. Crooked feeding is a top cause of peeling. Stack your paper neatly and align the leading edge with the feed guides. Use the alignment marks on your laminator if available.
Keep your film roll centered on its spindle. A tilted roll causes the film to bunch on one side, creating wrapping problems. Secure the roll firmly so it cannot shift during operation.
Monitor your temperature settings weekly. Overheating accelerates silicone breakdown. If you notice the machine running hotter than usual, allow extra cooling time between jobs.
Store your laminator in a dry, dust-free space. Moisture and dust settle on rollers and increase friction. Cover the machine when not in use for extended periods.
Run cleaning sheets through your machine monthly. These specialized sheets grab loose particles and dried residue. Feed them at normal operating temperature for best results.
Replace worn feed rollers promptly. Damaged feed components cause misalignment and increase peeling risk. Catching problems early saves your silicone coating from permanent damage and extends machine life significantly.
Why Field Repairs Fail and When Replacement Is Necessary
Field repairs on silicone roller coating fail because the damage goes deeper than surface residue. The coating itself separates from the metal roller underneath. You cannot glue it back or seal it with temporary fixes.
The core problem is structural, not cosmetic. When silicone coating peels, the bond between the coating and the metal core has already broken. Cleaning helps remove loose debris, but it does not restore that bond. Any attempt to fill gaps or patch the peeling area will fail within days or hours of operation.
Common field repair attempts include applying sealants, wrapping tape around rollers, or using adhesive products. None of these work long term. Heat and pressure from laminating destroy temporary patches. The coating continues to peel underneath, and loose pieces eventually jam your machine or contaminate your documents.
Replacement becomes necessary when peeling covers more than 25 percent of the roller surface. If only small spots show damage and your test documents come out clean, continued cleaning and maintenance might extend the roller’s life. However, once peeling spreads across the roller width or multiple sections peel simultaneously, replacement is your only option.
Attempting field repair wastes time and risks machine damage. Loose coating fragments can wrap around drive shafts or lodge in feed mechanisms. This causes expensive secondary damage beyond the roller itself.
Order replacement rollers from your laminator manufacturer. Installation typically takes 30 to 60 minutes. New rollers cost less than emergency repairs for jammed machines or document quality issues caused by deteriorating coatings.
Accept replacement as the practical solution. Your laminator performs best with factory original components designed specifically for your machine model.
Common Mistakes That Worsen Coating Damage
Using too much heat speeds up coating breakdown. When you run your laminator at maximum temperature, the silicone layer softens faster than normal. This causes the coating to separate from the metal roller underneath.
Ignoring early warning signs makes damage spread quickly. If you notice slight peeling or residue buildup, stop using the machine immediately. Continuing to laminate with a damaged roller pushes more material through the peeling area, which enlarges the problem.
Feeding documents at an angle creates uneven pressure on the rollers. When paper enters crooked, one side of the roller bears more weight than the other. This stress point causes the coating to crack and peel faster in that specific spot.
Skipping the cooling period is a serious mistake. After you stop the machine, you must wait 20 to 45 minutes for the rollers to reach room temperature. Attempting repairs or continued use while rollers are still hot makes the coating separate even more.
Using harsh cleaning materials damages the silicone layer. Abrasive cloths, rough scrubbing, or chemical solvents strip away the protective coating. Always use soft microfiber cloths and isopropyl alcohol only.
Leaving your laminator in humid or dusty environments accelerates peeling. Moisture gets trapped between the coating and metal, causing adhesion to fail. Dust particles scratch the surface and create starting points for peeling.
Not replacing misaligned feed rollers compounds the problem. Damaged feed components cause documents to enter at angles, which puts stress on your main rollers. This constant misalignment weakens the silicone coating over time until peeling becomes unavoidable.
Final Thoughts
Silicone coating peeling on laminator rollers feels frustrating, but you now know how to handle it. The key takeaway is simple: cooling, cleaning, and testing can rescue minor damage. Deep structural peeling cannot be fixed at home.
Think of your laminator like a car engine. Small maintenance tasks keep it running smoothly. Ignore those tasks, and bigger problems follow.
Your best defense is prevention. Clean rollers often. Feed documents straight. Watch your temperature settings closely. These small habits protect your machine for years.
When peeling does happen, act fast. Stop the machine right away. Let it cool fully before touching anything. Rushing this step often makes damage worse.
Remember that silicone coating cannot heal itself. Once it separates from the metal roller underneath, that bond is gone for good. No cleaning trick brings it back.
Testing after any recovery attempt matters too. Run a few documents through before trusting the machine with important paperwork. This simple check saves you from ruined projects later.
If your rollers keep failing despite good care, something else might be wrong. Check your feed alignment. Check your film roll placement. These small issues cause big damage over time.
Replacement is not a failure. It is simply part of owning a laminator. Rollers wear out, just like tires on a car. Planning for this keeps your workflow smooth.
Your laminator serves you best when you treat it with care. Clean it. Align it. Watch it closely. These simple steps keep peeling away for good, and keep your documents looking sharp every time you press start.
Frequently Asked Questions
Can I repair peeling silicone coating myself?
No, you cannot repair peeling silicone coating yourself. The damage goes deeper than the surface. The bond between the coating and the metal roller is broken. Field repair attempts waste time and risk further machine damage. Your only real solution is roller replacement from your laminator manufacturer.
What should I do if I notice peeling starting?
Stop using your machine immediately. Cut the power if possible. Let it cool for 20 to 45 minutes until it reaches room temperature. Do not skip this cooling step. Once cool, reduce your heat setting by 20 to 30 degrees below your normal temperature. Preheat for 1 to 2 minutes, then use a soft microfiber cloth on the spinning rollers to remove any softened residue. Run 3 to 5 test documents to check for wrinkles or flat spots.
Why does silicone coating peel in the first place?
Peeling happens for three main reasons. Film wraps around the roller when you feed documents incorrectly. Documents fed at an angle create uneven pressure. Your film roll may be misaligned. Each of these causes the coating to separate from the metal underneath over time.
How do I prevent coating damage?
Clean your rollers monthly with a soft cloth and isopropyl alcohol. Check that your document feed is square and straight. Verify your rollers spin freely without resistance. Keep your machine in a dry, dust free space. Replace worn feed rollers promptly, since damaged feed components cause misalignment. Avoid using excessive heat. These steps reduce peeling risk significantly.

Hi, I’m Sonny Dawson, the creator and voice behind ConvertResizeGen. 👋 I’m a passionate tech enthusiast who loves exploring the latest gadgets, devices, and electronics that shape the way we live and work. Through my website, I share honest, hands-on reviews of trending Amazon products to help you make smarter buying decisions.