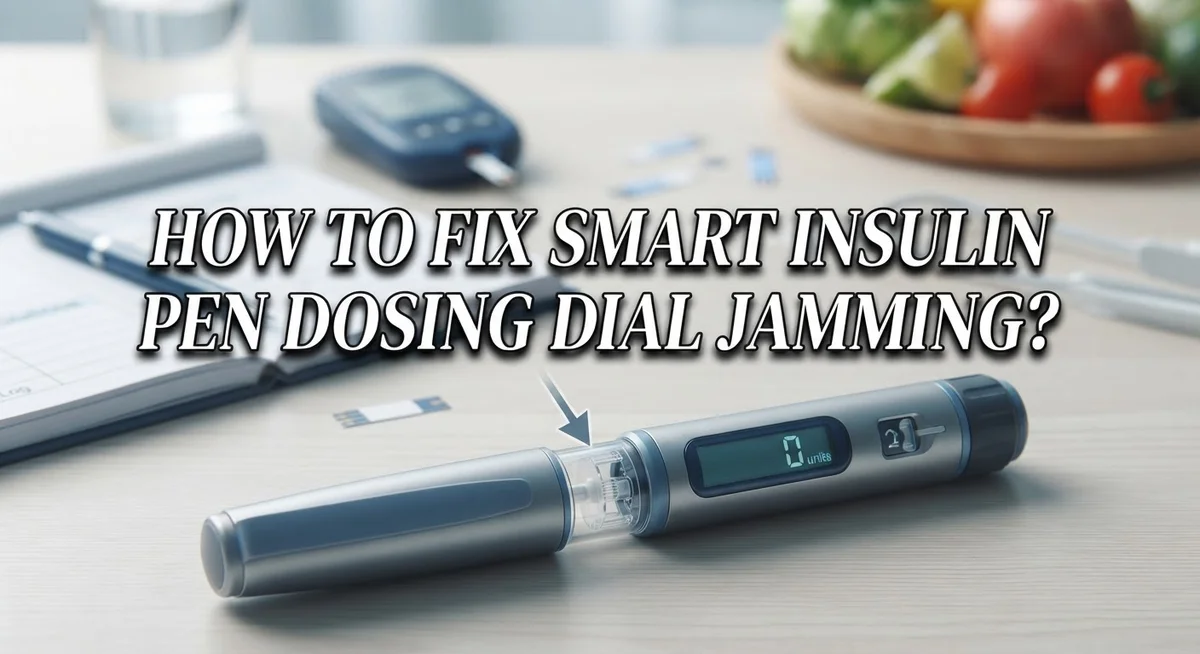
How To Fix Smart Insulin Pen Dosing Dial Jamming?
A jammed insulin pen can turn a quick dose into a stressful problem. You need your medicine now, but the dial won’t budge.
This is a common issue for many smart insulin pen users. The good news is that you can often fix it yourself at home.
Most jamming happens due to simple mechanical reasons. Forcing the dial, trying half unit doses, or a dirty needle are frequent causes.
In a Nutshell
- Never force the dial. If it won’t turn, stop right away. Forcing it can cause permanent damage to your pen.
- Skip half unit doses. Smart insulin pens only allow whole unit doses. Trying to set a half unit will cause the dial to jam.
- Replace the needle first. A blocked or bent needle is often the main cause of jamming. This simple swap solves many problems instantly.
- Prime your pen properly. Dial up one or two units and check for a drop of insulin. This step clears air and confirms your pen works.
- Check your cartridge. Make sure it sits correctly inside the pen. An empty or misaligned cartridge can easily cause the dial to stick.
- Press firmly against your skin. Slow and steady pressure on the injection button ensures full dose delivery. This also prevents future jamming issues from building up.
What Causes Dosing Dial Jamming in Smart Insulin Pens
A jammed dosing dial usually stems from one of several mechanical issues inside your smart insulin pen. Understanding these causes helps you prevent problems before they start.
Improper dial manipulation is the leading cause of jamming. When you force the dial or try to turn it too quickly, internal gears can misalign. The dial has specific stops built in, and pushing past them damages the mechanism. Even gentle wiggling before an injection can shift components out of place.
Attempting half unit doses creates another common problem. Smart insulin pens are designed for whole unit increments only. Trying to set a half unit puts stress on the dial’s internal stops. This pressure causes the mechanism to lock up or stick.
Needle issues frequently trigger jamming as well. A bent, dull, or contaminated needle can block insulin flow. When the pen senses resistance, it may lock the dial to prevent incomplete doses. A needle that touches surfaces or bends during insertion causes this problem regularly.
Cartridge problems also jam the dial. An empty or nearly empty cartridge creates pressure resistance. If the cartridge isn’t inserted correctly into a reusable pen, the dial won’t turn smoothly. Low insulin levels mean the plunger meets extra resistance.
Blockages inside the pen can develop over time. Dried insulin particles or debris in the needle pathway restrict movement. This makes the dial harder to turn and eventually causes it to stick completely.
Insufficient priming before use leaves air in the system. Air pockets prevent proper insulin delivery and can cause the dial to feel stuck or stiff.
Most jamming happens because users rush the process or don’t follow the manufacturer’s guidelines. Taking time with each step prevents nearly all dial problems from occurring.
Step-by-Step Fix: Replacing the Needle and Checking the Cartridge
Start by removing the needle from your pen. Unscrew it counterclockwise and set it aside. A worn or bent needle often causes the dial to jam because it creates resistance when you try to inject. A fresh needle eliminates this common obstacle immediately.
Insert a new needle straight onto the pen tip. Make sure it sits flush and secure. Screw it clockwise until snug, but don’t overtighten. A properly fitted needle allows the dial to move freely without obstruction.
Now prime your pen to remove air from the system. Dial up 1 to 2 units on your dose selector. Hold the pen with the needle pointing upward. Press the injection button slowly and firmly. You should see a small drop of insulin at the needle tip. This confirms the needle works and the insulin flows correctly.
Next, inspect your cartridge. Check if it still contains insulin by looking through the pen window. A low or empty cartridge prevents proper dosing and jams the mechanism. Remove the cartridge by twisting the base counterclockwise. Look for any visible cracks or damage.
Reinsert the cartridge carefully. Make sure it clicks into place and sits completely inside the pen. An incorrectly seated cartridge blocks the dial from moving smoothly.
Check for blockages inside the pen opening. Look for dried insulin, dust, or debris around the needle socket. Wipe the area gently with a clean, dry cloth.
Finally, test the dial by dialing up a small dose slowly. The dial should turn without resistance. If it still sticks, the internal mechanism may need professional service. Contact your device manufacturer for repair options.
How To Properly Prime Your Pen After a Jam
Priming your pen after a jam clears air from the needle and cartridge. This step is essential before you inject.
Start by dialing your pen to 1 or 2 units. Turn the dose selector slowly and steadily until it stops. Do not force the dial.
Hold your pen upright with the needle pointing up. Press and hold the injection button firmly. Watch the needle tip closely. A small drop of insulin should appear within seconds. This drop confirms the needle is clear and insulin flows properly.
If no drop appears, try again with 2 units. Press the button with steady pressure for a full 3 seconds. Sometimes air needs extra time to escape.
If still no drop shows up, replace the needle with a fresh one. Old or bent needles block insulin flow. Insert the new needle straight onto the pen tip. Screw it on firmly but do not overtighten.
Repeat the priming step with your new needle. Dial 1 to 2 units and press the button. The insulin drop should appear now.
Once you see that drop, your pen is ready to use. Do not skip this step. Priming ensures your full dose reaches your body.
After priming, wipe away any insulin on the needle tip with a clean cloth. This keeps the needle sharp and clean for injection.
Never prime your pen over and over repeatedly. Excessive priming wastes insulin and may damage the pen. One or two priming attempts is normal. If priming still fails after trying twice with a new needle, your cartridge may be empty or your pen may need service.
Inspecting for Blockages and Mechanical Damage
When your smart insulin pen dial jams, blockages and mechanical damage are often the culprits. You need to inspect these areas carefully before attempting any fixes.
Start by looking at the needle socket. This is where the needle attaches to your pen. Check for dried insulin, dust, or any visible debris around this opening. Dried insulin builds up over time and prevents the dial from moving smoothly. Use a clean, dry cloth to gently wipe away any residue you see. Never use water or liquids near the needle socket, as moisture can damage internal parts.
Next, examine the cartridge chamber. Remove the cartridge and look inside the pen barrel. Search for any particles, lint, or insulin buildup on the walls. If you spot anything, use a dry cloth to clean the interior gently. Make sure the cartridge sits flush when you reinsert it. A cartridge that isn’t fully seated causes dial resistance.
Inspect the dial itself for cracks or warping. Run your finger around the dial edge to feel for rough spots or breaks. If the dial feels damaged, the pen likely needs replacement.
Check your needle for bends or blockages. A bent needle can jam the internal mechanism. Replace it with a fresh needle and test the dial movement.
Look at the injection button area too. Press it gently to see if it moves freely. Stiffness here sometimes indicates internal blockages affecting the dial.
Document what you find. If you see significant damage, cracks, or persistent blockages that cleaning doesn’t remove, your pen may need replacement. These mechanical issues won’t resolve themselves and can worsen with continued use.
Correct Injection Technique To Prevent Future Jams
Proper injection technique prevents most dosing dial jams before they start. The way you hold and use your pen makes a real difference in keeping it working smoothly.
Hold your pen firmly against your skin during the entire injection. The pen must stay flush and stable. Shaking or moving the pen while injecting can misalign internal parts and cause jamming. Press the injection button slowly with steady, firm pressure. Rushing this step creates mechanical stress on the dial mechanism.
Never force the dose selector dial when turning it. The dial should rotate smoothly without resistance. If you feel tightness, stop immediately. Forcing it damages internal gears and locks the mechanism. Always dial slowly and deliberately to your target dose.
Avoid setting half unit doses if your pen doesn’t support them. Attempting partial doses strains the dial and often causes jamming. Check your pen’s manual to confirm which increments it accepts.
Don’t manipulate the dial before you’re ready to inject. Playing with or testing the dial beforehand creates unnecessary wear. Handle the dial only when you actively need to adjust your dose.
Keep your needle clean and never let it touch surfaces before injection. A contaminated or bent needle increases injection resistance, which puts extra strain on the dial mechanism.
Insert the needle straight onto the pen tip at a ninety degree angle. Tilting or forcing the needle on can misalign the internal pathway and trigger jamming.
After injecting, remove the needle immediately and store it properly. Leaving needles on the pen overnight can cause corrosion and mechanical problems.
These simple habits keep your dial functioning smoothly and reduce jamming incidents significantly.
Common Mistakes That Cause or Worsen Dial Jamming
Many people accidentally cause dial jamming through simple mistakes during everyday use. Understanding these errors helps you avoid them completely.
Forcing the dial is the most common culprit. Your dial has natural resistance built in. When you push too hard or turn it too fast, internal gears can slip or lock. Always rotate slowly and gently. If you feel resistance, stop immediately instead of pushing harder.
Attempting half unit doses causes serious problems if your pen doesn’t support them. Some smart pens only dial in full unit increments. Trying to force a half unit dose jams the mechanism. Check your pen’s manual to confirm what increments it allows.
Playing with your dial before injection creates unnecessary wear. Some people fidget with the dial while talking or waiting. This repeated manipulation stresses the gears and dial track. Only touch your dial when you’re actually ready to inject.
Insufficient needle pressure during injection prevents proper insulin delivery and frustrates users into forcing the dial harder. Press your pen firmly and steadily against your skin. Hold it there for a full ten seconds after pressing the injection button. This ensures the cartridge delivers all insulin.
Skipping the priming step leads to air pockets that jam the dial. Always prime your pen before each use, especially after inserting a new needle or cartridge. Dial to one or two units and check for an insulin drop at the needle tip.
Inadequate cleaning around the needle socket allows debris to build up. Wipe around the needle area gently with a clean, dry cloth. Never let dirt or lint accumulate near moving parts.
These mistakes are entirely preventable through careful, mindful pen use.
Prevention Tips for Long-Term Smooth Dial Function
Your smart insulin pen’s dial works best when you treat it carefully every day. Prevention is much easier than fixing problems later, so building good habits now saves you frustration and keeps your pen reliable.
Start by handling your pen gently. Never force the dose selector dial, even if it feels slightly stiff. Gentle, steady pressure is all you need. If resistance builds, stop and check for problems rather than pushing harder. This single habit prevents most jamming issues before they happen.
Store your pen properly between uses. Keep it at room temperature in a clean, dry place away from extreme heat or cold. Temperature changes can affect how smoothly the dial moves. Avoid dropping your pen or bumping it against hard surfaces, as impacts can misalign internal components.
Clean around the needle socket regularly. Dried insulin or debris here causes the dial to stick. Use a clean, dry cloth to wipe the area gently. Never use water or liquid cleaners unless your pen’s instructions specifically allow it.
Replace your needle after every injection. A used needle can bend slightly or collect particles that jam the dial mechanism. Fresh needles inject smoothly and reduce resistance on the dial.
Prime your pen before each injection. Dial 1 to 2 units and watch for an insulin drop at the needle tip. This removes air pockets that otherwise create pressure problems during dosing. Priming takes seconds but prevents major dial complications.
Insert cartridges correctly and check that they’re fully seated. A loose cartridge creates friction that makes the dial harder to turn. Verify your cartridge has enough insulin remaining before each use. Low cartridges sometimes jam because internal mechanisms shift slightly.
These daily practices keep your dial functioning smoothly throughout your pen’s life.
When To Contact Support or Replace Your Pen
Your smart insulin pen has limits. Some jams cannot be fixed at home, and knowing when to seek help saves you time and keeps you safe.
Contact support when you’ve tried basic troubleshooting without success. Replace your needle first. Prime your pen by dialing 1 to 2 units and checking for an insulin drop. Inspect your cartridge to confirm it’s full and inserted correctly. Look for visible blockages or damage. Press your injection button slowly with firm pressure. If your dial still won’t move after these steps, your pen needs professional attention.
Support teams can diagnose mechanical issues you cannot see. They determine whether your dial has internal damage or if something else is wrong. They may send replacement parts or a new pen. Don’t continue forcing a jammed dial because this causes more damage.
Replace your pen entirely if support cannot fix the jam. Most smart insulin pens have warranties that cover manufacturing defects. Check your documentation or contact the manufacturer to understand what’s covered. A jammed dial that won’t budge after troubleshooting usually means internal mechanical failure.
Never try to disassemble your pen yourself. Opening the device voids warranties and creates safety risks. Your insulin delivery depends on precise mechanical function that only manufacturers can properly repair or replace.
Keep records of when jamming started and what you were doing. This information helps support teams identify patterns. Tell them exactly what troubleshooting steps you’ve already completed. Provide your pen’s serial number and model information.
Timely action matters. A non functional pen means missed insulin doses, which affects your health. Contact support promptly rather than waiting. Most manufacturers respond quickly to jamming reports and prioritize replacements for customers with active prescriptions.
Final Thoughts
Dial jamming feels frustrating, but it rarely means your pen is broken beyond repair. Most jams happen from small habits like forcing the dial or skipping priming steps.
Simple fixes solve most problems. A fresh needle, proper priming, and gentle handling clear up jamming in the majority of cases.
Prevention truly beats troubleshooting every time. Building good habits now saves you time and stress later when you need your pen most.
Think about your daily routine with the pen. Small changes like checking cartridge placement or cleaning the needle socket make a real difference.
Your pen deserves patience and care. Rushing through injections or forcing stuck parts only creates bigger problems down the road.
Remember that mechanical devices need proper maintenance. Your smart insulin pen works hard every day to help manage your health.
Watch for warning signs early. Catching small issues before they become major jams keeps your treatment on track without interruption.
Don’t hesitate to reach out for help. Support teams exist because pen issues happen, and they want to help you solve them.
Trust your instincts about your pen’s performance. If something feels wrong or different, it probably is worth checking out.
Keep spare needles and supplies handy always. Being prepared means less stress when small issues do come up unexpectedly.
Your health depends on reliable insulin delivery. Taking dial jamming seriously protects both your treatment schedule and your peace of mind.
The steps outlined here work well together. Combine prevention habits with quick troubleshooting knowledge for the best results possible.
Most users find that once they understand proper technique, jamming becomes a rare occurrence rather than a regular frustration in their daily routine.
Frequently Asked Questions
Why does my smart insulin pen dial get stuck?
Your dial jams when something blocks its movement. Common causes include a bent needle, insulin buildup inside the pen, or a cartridge that isn’t fully inserted. Forcing the dial makes jamming worse, so stop immediately if you feel resistance.
What should I do first if my dial stops turning?
Replace your needle right away. A damaged or bent needle causes most jamming issues. After inserting a fresh needle, try turning the dial gently. If it moves freely now, you’ve solved the problem. If the dial still won’t budge, move to the next step.
How do I know if my cartridge is the problem?
Check that your cartridge sits completely inside the pen. Remove it and look for cracks or leaks. Reinsert it slowly until you hear a click. Make sure insulin remains in the cartridge. An empty or partially inserted cartridge stops the dial from working properly.
Can I fix a jammed dial by forcing it?
Never force your dial. Pushing hard damages the internal gears permanently. Forcing the dial can break your pen beyond repair. Instead, release pressure and try gentle, slow movements. If the dial resists, stop and troubleshoot using the steps above.
When should I replace my entire pen?
Replace your pen if the dial remains jammed after you’ve tried a new needle, primed the pen, and checked your cartridge. Contact support first to rule out other issues. They can guide you through additional steps. If support confirms the pen is broken, replacement is your best option.

Hi, I’m Sonny Dawson, the creator and voice behind ConvertResizeGen. 👋 I’m a passionate tech enthusiast who loves exploring the latest gadgets, devices, and electronics that shape the way we live and work. Through my website, I share honest, hands-on reviews of trending Amazon products to help you make smarter buying decisions.