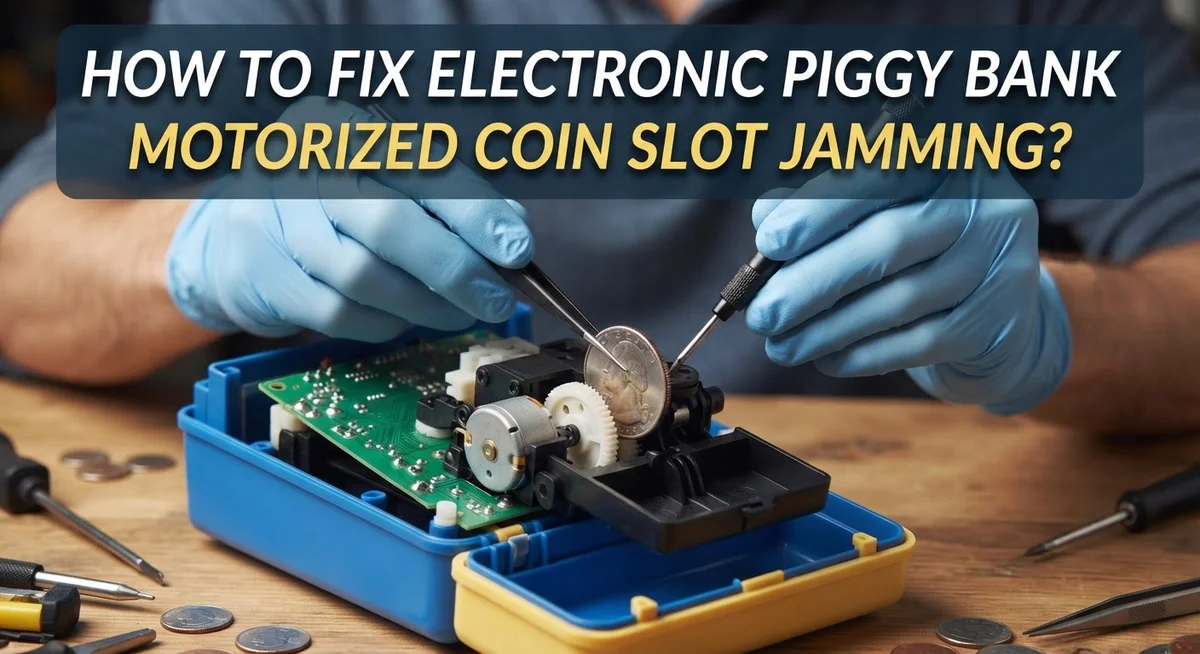
How To Fix Electronic Piggy Bank Motorized Coin Slot Jamming?
Does your electronic piggy bank suddenly refuse to accept coins? A jammed coin slot is a common problem. It can turn a fun savings gadget into a frustrating box.
Most jamming issues happen due to debris buildup, coin misalignment, or motor trouble. Sometimes the processor board causes hidden shorts too. The good news is that many of these problems have simple fixes.
This guide walks you through practical steps to diagnose the issue. You will learn how to check the coin slot for stuck coins. We also cover how to test the solenoid and roller mechanism.
In a Nutshell
- Check the coin slot first. Look for stuck coins or debris blocking the path. This is the most common cause of jamming.
- Test the motor and battery. A weak battery often stops the motor from working. Swap in a fresh one to see if that solves the problem.
- Use a thin tool to clear jams. A butter knife or small screwdriver can gently guide stuck coins out. Never force a coin, as this can damage the motor or roller.
- Inspect the solenoid and roller. These parts control coin movement. If they feel stuck, a light touch with a screwdriver can help them move freely again.
- Clean and lubricate regularly. Dust and coin residue build up over time. Compressed air and light lubrication keep parts moving smoothly.
- Know your bank’s design. Some piggy banks have no way to open them without breaking the case. Check this before you start any repair.
Understanding Why Motorized Coin Slots Jam
Electronic piggy banks jam for several clear reasons. Understanding these causes helps you fix the problem faster and prevent it from happening again.
Debris buildup is the most common culprit. Dust, lint, and small particles settle inside the coin slot over time. These materials block coins from falling smoothly through the mechanism. Even tiny bits of paper or fabric can stop the entire system.
Coin positioning and order matters more than you might think. When you insert coins at different angles or in rapid succession, the internal mechanism gets confused. The motor struggles to process coins that aren’t aligned properly. This confusion triggers the jamming response.
Motor and processor issues cause serious jams. If the motor fails or the processor board develops shorts, the solenoid cannot activate correctly. The solenoid controls whether coins enter or get blocked. A faulty board sends wrong signals to this critical part.
Weak batteries reduce motor power significantly. A dying battery cannot provide enough energy for the motor to push coins through. The mechanism slows down and eventually stops accepting new coins altogether.
Solenoid and roller problems directly block coin movement. The solenoid is an electromagnet that opens and closes the coin path. The roller physically guides coins downward. When either part wears out or gets stuck, jamming happens immediately.
Coin box fullness also triggers jams. Many piggy banks have sensors that detect when the collection box reaches capacity. Once full, the system refuses new coins to prevent overflow damage.
These causes work together or separately to create jams. Identifying which factor affects your specific bank helps you choose the right fix. Most jams result from a combination of debris, weak power, and worn internal parts working together against smooth coin entry.
Tools You Need Before You Start
Before you start fixing your electronic piggy bank, gather the right tools. Having everything ready makes the job faster and prevents damage.
A thin, flat tool is essential. A butter knife, small screwdriver, or flathead screwdriver works well. This tool helps you gently guide stuck coins out without forcing them. Never use anything sharp or pointed that could scratch internal parts.
Compressed air clears debris from tight spaces. A manual air pump or compressed air canister removes dust and coin particles stuck in the slot. This prevents future jams from building up again.
A small flashlight or headlamp lets you see inside the coin slot clearly. Jams often hide in dark areas. Good lighting helps you spot stuck coins and debris you might otherwise miss.
Tweezers or needle nose pliers grab small objects. These tools reach into tight spots where your fingers cannot fit. They help remove debris without damaging the slot mechanism.
A battery may be needed. Check what type your bank uses. Common sizes include AA, AAA, or button cell batteries. Having a fresh battery on hand helps test if power issues cause the jam.
A small container holds screws and small parts. Electronic piggy banks have many tiny screws. Keeping them organized prevents losing pieces during repairs.
Paper towels or a soft cloth protects internal components. Use these to wipe away dust and debris gently. Avoid using rough materials that scratch surfaces.
Lubricant helps moving parts work smoothly. A light machine oil or silicone spray reduces friction on rollers and solenoids. Apply sparingly to avoid attracting more dust.
Gather these tools first. You will work more efficiently and avoid frustration during repairs.
Step-by-Step Guide to Diagnosing the Jam
Start by removing power from your piggy bank. Unplug it or remove the battery completely. This keeps you safe and prevents accidental motor activation while you work.
Next, look directly into the coin slot with a flashlight. You need to see what’s blocking the path. Stuck coins, paper fragments, or dust often sit right at the entrance. Take note of exactly where the jam occurs. Is it near the top, middle, or deep inside the slot?
Gently insert a thin, flat tool into the slot without forcing it. Push slowly and feel for resistance. Move the tool side to side carefully. This tells you if something is physically blocking the coin path or if the jam is deeper in the mechanism.
Check the solenoid blocking mechanism next. This part controls when coins can enter. Look for any coins wedged against it. The solenoid may be stuck in the closed position, preventing coins from moving forward.
Test the roller movement by hand. Use a small screwdriver to gently turn the roller mechanism. It should spin smoothly without grinding sounds. Rough or stuck movement means internal damage or debris.
Inspect the coin box area too. Open the access panel if your bank has one. Look for coins piled up or debris sitting at the bottom. A full coin box sometimes triggers jams because pressure builds up.
Listen carefully during these tests. Grinding, clicking, or scraping sounds tell you where the problem exists. Write down everything you observe. This information helps you decide whether you need simple cleaning or deeper repairs.
Document what you find before moving forward with fixes.
How to Safely Remove a Stuck Coin
Start by turning off power to your piggy bank completely. This protects both you and the internal electronics from accidental damage during removal.
Look directly into the coin slot using a flashlight. You need to see exactly where the coin is stuck. Take your time and shine light from different angles to get a clear view of the blockage.
Never force a stuck coin out. Forcing causes permanent damage to the slot mechanism and internal gears. The coin may break apart inside, making the problem worse.
Use a thin, flat tool like a butter knife or plastic spoon handle. Gently slide it down alongside the stuck coin. The goal is to guide the coin, not push it forcefully. Work slowly and let gravity help you.
If the coin won’t budge, try a different approach. Insert the tool at a slight angle. Gently rock the coin back and forth. This small movement often loosens coins that are wedged tightly.
For coins stuck deeper inside, use tweezers or needle nose pliers. Grip the edge of the coin carefully. Pull with steady, gentle pressure rather than quick jerks. Patience matters more than strength here.
Once the coin moves even slightly, keep working it out gradually. Stop if you feel strong resistance. Pushing through resistance risks breaking internal parts.
After removing the stuck coin, inspect the slot opening. Look for debris, dust, or small coin fragments. Use compressed air to blow out any loose particles. This prevents future jams from forming.
Test the slot with a different coin before reassembling everything. Insert a coin slowly and listen for normal operation sounds. If it moves smoothly, you’ve successfully cleared the jam.
Fixing Motor and Processor Board Related Jams
Your electronic piggy bank’s motor and processor board control how coins move through the slot. When these parts fail, coins jam and the mechanism stops working.
Motor failure happens when power drops too low or internal gears wear out. The motor spins the roller that guides coins downward. If the motor doesn’t spin, coins get stuck at the entry point. You’ll hear a clicking sound but no movement. The processor board tells the motor when to activate. If the board has a short circuit or bad connection, it sends wrong signals to the motor.
Start by replacing the battery first. A weak battery reduces motor power significantly. Install a fresh battery and test the coin slot again. If jamming continues, the motor itself may need replacement.
Next, inspect the processor board for visible damage. Look for burned areas, loose wires, or corroded connections. Gently wiggle any loose wires back into place. If you see burned components, the board likely needs replacement.
Test the motor manually using a small screwdriver. Gently push the roller inside the slot. It should move smoothly without grinding sounds. Grinding means internal gears are damaged.
Lubrication helps when the motor runs but moves slowly. Apply a small amount of lubricant to the roller axle and moving joints. Wipe away excess lubricant with a cloth. Too much lubricant attracts dust and causes new jams.
If the motor still won’t spin after battery replacement and lubrication, the motor assembly needs replacement. Document all your findings before deciding on replacement parts. This information helps you order the correct components for your specific piggy bank model.
Preventing Future Coin Slot Jams
Regular maintenance stops most jams before they happen. Empty your coin box every two to three weeks so debris doesn’t pile up inside. A full box puts pressure on the internal mechanisms and triggers jamming.
Insert coins one at a time in the same orientation. When you drop coins randomly or mix different coin types, the processor board gets confused about positioning. This confusion causes the motor to jam or reject coins. Consistency matters more than you might think.
Use compressed air monthly to blast away dust and debris from the coin slot opening. Hold the can upright and use short bursts. This simple step prevents particles from entering the mechanism and causing blockages.
Check the solenoid blocking mechanism every few months. This part controls when coins can enter the slot. If it gets sticky or corroded, coins won’t pass through smoothly. A light cleaning with a dry cloth keeps it functioning properly.
Test your piggy bank weekly by inserting a single coin. Listen for normal motor sounds and watch for smooth operation. Early warning signs like grinding noises or hesitation tell you maintenance is needed before a real jam occurs.
Store your piggy bank in a dry location away from moisture. Humidity causes internal corrosion and processor board problems. Keep it away from extreme heat too, since electronics perform poorly in high temperatures.
Replace the battery every six months even if the piggy bank still works. Low battery voltage causes motor sluggishness and jamming. Fresh batteries cost very little compared to repair expenses.
Document any unusual sounds or behavior in a simple notebook. Patterns emerge over time that help you spot problems early and prevent future jams.
Common Mistakes to Avoid When Fixing Jams
Fixing an electronic piggy bank requires patience and careful technique. Many people make costly errors that worsen the problem instead of solving it.
Forcing stuck coins is the most damaging mistake you can make. When you push hard on a jammed coin, you risk breaking the internal slot mechanism, bending the coin ejector, or stripping the motor gears. These repairs cost far more than the coin itself. Always work slowly and gently when removing any stuck object.
Another common error is ignoring the processor board. People focus only on the coin jam and miss that the real problem sits on the circuit board. If you see visible damage, corrosion, or burned spots on the board, no amount of coin removal will fix the jam. The board controls the entire ejection sequence.
Many users also skip battery replacement as their first troubleshooting step. A weak battery causes the motor to move slowly or not at all, which creates jams. Replacing the battery takes two minutes and solves many problems instantly.
Neglecting regular maintenance sets you up for future jams. Inserting coins in random orders or at different angles confuses the mechanism. Dust and debris pile up inside the slot over time. These small oversights compound into serious jams.
People also make the mistake of disassembling too aggressively. Removing every screw at once leaves you confused about reassembly. Take photos before opening anything. Remove screws one section at a time. Label each part as you go.
Finally, many owners fail to test after repairs. Always insert a test coin slowly before declaring success. Listen for unusual sounds. Watch for smooth operation. This simple step catches problems early before they cause new damage.
When the Piggy Bank Cannot Be Repaired
When your electronic piggy bank stops responding to repair attempts, you face a difficult decision. Some piggy banks simply cannot be fixed due to their design or the extent of internal damage.
Irreparable damage occurs when the processor board has multiple burned circuits or the motor assembly is completely corroded. If water has entered the internal mechanisms, electronic components often fail permanently. Corrosion spreads quickly and destroys the delicate connections that make the motor and solenoid work together.
Design limitations also prevent repairs. Many piggy banks lack accessible screws or removal panels. The manufacturer intentionally sealed these units to prevent tampering. You cannot reach the internal components without destroying the plastic housing.
Replacement becomes necessary when the cost of parts exceeds the piggy bank’s value. Motor assemblies and processor boards are expensive. Battery replacements and lubrication work only for minor jams, not catastrophic failures.
Consider these signs of irreparable damage. The motor makes grinding sounds but won’t spin. The solenoid clicks repeatedly without moving coins. The coin slot remains jammed after you remove visible obstructions. Pressing the coin insertion button produces no response whatsoever.
Before accepting defeat, try one final step. Remove the battery completely and wait 24 hours. This resets the processor board in some models. Reinstall the battery and test the slot with a single coin.
If nothing works, you have two options. Donate the piggy bank to a repair enthusiast or recycle it properly. Some communities accept electronic devices at special collection sites. Document what you tried so others learn from your experience. Sometimes accepting that a device has reached the end of its life is the most practical choice.
Final Thoughts
Fixing a jammed electronic piggy bank does not need to feel hard. Most jams come from simple causes like debris, misaligned coins, or a weak battery.
Start with the easy fixes first. Check the coin slot for stuck coins. Clean out dust with compressed air. Replace the battery before assuming the worst.
Patience matters more than force. Rushing to pull apart the piggy bank often causes more harm than good. Take your time with each step and test after every change you make.
The diagnostic steps outlined here work for most common jams. Removing the coin jumper, checking the solenoid, and testing the roller all give you clear answers about what’s wrong.
Regular care prevents most problems. A piggy bank that gets cleaned and checked often will jam less than one that gets ignored for months at a time.
Sometimes a piggy bank cannot be saved. The processor board may be too damaged, or the design may not allow safe access to the parts inside. This is normal for some models.
Know when to stop trying. If you have tried the basic fixes and nothing works, it may be time to retire the piggy bank rather than risk more damage.
Think of this guide as a tool you can return to anytime a jam happens again. The steps stay the same whether it is your first jam or your fifth.
With steady hands and a calm approach, you can solve most coin slot problems on your own. And when a jam proves impossible to fix, you will know exactly why, and that knowledge still counts as a win.
Frequently Asked Questions
Why does my electronic piggy bank jam when I insert coins?
Jams happen for three main reasons. First, the motor or processor board might fail. Second, coins inserted in different orders can trigger the blocking mechanism. Third, debris builds up inside the slot over time.
Start by removing the coin jumper while power is on. Close the door to test if the mechanism moves. If nothing happens, the motor likely needs attention. Check inside the slot for stuck coins or dust.
How do I safely remove a stuck coin without breaking my piggy bank?
Never force the coin. Use a thin tool like a butter knife to gently guide it from the top slot. Push slowly and let gravity help. If the coin won’t budge, try using a small screwdriver to test the roller movement first.
This tells you if the mechanism is truly jammed or just stuck. Patience works better than pressure here.
What should I check before taking my piggy bank apart?
Test the solenoid blocking mechanism first. Insert a single coin and watch what happens. Replace the battery next, since a weak battery causes many false jams. Check that your piggy bank sits in a dry location, as moisture creates electrical problems.
Only disassemble if these steps fail.
Can compressed air help fix jamming issues?
Yes. Compressed air clears debris from the slot without opening the piggy bank. Use short bursts to push dust and particles out. Do this monthly as part of regular care.
This simple step prevents many jams before they start.

Hi, I’m Sonny Dawson, the creator and voice behind ConvertResizeGen. 👋 I’m a passionate tech enthusiast who loves exploring the latest gadgets, devices, and electronics that shape the way we live and work. Through my website, I share honest, hands-on reviews of trending Amazon products to help you make smarter buying decisions.