How To Fix Motorized Bassinet Mesh Fabric Tearing At Seams?
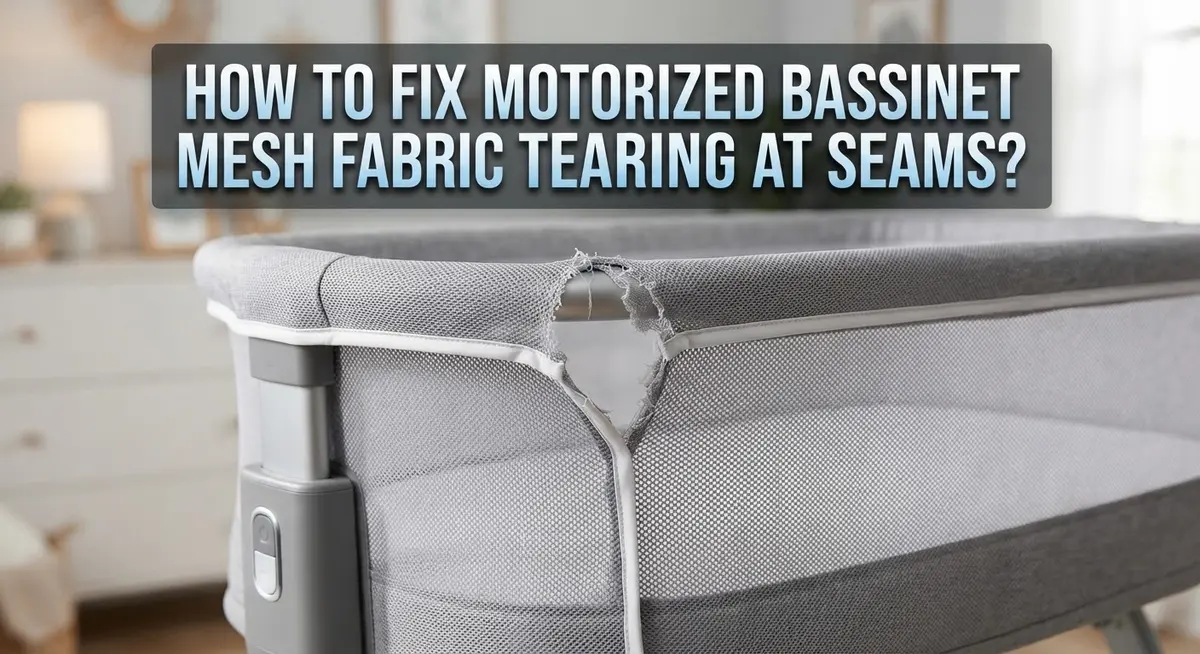
Does your motorized bassinet mesh keep tearing at the seams? You are not alone. Many parents notice small rips near the stitching after months of gentle rocking and everyday use.
This problem often starts small. But a tiny seam tear can quickly grow into a bigger safety concern if you ignore it.
The good news is you can fix this issue yourself. You do not need to be a sewing expert to repair mesh fabric properly.
This guide walks you through the entire repair process step by step. We will show you how to safely remove damaged stitches with a seam ripper. You will also learn the right way to re-stitch torn seams using proper needles and thread.
In a Nutshell
- Seam tears need a different fix than holes. Always identify which problem you have before starting repairs.
- A seam ripper removes damaged stitches safely. This step protects the delicate mesh from further damage.
- Fresh needles matter a lot. Dull or bent needles cause skipped stitches and snags on mesh fabric.
- Re-stitching requires the right needle and thread. Standard sewing methods often fail on chiffon-like material.
- Catch small tears early. Waiting too long lets tiny rips turn into bigger, harder repairs.
- Check seams often for fraying. Early inspection helps you spot stress points before they tear.
- Motorized bassinets can be repaired safely at home. You just need proper technique and patience.
Why Mesh Seams Tear on Motorized Bassinets
Mesh seams tear on motorized bassinets for several clear reasons. Understanding these causes helps you prevent future damage and fix problems faster.
Constant motion creates stress. Motorized bassinets rock back and forth continuously. This repetitive movement puts pressure on every seam. Over time, the fabric fibers weaken at stress points. Seams bear the most tension because they hold layers together.
Delicate material breaks easily. The mesh used in bassinets is thin and lightweight. This design lets air flow freely around your baby. However, delicate fabrics cannot handle rough handling or sharp objects. Even gentle tugging can cause seams to separate.
Friction damages stitching. When the bassinet rocks, fabric rubs against itself. This friction weakens thread gradually. Stitches loosen or break under repeated rubbing. Once one stitch fails, nearby stitches follow quickly.
Improper cleaning causes problems. Washing mesh in hot water or using harsh scrubbing damages fibers. Aggressive drying techniques can also weaken seams. The fabric shrinks unevenly, creating stress on stitched areas.
Age and wear take a toll. Bassinets used frequently show wear faster. Older mesh becomes brittle and loses flexibility. Brittle fabric tears more easily at seams where tension concentrates.
Manufacturing defects exist. Some bassinets leave the factory with weak seams. Poor quality stitching fails sooner than expected. Checking seams early catches these problems before they worsen.
Babies move and shift. Your baby’s weight distribution changes constantly. This shifting movement stresses different seam sections. Seams near the head and foot areas experience the most strain.
Recognizing these causes helps you spot problems early. Regular inspection prevents small tears from becoming major repairs.
Tools and Materials You’ll Need Before Starting
Gathering the right tools and materials makes your repair job much easier. Start with a seam ripper, which safely removes damaged stitches without harming the delicate mesh. This small tool has a curved blade that slides under threads cleanly.
You’ll also need a fresh needle in the correct size for mesh fabric. Dull or bent needles cause skipped stitches and create snags. Replace your needle even if it looks fine, since invisible damage leads to uneven seams.
Thread selection matters greatly for mesh repairs. Use polyester or nylon thread that matches your bassinet color. Mesh fabric requires thread that moves with the material without breaking.
Grab a pair of small, sharp scissors for trimming loose threads. Regular scissors crush delicate mesh, so precision cutting tools work best. You’ll also want tweezers to hold small mesh sections steady while you work.
A magnifying glass helps you see seams clearly. Mesh fabric is thin, and proper visibility prevents mistakes during re stitching. Good lighting in your work area is equally important.
Consider having a stabilizer fabric nearby. This backing material supports mesh during repairs and prevents further tearing. You can use lightweight cotton or specialty mesh stabilizers.
Keep a small piece of matching mesh fabric on hand for testing stitches first. Practice your technique before working on the actual bassinet. This prevents frustration and saves your repair attempt.
Finally, have a flat work surface ready. A clean table with good lighting gives you space to spread out the bassinet section and work comfortably. Rushed repairs in poor conditions often fail, so proper setup matters.
Step-by-Step: Removing Damaged Stitches with a Seam Ripper
A seam ripper is a small tool with a curved blade designed to cut stitches without damaging fabric. This tool becomes essential when working with delicate mesh material on your bassinet.
Start by placing your bassinet on a flat, well lit surface. Position the damaged seam so you can see it clearly. Use your magnifying glass to locate exactly where the old stitches begin and end.
Hold the seam ripper with a steady grip. Slide the curved blade under each stitch carefully. The blade should go between the thread and fabric, not into the mesh itself. Cut one stitch at a time rather than rushing through multiple stitches.
After cutting each stitch, use tweezers to pull away the cut thread pieces. Work slowly and gently. Mesh fabric tears easily when you apply too much force or pull at wrong angles.
Once you remove all damaged stitches, inspect the seam area closely. Look for fraying fibers or weakened spots. If you see loose threads, trim them with small sharp scissors. Cut only the loose pieces, not the mesh fabric itself.
Check that the two fabric edges align properly now that stitches are gone. The edges should sit flat against each other without bunching or gaps. If edges don’t line up, you may need to adjust them slightly before resewing.
Take a moment to examine the surrounding seams too. Look for any signs of stress or early damage. Catching problems early prevents bigger repairs later.
Your mesh is now ready for fresh stitching. The seam ripper removed old threads safely without creating new damage to your delicate fabric.
Step-by-Step: Re-Stitching a Torn Mesh Seam
Re-stitching a torn mesh seam requires patience and the right technique. Your goal is to restore the seam’s integrity so the bassinet remains safe and functional for your baby.
Start by threading your needle with thread that matches your mesh fabric color. Use a needle size appropriate for delicate mesh material—typically a size 70/10 or 80/12 needle works best. Make sure your needle is sharp and undamaged, as dull needles cause uneven stitches and can snag the delicate fibers.
Position the torn seam so the two fabric edges meet perfectly. You want them aligned edge to edge with no gaps or overlaps. Use your fingers or tweezers to hold the edges in place while you work.
Begin stitching at one end of the tear using a straight stitch or backstitch. Take small, even stitches along the entire seam length. Keep your stitch length consistent—approximately 2 to 3 millimeters per stitch works well for mesh fabric.
Work slowly and deliberately. Rushing causes uneven stitches that weaken the repair. If you notice a stitch pulling too tight, loosen it slightly to prevent puckering the delicate mesh.
As you stitch, periodically check that both fabric edges remain aligned. Misalignment creates weak spots that fail quickly.
Once you complete the seam, tie off your thread securely at the end. Trim any loose thread pieces with sharp scissors.
Inspect your finished seam carefully. Look for gaps, loose stitches, or areas where fabric edges separated. A properly re-stitched seam should feel smooth and hold the two fabric edges firmly together.
Test the repair gently by flexing the seam slightly. It should hold without separating or showing stress.
Patching Holes vs. Repairing Seam Tears
Holes and seam tears require completely different repair approaches. Understanding the difference helps you fix your bassinet correctly and safely.
Holes appear in the mesh fabric itself, away from seam lines. These occur when the material gets punctured or worn through. You repair holes by applying a patch over the damaged area. The patch covers the opening and restores the mesh barrier that keeps your baby safe inside the bassinet.
Seam tears happen along the stitched edges where two pieces of fabric connect. These tears compromise the structural integrity of the entire seam. You cannot simply patch a seam tear because the stitching itself is broken. The seam must be re-stitched to restore proper strength and support.
Why does this distinction matter? A patched hole might hold fine, but a patched seam tear could fail under pressure. When your baby moves or the motorized motion activates, stress concentrates on seams. A weak seam can expand rapidly and create safety risks.
Catch seam tears early before they spread. Small seam separations are easier to repair than large ones. If you notice stitching coming loose, address it immediately.
For holes, you need a patch material that matches your mesh fabric type. Apply the patch securely so it stays in place during washing and use.
For seam tears, remove the damaged stitches completely using a seam ripper. Then re-stitch the seam with fresh thread using proper technique. This restores the original seam strength.
Always inspect repaired areas regularly. Check that patches stay adhered and re-stitched seams remain tight. Your baby’s safety depends on these repairs holding strong throughout the bassinet’s use.
Inspecting for Fraying and Preventing Future Tears
Fraying happens when thread fibers at the seam edges start to separate and unravel. You’ll notice loose threads sticking out around the damaged area. Catching fraying early stops small problems from becoming big ones.
Check your bassinet mesh regularly for signs of stress. Look along all seams where two fabric pieces connect. Run your fingers gently over the mesh surface. Pay special attention to areas where your baby moves most. Corners and edges experience more wear than flat sections.
Use a bright light when inspecting. Natural daylight works best. Look for loose threads, separated stitches, or fabric edges that are coming apart. If you spot fraying, address it immediately. Small frayed areas expand quickly under the constant motion of a motorized bassinet.
Prevention starts with understanding what causes fraying. Repeated movement stresses the seams. Moisture can weaken thread fibers over time. Rough handling during cleaning or transport also damages mesh fabric. Be gentle when wiping down your bassinet.
Inspect the seams at least once every two weeks. Keep a simple checklist to track which areas you’ve examined. Document any changes you notice. This helps you catch problems before they affect the bassinet’s safety or function.
When you find fraying, stop using the bassinet in that area if possible. Mark the spot so you remember to repair it soon. Don’t wait for the fraying to spread further.
Proper storage prevents unnecessary wear. Keep your bassinet in a clean, dry place. Avoid extreme temperatures or humidity. Protect it from direct sunlight when not in use. These simple steps reduce stress on mesh seams and keep your fabric stronger longer.
Common Mistakes That Weaken Your Repair
Parents often make simple mistakes that actually make their mesh fabric tears worse. Understanding these errors helps you avoid costly damage to your bassinet.
Using a dull or bent needle is the biggest culprit. A damaged needle skips stitches and creates uneven seams. This weakness spreads the tear further. Always replace your needle before starting any repair work. A fresh needle costs almost nothing but saves your repair.
Waiting too long to fix small tears compounds the problem. A tiny seam separation grows into a large hole within days. Movement from the motorized bassinet motion stresses weak spots. What takes five minutes to fix today becomes a major project tomorrow. Check your bassinet weekly for early signs of damage.
Choosing the wrong repair method matters more than you think. Standard sewing techniques fail on delicate mesh fabric. The material is too thin for regular stitches. Mesh requires specialized approaches that account for the fabric’s delicate nature. Using heavy thread or thick needles can actually tear the material further.
Rushing through the stitching process creates problems. You might skip sections or create uneven tension. Take your time and work slowly. Check alignment frequently as you stitch. A rushed repair fails quickly and wastes your effort.
Ignoring fraying at seam edges allows tears to expand. Fraying means threads are separating and unraveling. Address fraying immediately by securing loose threads. This prevents the tear from spreading outward.
Not inspecting your work afterward means you miss weak spots. Gently flex the repaired seam to test it. Look for gaps or loose stitches. A quick inspection catches problems before they become dangerous for your baby.
Troubleshooting Persistent or Recurring Seam Issues
When seam issues keep coming back, something deeper is causing the problem. Persistent tears mean your repair didn’t address the root cause. Let’s identify what’s happening and fix it properly.
First, check if you’re using the right needle size. A needle that’s too small or too large creates uneven stitches that eventually fail. The needle should pass through mesh fabric smoothly without forcing or bending. Replace your needle before every repair to avoid skipped stitches that weaken the seam.
Thread tension matters more than most parents realize. If your tension is too tight, it pulls the delicate mesh and creates stress points that tear again. If it’s too loose, stitches don’t hold under the weight and movement of the bassinet. Test your tension on scrap mesh fabric first.
Recurring tears also happen when you don’t remove all the damaged stitches. Old broken threads create weak spots that fail immediately. Use your seam ripper carefully to remove every bit of the old stitching before you start fresh.
Consider the bassinet’s movement pattern. If tears happen in the same spot repeatedly, that area experiences extra stress. You might need to reinforce it with a small fabric strip underneath before stitching. This backing prevents the mesh from tearing through again.
Finally, examine your stitching technique. Are you sewing slowly and evenly? Rushed stitches create gaps where the seam can split. Take your time and use small, consistent stitches about one eighth inch apart.
If problems persist after these adjustments, the mesh itself may be damaged beyond simple repair. At that point, replacement becomes safer than repeated fixes.
Final Thoughts
Fixing torn mesh fabric on a motorized bassinet does not need to be scary. With the right tools and a little patience, you can restore the seam safely.
Remember the basics: remove old stitches first, choose the correct needle, and stitch with care. These small steps make a big difference.
Mesh fabric is delicate. It needs gentle handling and the right technique. Rushing the job often leads to weak spots that tear again later.
Safety always comes first when your baby uses this bassinet daily. If a repair looks weak or uneven, redo it before placing your baby inside.
Regular checks help you catch problems early. A quick glance every two weeks can save you from a bigger repair job later.
Trust your instincts as a parent. If something feels off about the mesh or the stitching, take action right away.
Small tears grow fast on mesh fabric. Waiting even a few days can turn an easy fix into a hard one.
Keep your repair kit simple. A seam ripper, proper needle, and matching thread are usually enough for most fixes.
Practice makes your stitching better over time. Your first repair may look imperfect, but each attempt builds your skill.
If a tear seems too large or the mesh feels weak overall, consider asking a professional for help. Some damage goes beyond simple home repair.
Your baby’s safety matters most. A well repaired bassinet gives you peace of mind and keeps your little one secure during sleep and movement.
With patience and the right approach, you can handle most mesh fabric issues yourself. Stay alert, act quickly, and your bassinet will serve your family well for a long time.
Frequently Asked Questions
Can I fix seam tears myself or do I need professional help?
You can fix seam tears yourself if the damage is small and the mesh feels sturdy. Start by using a seam ripper to carefully remove the damaged stitches. Then re stitch the seam with a fresh needle and matching thread. If the tear is longer than half an inch or the mesh feels weak around the damaged area, ask a professional for help. Your baby’s safety comes first.
What’s the difference between fixing a hole versus fixing a torn seam?
Holes and seam tears need different repair approaches. Seam tears happen where stitches failed, so you remove the old stitches and re stitch the line. Holes in the mesh fabric itself require a patch applied over the damage. Seam tears are more critical because they affect the bassinet’s structural integrity. Holes are usually easier to patch but still important to address quickly.
Why do my seam repairs keep failing?
Recurring seam problems usually come from one of three causes. First, check your needle. A dull or bent needle creates uneven stitches that fail faster. Second, your thread tension might be too tight, pulling the delicate mesh and causing stress. Third, make sure you removed all the old damaged stitches before re stitching. If problems persist, the mesh around the seam may be too weakened to hold a repair.
How soon should I fix a torn seam?
Fix torn seams as soon as you notice them. Small tears expand quickly on mesh fabric, especially with the constant movement of a motorized bassinet. Catching damage early makes repairs simpler and keeps your baby safer. Check your bassinet weekly for new tears or fraying edges.

Hi, I’m Sonny Dawson, the creator and voice behind ConvertResizeGen. 👋 I’m a passionate tech enthusiast who loves exploring the latest gadgets, devices, and electronics that shape the way we live and work. Through my website, I share honest, hands-on reviews of trending Amazon products to help you make smarter buying decisions.