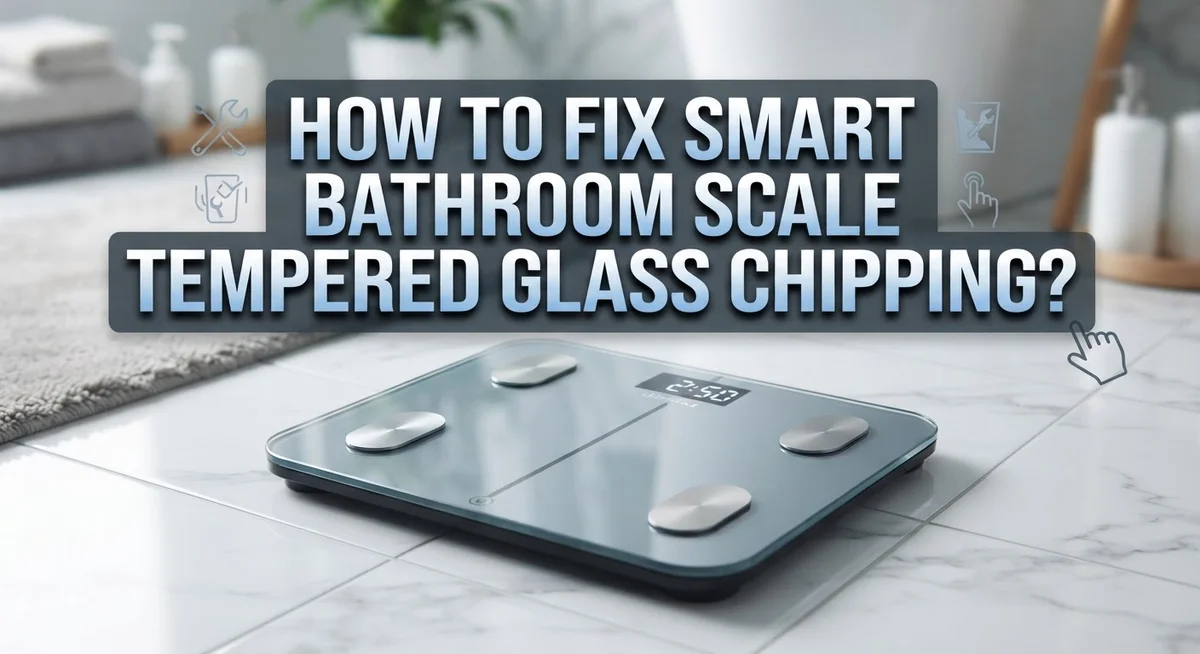
How To Fix Smart Bathroom Scale Tempered Glass Chipping?
A chipped glass surface on your smart bathroom scale can feel like a small disaster. You step on it every morning. You trust it with your health data. Seeing a crack or chip makes you worry about safety and accuracy.
Tempered glass is strong, but it is not invincible. Drops, heavy impact, or even temperature changes can cause chipping. Once damage appears, the glass can weaken further over time.
This guide will help you understand why your scale’s glass chips in the first place.
In a Nutshell
- You cannot truly “fix” chipped tempered glass. Once the surface chips, the glass has lost its structural strength. The safest step is always replacement, not repair.
- Small chips can weaken the entire panel. Tempered glass relies on even pressure across its surface. A tiny crack can spread fast.
- Stop using the scale immediately after noticing damage. Standing on a chipped scale raises your risk of the glass shattering under your feet.
- Check your warranty before buying a new scale. Many brands replace damaged units for free within the coverage period.
- Clean up glass fragments carefully. Use gloves and a damp cloth to collect small shards, then dispose of them safely.
- Prevent future chipping with simple habits. Keep the scale on a flat, stable floor and avoid dropping heavy objects near it.
Why Tempered Glass Scales Chip: Common Causes
Tempered glass breaks differently than regular glass. When it chips, the entire panel becomes weak and unsafe. The damage spreads faster than you might expect.
Impact and dropping cause most chips on bathroom scales. You accidentally drop the scale or step on it wrong. The glass cannot absorb the shock and cracks. Even a small fall from waist height can cause serious damage.
Temperature changes create stress inside the glass. Moving your scale from a cold bathroom to a warm bedroom causes expansion. The glass shifts and weakens. Over time, tiny cracks form and eventually chip away.
Uneven pressure on the surface leads to chipping. Bathroom scales need even weight distribution. Standing on one corner or edge puts stress on that spot. The glass fails at the weakest point and chips appear.
Manufacturing defects sometimes cause hidden weakness. A scale might have a tiny flaw inside the glass. Normal daily use reveals the problem weeks or months later. The chip seems random, but the glass was already compromised.
Hard water and moisture weaken the glass edges. Bathroom humidity seeps into small cracks. Minerals from water deposits build up under the surface. This process slowly damages the glass from inside out.
Cleaning products can accelerate chipping. Harsh chemicals cause the glass to become brittle. Repeated scrubbing with abrasive materials scratches the surface. Small scratches become entry points for moisture and damage.
Understanding these causes helps you prevent future problems. Handle your scale gently and keep it in a stable environment. Avoid placing it near temperature sources like heating vents or air conditioners. Regular gentle cleaning protects the glass better than aggressive scrubbing.
Assessing the Damage: Is Your Scale Still Safe to Use?
Your smart bathroom scale’s tempered glass can still be safe after a chip, but you need to assess the damage carefully. Small surface chips are different from deep cracks that go through the entire panel.
Start by examining the chip closely. Look at its size, depth, and location. A tiny chip smaller than a quarter might not affect safety right away. However, a chip larger than a quarter or any crack running across the glass means you should stop using the scale immediately.
Press gently around the damaged area with your finger. If the glass feels loose or wiggles, the structural integrity is compromised. This is a clear sign to stop using it. If the glass feels solid and the chip is only on the surface, you have a bit more time to decide your next steps.
Check if the chip is near the edges or in the center. Edge chips spread faster because pressure concentrates on those weak points. Center chips tend to be more stable temporarily.
Look underneath the glass too. Sometimes chips on top cause hidden damage below the surface. Flip the scale carefully and inspect the underside. If you see cracks spreading or multiple chips, the glass is failing.
Test the scale’s weight reading if the glass still feels solid. Place a known weight on it and compare the reading to the actual weight. If readings are off, internal damage may have occurred.
Your safety matters most. If you have any doubt about the glass’s stability, stop using the scale. Tempered glass can shatter suddenly without warning once it’s damaged. Don’t risk a fall or injury just to keep using a faulty scale.
Tools and Materials Needed Before You Begin Repairs
Before you start any repair work on your chipped bathroom scale, gather the right tools and materials. Having everything ready makes the process safer and faster.
Protective gear comes first. You need heavy duty gloves to protect your hands from sharp glass edges. Safety glasses shield your eyes from tiny fragments that may fly during cleanup. A dust mask prevents you from breathing in glass particles.
Cleaning supplies matter. Get a soft cloth or microfiber towel for wiping surfaces. You’ll want rubbing alcohol or glass cleaner to remove dust and residue. A small brush helps sweep away loose fragments from crevices.
Basic tools you’ll need. Keep a flashlight handy to inspect the damage clearly. A magnifying glass lets you see small cracks or chips up close. A ruler or measuring tape helps you document the damage size.
For temporary stabilization. Clear tape can hold loose edges together temporarily, though this is not a permanent fix. Newspaper or cardboard protects your work surface from glass debris.
Optional but helpful items. A small vacuum with a brush attachment picks up fine glass dust safely. Paper towels absorb moisture and spills. A trash bag keeps broken pieces contained during cleanup.
Documentation tools. A camera or phone takes photos of the damage. These images help if you need to file a warranty claim or contact customer support.
Safety first approach. Never skip protective equipment. Glass shards are invisible and cause serious cuts. Work in a well lit area so you can see all fragments clearly.
Gather these items before you begin. This preparation prevents injuries and makes your work area organized and efficient.
Step-by-Step Guide to Fixing Minor Chips and Edge Damage
Minor chips on your smart bathroom scale’s tempered glass need careful attention. The repair process depends on the chip’s size and location.
Start with safety first. Put on your heavy duty gloves before touching any damaged area. Glass edges become sharp when chipped, and you want to protect your hands throughout the repair work.
Clean the area thoroughly. Use a soft cloth to wipe away dust and debris around the chip. A damp microfiber towel works best for this step. Make sure the surface is completely dry before moving forward.
Inspect the damage closely. Look at the chip from multiple angles using a flashlight. Check if the glass feels loose or stable. Press gently around the edges to see if any pieces move or shift.
For small surface chips, you can apply clear epoxy resin to seal the damaged area. This temporary fix prevents the chip from spreading further. The resin fills small gaps and hardens to create a protective layer.
Apply the repair material carefully. Follow the product instructions exactly. Most epoxy resins require mixing before application. Use a small applicator to work the material into the chip. Smooth it level with the surrounding glass surface.
Let it cure completely. This usually takes several hours or overnight, depending on the product. Avoid using your scale during this time.
Test the repair afterward. Place the scale on a flat surface and check if it works properly. The weight readings should remain accurate if the damage was minor.
Remember your limits. If the chip is large or the glass feels unstable, repair attempts may not be safe. Consider professional replacement options instead.
Sealing and Protecting Chipped Areas to Prevent Further Cracking
Sealing chipped glass prevents water from seeping into your scale’s internal components. Moisture damage can destroy the electronics and ruin your device permanently. You need to act quickly once you spot a chip.
Start by cleaning the chipped area completely. Use a soft, dry cloth to remove all dust and debris. A small vacuum with a brush attachment works well for fine glass particles. Let the area air dry for at least 30 minutes before applying any sealant.
Clear epoxy resin works best for sealing small chips. Apply it directly into and around the damaged spot. Follow the manufacturer’s instructions carefully for mixing and application. Most epoxy products require you to work quickly before they harden.
Use a small brush or applicator stick to spread the sealant evenly. Fill the chip completely so no gaps remain. Smooth the surface as much as possible while the material is still wet. Excess sealant can be wiped away with a damp cloth before it dries.
Allow the sealant to cure for the full recommended time. This is usually 24 hours for complete hardening. Avoid using your scale during this period. The resin needs undisturbed time to bond with the glass properly.
After the sealant dries, inspect your work carefully. Check that the chip is completely sealed and no water can enter. Run your finger gently over the repaired area. It should feel smooth without sharp edges remaining.
For extra protection, apply a thin waterproof coating over the entire glass surface. This adds an additional barrier against moisture. Your scale will have better protection against future water damage and chip progression.
Tips for Preventing Future Chipping and Extending Scale Life
Your smart bathroom scale’s tempered glass needs ongoing care to stay in good condition. Prevention is always easier than repair, so focus on simple daily habits that protect your investment.
Keep your scale on a stable, flat surface away from high traffic areas. Bathroom floors near doorways or shower entrances get bumped more often. Move your scale to a corner or against a wall where people won’t accidentally kick it.
Wipe your scale regularly with a soft, dry cloth. Moisture buildup weakens the glass over time and makes it more prone to cracking. After each use, dry the surface completely. This simple step extends your scale’s lifespan significantly.
Avoid placing heavy objects on your scale when you’re not using it. Don’t stack items on top or lean things against it. Pressure from weight distribution can create stress points in the glass that lead to chips later.
Check your scale monthly for early signs of damage. Look for tiny hairline cracks or small chips that you can catch before they become big problems. Catching issues early means simpler repairs and lower costs.
Keep the area around your scale clear of clutter. Loose items can fall and strike the glass. A clean, organized space reduces accident risks.
Avoid extreme temperature changes in your bathroom. Rapid temperature shifts can stress the glass and cause cracking. Keep your bathroom at consistent temperatures when possible.
If you notice any chips appearing, address them immediately using the repair methods you’ve already learned. Small problems grow into expensive replacements if you ignore them.
These prevention tips work together to keep your scale functioning properly for years. Consistent care beats emergency repairs every time.
Common Mistakes to Avoid When Repairing Glass Scales
Repairing your smart bathroom scale requires careful attention. Many people make errors that worsen the damage or create safety risks. Understanding these mistakes helps you fix your scale properly.
Rushing the cleaning process is a common error. You must remove all dust, soap residue, and moisture before applying any repair material. Skipping this step means the sealant won’t bond correctly to the glass. Take your time and use a lint free cloth for best results.
Applying too much epoxy resin causes problems. People think more product means better coverage, but excess material creates messy overflow and uneven surfaces. Apply only what you need to fill the chip completely. Less is actually more in glass repair work.
Ignoring cure time is another frequent mistake. Rushing to use your scale before the sealant fully hardens leads to failure. The repair material needs the entire recommended time to set properly. Patience prevents you from repeating the whole process.
Using the wrong applicator tools damages the glass further. Avoid metal tools or rough materials that scratch surrounding areas. Soft brushes and plastic applicators protect the undamaged glass while you work.
Skipping waterproofing leaves your scale vulnerable. Even sealed chips need extra protection from bathroom moisture. This step prevents water from eventually seeping into electrical components and causing malfunction.
Applying repair materials in humid conditions reduces effectiveness. High bathroom moisture interferes with proper curing and bonding. Wait for a dry day or use a dehumidifier in your bathroom first.
Forgetting to inspect your work means you miss incomplete sealing. After curing, examine the repair closely with good lighting. Check that water cannot enter any remaining gaps or cracks.
Troubleshooting: When Chipping Affects Scale Accuracy or Sensors
When chipping affects your smart bathroom scale, it can interfere with how the device reads your weight. The tempered glass surface contains sensors underneath that detect pressure and movement. Chips create gaps where these sensors may not receive accurate readings.
Water exposure through chips is the biggest threat to sensor function. Moisture seeps into the internal circuitry and causes electrical shorts. Your scale may display error messages or stop responding entirely. The sensors become less sensitive when water reaches them.
Check if your scale shows inconsistent weight readings. You might notice the numbers jump around or the display freezes. These signs often indicate that chipping has compromised the sensor area. Some scales won’t turn on at all if water damage reaches the battery compartment.
Test your scale on a flat surface first. Step on it gently and watch if the display responds smoothly. If readings fluctuate wildly, the sensors likely need attention. Compare multiple readings over a few minutes to spot patterns in the errors.
The location of the chip matters significantly. Chips near the center of the glass usually affect sensors more than chips around the edges. Chips on corners typically cause fewer accuracy problems.
Before attempting repairs, check your scale’s warranty. Some manufacturers cover sensor damage, and opening the device yourself might void coverage. If you proceed with repairs, seal the chip quickly to prevent further water infiltration.
Document the problem with photos before you start working. This helps you remember the exact damage location. Take another photo after repair to confirm the seal is complete and solid.
Final Thoughts
Fixing a chipped tempered glass scale is simple once you know the steps. You don’t need special skills or expensive tools. A little patience goes a long way.
Small chips rarely mean you need a new scale. Clean the area, apply the right repair material, and let it cure properly. Your scale can work well again.
Prevention matters just as much as repair. Regular cleaning and careful placement stop most chips before they start. A stable surface protects your scale from daily wear.
Watch your scale for early warning signs. Small chips grow bigger if you ignore them. Quick action saves you time and money later.
Accuracy is the real concern with any glass damage. A chip that affects your sensor readings needs immediate attention. Trust the troubleshooting steps you now know.
Sometimes a repair isn’t enough. If your scale shows constant errors or the damage covers a large area, replacement makes more sense. Your health tracking depends on accurate data.
Take your time with each repair step. Rushing leads to mistakes that make things worse. Follow the process carefully from start to finish.
Keep your tools clean and your workspace tidy. This small habit improves your results every time. It also protects you from unnecessary accidents.
Remember that glass scales are delicate by design. They give you precise readings because of their sensitive build. Treat them with respect and they’ll serve you well.
With the right care, your smart bathroom scale can last for years. Chips don’t have to mean the end of your device. Fix them right, and your scale keeps working like new.
Frequently Asked Questions
Can I still use my smart bathroom scale if the glass is chipped?
Yes, you can use it temporarily if the chip is small and doesn’t expose internal components. However, check the display first. Step on the scale gently and see if it responds normally. If readings seem off or inconsistent, stop using it right away.
Water is the real danger here. Moisture can seep through chips and damage the sensors inside. Even small cracks let humidity in over time. If your scale sits in a steamy bathroom, the risk increases significantly.
How do I know if a chip is too severe to repair?
Large chips that expose the internal circuitry or wiring need professional help. If you see metal parts, circuits, or wires through the damaged area, don’t attempt a DIY fix.
Also check if the chip affects the sensor area. Most smart scales have sensors around the edges or corners. Damage to these zones may interfere with weight readings permanently.
What’s the best way to prevent future chips?
Keep your scale on a stable, flat surface away from high traffic areas. Don’t place it near the edge of counters or shelves. Handle it with care when moving or cleaning around it.
Use a protective mat underneath if you have tile or stone floors. This absorbs impact if the scale gets bumped. Avoid dropping it or stepping on the edges.
Should I repair the glass myself or get professional help?
Small chips on non sensor areas work well for DIY repairs using proper techniques. Larger damage or chips near sensors need expert attention.
If your scale is still under warranty, contact the manufacturer first. They may replace it for free rather than have you repair it yourself.

Hi, I’m Sonny Dawson, the creator and voice behind ConvertResizeGen. 👋 I’m a passionate tech enthusiast who loves exploring the latest gadgets, devices, and electronics that shape the way we live and work. Through my website, I share honest, hands-on reviews of trending Amazon products to help you make smarter buying decisions.