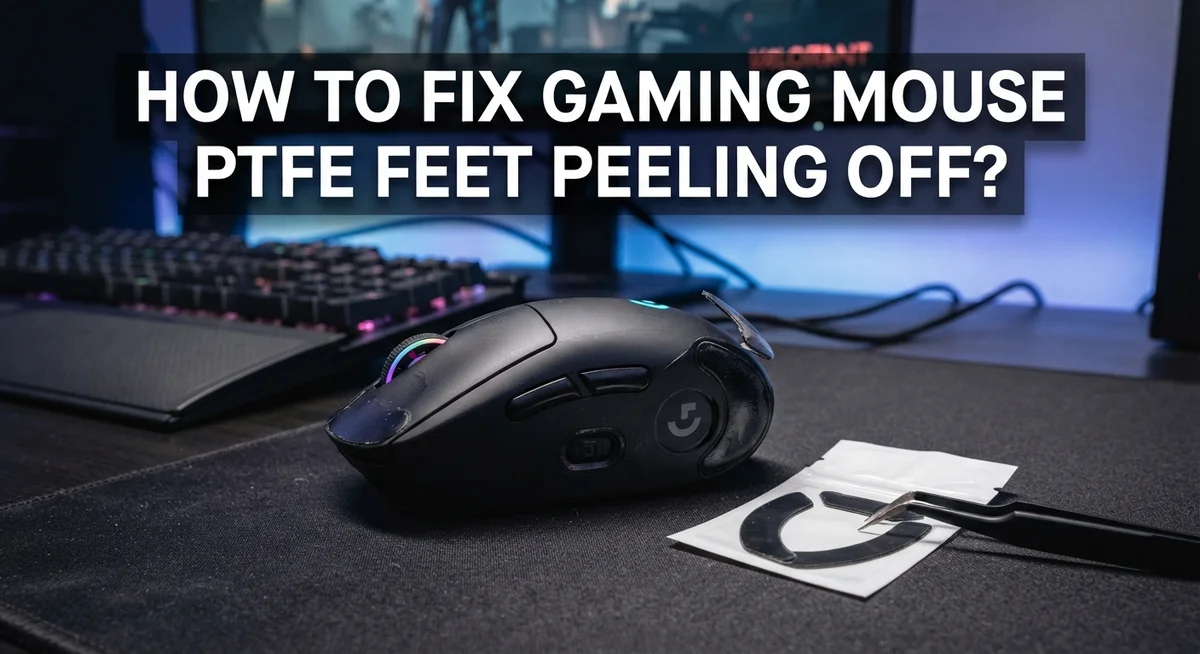
How To Fix Gaming Mouse PTFE Feet Peeling Off?
Your gaming mouse feels sticky. It drags instead of glides. You check the bottom and see it: the PTFE feet are peeling off.
This is a common problem for gamers. PTFE feet wear down over time. Heavy use, dirt, and heat all speed up this process.
Peeling feet hurt your gameplay. Your mouse loses smooth glide. Your aim suffers during fast movements. This is not something to ignore.
The good news? You can fix this problem yourself. You do not need special skills. You just need the right steps and a little patience.
In a Nutshell
- Heat first, peel second. Use a hairdryer or heat gun to soften the old glue. This makes removal easy and clean.
- Get rid of residue. Wipe away leftover adhesive with 70% isopropyl alcohol. Skip harsh chemicals that can hurt your mouse coating.
- Never shave down peeled corners. This is a common mistake. Always replace the entire foot for smooth gliding.
- Apply new PTFE feet evenly. Press them down firmly so they sit flush with the mouse base. Uneven feet cause drag.
- The whole process takes about 10 minutes. It is a simple, affordable fix you can do at home.
- Clean your sensor too. A dust free sensor keeps tracking accurate after your foot swap.
Why PTFE Mouse Feet Peel Off Over Time
PTFE mouse feet peel off because they wear down from constant friction against your mousepad. Every time you move your mouse, the feet gradually thin out through normal use.
The glue that holds PTFE feet to your mouse base breaks down over time. Heat, moisture, and repeated movement weaken the adhesive bond. Eventually, the feet separate from the base and start to curl or flake away.
Peeling feet happen faster if you use your mouse heavily. Competitive gamers who play for hours daily wear out feet much quicker than casual users. The more you move your mouse, the sooner the feet deteriorate.
Low quality adhesive accelerates peeling. Some manufacturers use cheaper glue that doesn’t hold up well. This glue fails faster under stress and temperature changes. That’s why some mice develop peeling feet within weeks while others last months.
Moisture also plays a role in foot degradation. Sweat from your hand, humidity in the air, and spilled liquids can seep under the feet. This moisture weakens the bond between the adhesive and both the mouse base and the PTFE material itself.
Environmental factors matter too. Dust and dirt accumulate under peeling feet and prevent proper contact with your mousepad. This creates gaps that make peeling worse. The feet lift slightly, then peel faster as more adhesive fails.
The good news? Peeling feet are completely normal and fixable. Your mouse isn’t broken. The PTFE material simply wore out from doing its job. Replacement feet restore your mouse to like new condition and cost very little.
Signs Your Mouse Feet Need Replacing
Your gaming mouse will show clear warning signs when PTFE feet need replacing. The most obvious indicator is visible peeling or lifting at the edges of the feet. You’ll notice the corners start to curl upward or separate from the mouse base.
Another sign is reduced gliding smoothness. Your mouse feels slower or stickier than before, even on a clean mousepad. This happens because worn feet no longer maintain consistent contact with the surface. The tracking feels uneven or jerky during gameplay.
Check if the feet are worn down to the same level as your mouse base. Run your finger across the bottom of your mouse. If the feet no longer stick out slightly, they’ve reached the end of their lifespan. Flush or level feet mean zero gliding advantage.
Listen for unusual sounds too. Damaged feet sometimes create scratching or grinding noises as they catch on your mousepad. This is your mouse telling you it needs attention.
Inspect the adhesive underneath. If you see exposed glue or the feet are barely hanging on, replacement time has arrived. Partial peeling gets worse quickly, so don’t wait.
You might also notice uneven wear patterns. One side peels faster than the other if you drag your mouse at odd angles. This imbalance affects your aim and control in competitive games.
Finally, check for discoloration or a sticky residue on your mousepad. This indicates the feet are breaking down and leaving material behind. Your mousepad shouldn’t feel tacky after normal mouse movement.
These signs mean your mouse is ready for new feet. The replacement process is straightforward and restores your mouse to peak performance.
Tools and Materials You’ll Need
Before you start fixing your peeling PTFE feet, gather the right tools and materials. Having everything ready makes the job smooth and quick.
Heat source is your first essential item. A hairdryer works well for most people. A heat gun is faster if you have one available. The heat softens the old adhesive so feet come off without damaging your mouse base.
Removal tools come next. Your fingernail can work, but a thin plastic spudger is gentler on the mouse surface. Some people use old credit cards or plastic scrapers. Avoid metal tools that scratch or gouge the base.
Cleaning supplies matter for removing leftover adhesive. Get 70% isopropyl alcohol and a lint free cloth or microfiber towel. This alcohol dissolves old glue without harming PTFE coatings or your mouse electronics. Never use aggressive solvents like acetone or paint thinner.
Replacement PTFE feet are the core of your fix. Aftermarket feet come in various sizes to fit different mouse models. Check your mouse model before buying to ensure proper fit.
Optional but helpful items include a small brush for cleaning your mouse sensor while you work. Dust buildup affects tracking accuracy after you replace the feet.
Workspace preparation matters too. Work on a clean, flat surface with good lighting. A small towel protects your work area from adhesive residue and alcohol.
Having these materials ready prevents frustration and delays. You’ll finish the entire replacement process in about 10 minutes once you start. The investment in proper tools ensures your mouse feet replacement goes smoothly and your gaming mouse performs like new.
Step-by-Step Guide to Removing Old PTFE Feet
Start by gathering your removal tools before heating anything. You’ll need a thin, flat implement like a plastic spudger or old credit card to slide under the feet. A fingernail works too if you’re gentle. Keep these tools within arm’s reach so you can work quickly once the glue softens.
Next, prepare your heat source. A hairdryer on medium heat works perfectly for this task. A heat gun is faster but requires more care to avoid damaging your mouse plastic. Set up your hairdryer at least six inches away from the mouse base to prevent overheating any electronic components underneath.
Now apply heat directly to one corner of the PTFE feet. Move the hairdryer back and forth for about 30 to 45 seconds. You want the adhesive warm enough to become pliable, not scorching hot. Test the corner gently with your fingernail to see if it lifts easily.
Once the glue softens, slide your removal tool under the edge of the foot. Work slowly and steadily. Push the tool forward to separate the foot from the base rather than pulling upward, which can tear the feet into pieces. If resistance builds, apply more heat and wait another 15 seconds.
Peel the foot away gradually. Rushing this step causes the PTFE to tear, leaving fragments stuck to your mouse. Take your time working around all edges. Repeat this heating and peeling process for each foot until they’re completely removed from your mouse base.
How to Clean the Mouse Surface Before Reapplying Feet
Once you remove the old PTFE feet, your mouse base still has adhesive residue stuck to it. This leftover glue prevents new feet from sitting flat and smooth. You need to clean this surface properly before applying replacement feet.
Start by wiping the base with a dry microfiber cloth. This removes loose dust and debris. Push gently across the entire area where the old feet were attached.
Next, apply 70% isopropyl alcohol to your microfiber cloth. Do not pour alcohol directly onto your mouse. Dampen the cloth lightly and wipe the adhesive residue in circular motions. The alcohol dissolves old glue without harming your mouse coating or electronics.
For stubborn residue, let the alcohol sit for 10 to 15 seconds. Then wipe again with gentle pressure. Repeat this process until the surface feels clean and sticky residue is gone. You should see bare plastic or the original mouse finish underneath.
Avoid aggressive solvents like acetone or strong degreasers. These can damage your mouse coating or plastic base. Stick with 70% isopropyl alcohol as your cleaning solution.
After cleaning with alcohol, wipe the base one more time with a dry cloth. Let any remaining moisture evaporate completely. This takes about one minute.
Inspect the cleaned surface with good lighting. Run your fingernail gently across it. The surface should feel smooth with no sticky spots or rough patches. If you find remaining adhesive, repeat the alcohol cleaning step.
Once the base is completely clean and dry, you are ready to apply new PTFE feet. A clean surface ensures your replacement feet stick properly and last longer.
Applying New PTFE Feet the Right Way
Applying new PTFE feet requires precision and patience to restore your mouse’s gliding performance. Start by positioning your replacement feet directly over the mounting points on your mouse base. These points are where your old feet sat before peeling away.
Align each foot carefully before pressing down. Most replacement PTFE feet come with pre applied adhesive on the back. If yours don’t, you’ll need to add a thin layer of appropriate adhesive designed for PTFE materials. Apply just enough to cover the mounting area without excess glue squeezing out.
Press each foot firmly into place for about 10 to 15 seconds. Use steady, even pressure across the entire foot surface. This ensures proper contact between the adhesive and your mouse base. Uneven pressure creates air bubbles that cause premature peeling.
Let the adhesive cure completely before using your mouse. Most adhesives need 24 hours to reach full strength. Check your replacement feet packaging for specific curing times. Using your mouse too early weakens the bond and causes the same peeling problem to return.
After the feet are fully cured, test your mouse on different surfaces. Your gliding should feel smooth and consistent across all directions. If you notice any lifting at the edges, the feet weren’t pressed firmly enough during installation.
Proper application prevents future peeling and extends your PTFE feet lifespan significantly. Take your time with this step rather than rushing through it. Your gaming performance depends on feet that stay firmly attached to your mouse base.
Common Mistakes That Cause Feet to Peel Again
Peeling feet often return because people skip critical steps during replacement. The most common mistake is applying new feet without removing all old adhesive residue. Even thin layers of leftover glue prevent proper contact between the new feet and your mouse base. This creates air pockets that weaken the bond and cause peeling within days.
Another frequent error is rushing the curing process. Many gamers use their mouse immediately after applying new feet. Adhesive needs full time to set properly, usually 24 hours. Using your mouse too soon puts stress on the incomplete bond and causes premature peeling at the edges.
Uneven application causes problems too. If you press down one side of a foot harder than the other, the opposite edge lifts slightly. This gap lets moisture and dust underneath, weakening the adhesive over time. Always apply even pressure across the entire foot for 10 to 15 seconds.
Using the wrong solvents during cleaning creates lasting damage. Acetone or aggressive degreasers can strip protective coatings from your mouse base. This makes adhesive stick poorly to damaged surfaces. Stick with 70% isopropyl alcohol, which cleans effectively without harming materials.
Skipping the heat step during removal also matters. Some people try peeling old feet cold, which damages the plastic base underneath. Gentle heat softens the glue and makes removal safe and clean.
Finally, applying new feet unevenly on the mouse base causes tilting. Your mouse needs level feet to glide smoothly. Take time to position each foot correctly before pressing down. These simple precautions prevent your replacement feet from peeling again and keep your mouse performing well for months.
Maintenance Tips to Extend the Life of Your Mouse Feet
Keeping your mouse feet in good condition requires simple daily habits. Start by cleaning your mouse pad regularly. Dust and debris build up on surfaces and accelerate wear on your PTFE feet. A quick wipe with a dry cloth removes particles that cause friction.
Avoid eating or drinking near your gaming setup. Crumbs and liquid spills create sticky residue that damages feet and reduces gliding performance. This buildup forces your feet to work harder and peel faster.
Store your mouse properly when not in use. Keep it in a clean, dry location away from extreme heat or humidity. Temperature changes can weaken adhesive bonds over time and cause premature peeling.
Clean your mouse sensor regularly. A dirty sensor forces you to move your mouse more, which increases stress on the feet. Use a cotton swab with 70% isopropyl alcohol to gently clean the sensor lens.
Monitor your feet for early signs of wear. Check the corners and edges monthly. If you notice slight lifting, apply gentle pressure to reseal the edges before peeling spreads. Early intervention prevents complete failure.
Use a mousepad designed for gaming. Hard, smooth surfaces reduce friction and wear on feet compared to rough cloth pads. This simple choice extends foot lifespan significantly.
Adjust your mouse sensitivity properly. Higher sensitivity settings mean less physical movement needed. Less movement means less wear on your feet. Take time to find your optimal sensitivity level.
Replace feet before they completely fail. Waiting until feet peel off entirely damages the adhesive surface beneath. Proactive replacement every 6 to 12 months keeps your mouse performing smoothly and prevents base damage.
Final Thoughts
Peeling PTFE feet don’t mean your gaming mouse is done. It’s a simple fix you can handle at home.
The whole process takes about ten minutes. Heat the old glue, peel the feet, clean the base, and stick on new ones.
You don’t need special skills for this task. A hairdryer, some alcohol, and a steady hand get the job done.
Skipping steps causes most problems. Rushing the heat step or ignoring proper cleaning leads to feet that peel again soon.
Take your time during each stage. Let the adhesive cure fully before you jump back into gaming sessions.
Good habits keep your feet lasting longer too. Clean your mouse regularly and store it properly when you’re done playing.
Watch for early signs of wear on your feet. Catching problems early saves you from bigger headaches later.
Fresh PTFE feet make a real difference in how your mouse feels. Your cursor glides smoother and tracking feels more precise.
This small upgrade costs very little money. Yet it brings back that new mouse feeling without buying a whole new device.
Think of foot replacement as routine maintenance. Just like changing a mousepad, it’s part of keeping your gear in top shape.
Don’t wait until your feet are completely gone. Replace them once you notice real wear starting to show.
Your gaming performance depends on smooth, even glide. Worn feet slow you down and hurt your accuracy in games.
Take action now if you see peeling. Your mouse will thank you with better performance and a longer life.
With the right approach, this fix becomes second nature. Soon you’ll handle it without even thinking twice.
Frequently Asked Questions
Why do PTFE feet peel off my gaming mouse?
PTFE feet wear down from constant use and friction against your mousepad. Over time, the adhesive bond weakens and the material breaks apart. Peeling indicates your feet have reached the end of their lifespan. This is normal wear and tear, not a manufacturing defect.
Environmental factors speed up peeling too. Dust, moisture, and heat all damage the adhesive bond. Improper cleaning with harsh solvents can also cause premature separation.
Can I just glue the peeling corners back down?
No. Attempting to reglue peeling corners won’t work long term. The old adhesive has already failed, and the material is too worn to function properly.
Replace the entire feet instead. This takes only 10 minutes and restores your mouse to like new condition. Partial repairs always fail again within days.
What’s the best way to remove old PTFE feet?
Heat the adhesive first using a hairdryer or heat gun on low setting. This softens the glue bond significantly. Then gently peel the old feet away using your fingernail or a thin plastic tool called a spudger.
After removal, clean any adhesive residue from the base using 70% isopropyl alcohol and a microfiber cloth. Let the surface dry completely before applying new feet.
Should I clean my mouse before applying new feet?
Yes, absolutely. A clean surface ensures proper adhesion for your replacement feet. Use 70% isopropyl alcohol to wipe down the mouse base thoroughly.
Avoid aggressive solvents that damage coatings or plastic. Let everything dry completely before proceeding. This simple step prevents future peeling problems.

Hi, I’m Sonny Dawson, the creator and voice behind ConvertResizeGen. 👋 I’m a passionate tech enthusiast who loves exploring the latest gadgets, devices, and electronics that shape the way we live and work. Through my website, I share honest, hands-on reviews of trending Amazon products to help you make smarter buying decisions.