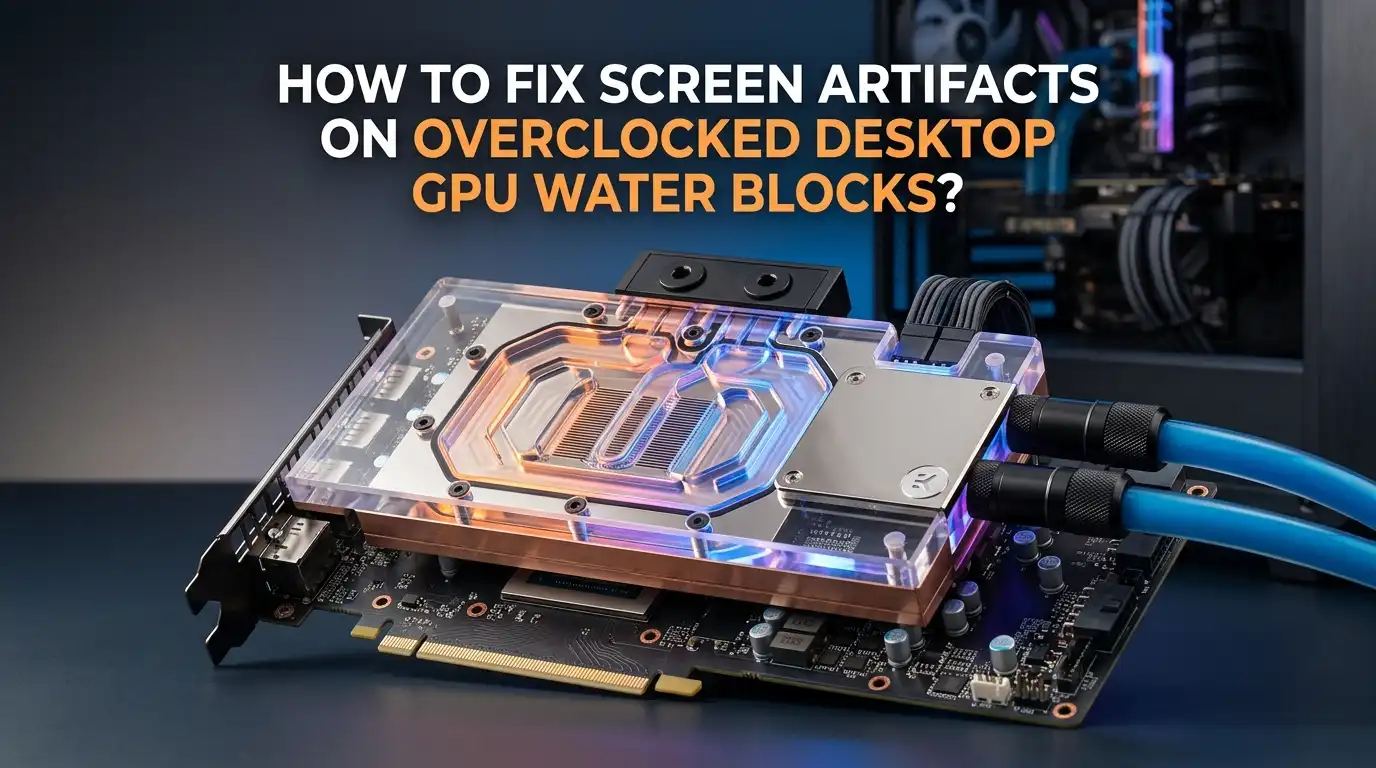
How To Fix Screen Artifacts On Overclocked Desktop GPU Water Blocks?
You pushed your GPU a little further. You installed a water block, cranked up the clocks, and expected smooth, cool performance. Instead, your screen is filled with strange colored lines, flickering textures, or distorted geometry.
Screen artifacts on an overclocked water cooled GPU can be frustrating, especially because you assumed the extra cooling headroom would keep things stable. The good news is that most of these issues are fixable without replacing your card.
This guide walks you through every cause and every fix, from simple software resets to hands on hardware adjustments. Whether your artifacts just started or have been getting worse over weeks, you will find the right solution here.
Key Takeaways
- Screen artifacts on overclocked water cooled GPUs usually come from unstable clock speeds, insufficient voltage, or poor thermal contact between the water block and the GPU die. The water block may keep core temps low, but VRAM and VRM components can still overheat if thermal pads are misaligned or worn out.
- Reducing your memory clock offset is the single fastest fix for most overclocking related artifacts. VRAM pushed beyond its limits produces visual corruption like colored dots, lines, and texture glitches long before the core clock causes a full crash.
- A clean driver reinstall using DDU (Display Driver Uninstaller) in Safe Mode resolves around 40% of artifacting cases, even on water cooled systems. Corrupted driver files can mimic hardware failures and cause persistent screen glitches.
- Water block mounting pressure matters more than most builders realize. Full coverage GPU water blocks are known to lift off the die if screws are not tightened evenly. Uneven pressure leads to hot spots and artifacts even with coolant flowing properly.
- Air bubbles trapped inside the GPU water block reduce cooling efficiency and create thermal spikes that trigger artifacts under load. Tilting your case and bleeding the loop properly can eliminate this hidden issue.
- If artifacts appear in BIOS before Windows loads, the problem is hardware level and no software fix will help. This indicates failing VRAM or GPU die degradation, and the card likely needs an RMA or replacement.
Understanding What GPU Artifacts Actually Are
GPU artifacts are visual errors that appear on your screen when your graphics card fails to render images correctly.
They show up as random colored pixels, stretched textures, flickering geometry, or lines scattered across your display. These errors happen because the GPU or its VRAM sends corrupted data to your monitor.
On a water cooled and overclocked system, artifacts typically mean one thing: something in the overclock is unstable. Your core clock, memory clock, or voltage is set beyond what the silicon can handle reliably.
Water cooling lowers temperatures, but it does not change the electrical limits of your GPU chip. Many builders assume cooler temps equal unlimited overclocking headroom, but every chip has a hard ceiling regardless of temperature.
Pros of identifying artifact types early: You save time by targeting the right fix.
Cons: Some artifact types look similar but have very different causes, which can lead to misdiagnosis.
Reset Your GPU Overclock To Stock Settings
The very first thing you should do is reset all overclock settings to default. Open your overclocking software, whether it is MSI Afterburner, EVGA Precision, or any other tool. Set the core clock offset back to zero. Set the memory clock offset back to zero. Return the power limit to 100%.
Now run a demanding game or benchmark for at least 30 minutes. If the artifacts disappear completely, your overclock was the problem. This confirms the issue is electrical instability, not hardware failure. You can then slowly raise clocks again in small increments to find your card’s true stable limit.
Pros: This is the fastest and safest diagnostic step. It costs nothing and takes minutes.
Cons: You lose your performance gains temporarily. Some users may find their card is no longer stable at clocks that previously worked, which can indicate silicon degradation over time.
Lower Your Memory Clock Offset First
Memory overclocking is the most common cause of visual artifacts on GPUs. VRAM errors produce the classic signs like colored dots, horizontal lines, and texture corruption. The GPU core, by contrast, tends to cause crashes or black screens rather than visual glitches.
Start by reducing your memory clock offset by 50 to 100 MHz from your current overclock. Test again with a game or stress tool. If artifacts decrease, keep lowering in small steps until they vanish.
Many overclockers push memory too hard because it does not immediately crash the system. Instead, memory errors quietly produce visual corruption that gets worse under sustained load.
Pros: Targets the most likely cause of artifacts directly.
Cons: Reducing memory clocks lowers bandwidth, which can affect performance in memory intensive games and applications.
Increase GPU Core Voltage Carefully
Sometimes the artifact problem is not that your clocks are too high. It is that your voltage is too low to sustain those clocks. A GPU needs adequate voltage to switch transistors reliably at higher frequencies. Without enough voltage, signals become unstable and produce visual errors.
In your overclocking software, try adding 25 to 50 mV to the core voltage. Monitor your temperatures closely after this change. Higher voltage means more heat, and even with water cooling, you want to stay within safe limits for your specific GPU model. Check your card’s maximum safe voltage before making changes.
Pros: Can stabilize an overclock without reducing performance.
Cons: Increases power draw and heat output. Long term use of elevated voltage accelerates GPU wear and can shorten the card’s lifespan.
Perform A Clean GPU Driver Reinstall With DDU
Corrupted or conflicting GPU drivers cause artifacts that look exactly like hardware failure. This is especially common after updating drivers or switching between driver versions. A clean reinstall removes all traces of old driver files and starts fresh.
Download Display Driver Uninstaller (DDU) from guru3d.com. Boot your PC into Windows Safe Mode. Run DDU and select the option to clean and restart. After your system reboots, install the latest stable driver directly from NVIDIA or AMD’s official website. Do not let Windows auto install a generic driver before you finish.
Pros: Fixes roughly 40% of all artifacting cases. Free and does not require any hardware changes.
Cons: You need to reconfigure any custom driver settings afterward. Some users report that certain driver versions introduce new bugs, so keeping a known stable version on hand is smart.
Check Your Water Block Mounting Pressure
Full coverage GPU water blocks are sometimes notorious for uneven mounting pressure. If the screws holding the block to the PCB are not tightened evenly, the cold plate can lift slightly off the GPU die. This creates a gap that reduces thermal transfer and causes hot spots.
Remove your GPU from the system and carefully inspect the water block mounting. Check each screw for consistent tightness.
Tighten them in a diagonal cross pattern, similar to how you would mount a CPU cooler. Look at the thermal paste spread on the die when you remove the block. A clean, even spread means good contact. Dry spots or uneven coverage means the block was not seated properly.
Pros: Fixes a hidden issue that temperature sensors may not reveal, since the die can have localized hot spots even with low average temps.
Cons: Requires draining your loop and disassembling the GPU block, which takes time and effort.
Reapply Thermal Paste And Check Thermal Pads
Over time, thermal paste dries out and loses effectiveness. This is true even on water cooled systems. If your water block has been installed for a year or more, the paste between the cold plate and GPU die may have degraded. This causes higher junction temperatures and can trigger artifacts under load.
Clean the old paste off the GPU die and the cold plate using isopropyl alcohol (90% or higher). Apply a fresh, pea sized dot of quality thermal paste to the center of the die.
Also inspect the thermal pads covering the VRAM and VRM components. Worn, compressed, or misaligned thermal pads allow those chips to overheat even while the GPU core stays cool. Replace any pads that look damaged or flat.
Pros: Restores optimal thermal transfer and can drop temperatures significantly.
Cons: Requires complete disassembly of the water block from the GPU. Incorrect reassembly can cause leaks or further problems.
Bleed Air Bubbles From Your GPU Water Block
Trapped air inside your water block reduces coolant flow and creates pockets where heat builds up. Air bubbles are one of the most overlooked causes of thermal issues in custom loops. A bubble sitting on top of the GPU die inside the block acts as an insulator, causing localized overheating.
To bleed air from your loop, tilt your PC case gently in different directions while the pump is running. Move it front to back, side to side, and even briefly upside down.
Listen for gurgling sounds, which indicate air moving through the system. Run the pump for 15 to 30 minutes while tilting periodically. Check your reservoir level and top off coolant as air escapes.
Pros: Simple fix that requires no disassembly. Can resolve intermittent artifacts that only appear under heavy load.
Cons: Some air may persist in micro channels of the block and require multiple bleeding sessions. Aggressive tilting can stress fittings if they are not properly secured.
Monitor VRAM And Hotspot Temperatures
Standard GPU temperature readings only show you the average core temperature. This number can be misleadingly low on water cooled cards. The real problem often hides in VRAM junction temperatures or GPU hotspot readings, which can be 20 to 30 degrees higher than the reported core temp.
Use GPU Z or HWiNFO to monitor these specific sensors while running a stress test. GDDR6X memory, found on cards like the RTX 3090 and RTX 4090, runs especially hot and needs direct cooling contact.
If your VRAM temps exceed 100 degrees Celsius under load, the thermal pads on those chips need immediate attention. Replace them with higher quality pads of the correct thickness.
Pros: Reveals the true thermal picture of your GPU, not just the core.
Cons: Not all GPU models expose VRAM junction temps in monitoring software, which can limit your diagnostic ability.
Check Coolant Flow Rate And Pump Health
A failing pump or restricted flow path reduces cooling performance across your entire loop. If your pump is running slower than expected, or if your coolant has become thick with algae or particulate buildup, your GPU block may not be receiving adequate flow.
Check your pump RPM in your motherboard software or fan controller. Listen for unusual noises from the pump, which can indicate bearing wear. Inspect your coolant for discoloration or floating particles.
If you have not flushed your loop in over 12 months, drain it completely, clean all components, and refill with fresh coolant. A flow meter inline with your loop gives you real time data on how much coolant is actually moving.
Pros: Addresses a system wide cooling issue that affects both GPU and CPU performance.
Cons: Requires a full loop drain and refill, which is time consuming. A flow meter adds cost to the loop.
Stress Test To Confirm Stability
After making any changes, you need to verify that your GPU is truly stable. Run a demanding stress test like FurMark, 3DMark Time Spy, or Unigine Superposition for at least 30 minutes. Watch for any artifacts, crashes, or temperature spikes during the test.
If the stress test passes clean, move on to real world testing in your most demanding games. Some artifacts only appear under specific rendering conditions that synthetic benchmarks do not replicate.
Play for at least an hour and pay close attention to scenes with heavy particle effects, complex geometry, or high resolution textures. Document your clock speeds, voltages, and temperatures so you have a stable baseline for future reference.
Pros: Gives you confidence that your system is reliable for daily use.
Cons: Stress tests push the GPU harder than most real applications, so a passed stress test does not guarantee zero issues in every scenario.
Know When The Problem Is Hardware Failure
Sometimes, despite every fix you try, artifacts persist at stock settings with normal temperatures. This is a strong indicator of hardware failure. If you see artifacts during the BIOS splash screen before Windows loads, the GPU hardware itself is damaged. Driver reinstalls and overclock resets will not fix this.
Common hardware failures include dying VRAM chips, degraded solder joints from thermal cycling, and GPU die deterioration. These issues get progressively worse over time. If your GPU is still under warranty, contact the manufacturer for an RMA.
Provide clear documentation of the problem, including photos or video of the artifacts and the troubleshooting steps you have already completed. Most GPU warranties last three years from the original purchase date.
Pros: An RMA gets you a working replacement at no cost if the card is under warranty.
Cons: The RMA process can take weeks. If the warranty has expired, replacement is your only real option.
Step By Step Summary For Quick Reference
Here is the complete order of troubleshooting steps for screen artifacts on an overclocked water cooled GPU. Follow them from top to bottom for the best results.
- Step 1: Reset all overclock settings to stock.
- Step 2: Lower the memory clock offset by 50 to 100 MHz and test.
- Step 3: Try increasing core voltage by 25 to 50 mV if clocks are within reason.
- Step 4: Perform a clean driver reinstall using DDU in Safe Mode.
- Step 5: Bleed air bubbles from your loop.
- Step 6: Check water block mounting pressure and reseat if needed.
- Step 7: Reapply thermal paste and replace thermal pads.
- Step 8: Monitor VRAM and hotspot temps under load.
- Step 9: Verify coolant flow and pump health.
- Step 10: Run a full stress test to confirm stability.
If artifacts remain after all steps at stock settings, the GPU hardware is likely failing and needs warranty service or replacement.
Frequently Asked Questions
Can water cooling completely prevent GPU artifacts from overclocking?
No. Water cooling reduces temperatures, but it cannot change the electrical limits of your GPU silicon. Every chip has a maximum stable frequency regardless of how cool it runs. Water cooling gives you more thermal headroom, but pushing clocks beyond the chip’s capability will still produce artifacts.
Why do I see artifacts only during gaming but not on the desktop?
Gaming puts heavy load on both the GPU core and VRAM. The overclock may be stable at idle but become unstable under full load. Your desktop uses minimal GPU resources, so minor instabilities do not show. Try reducing your memory clock offset and testing again in the game that triggers the artifacts.
How do I know if my VRAM or my GPU core is causing the artifacts?
VRAM issues produce colored dots, lines, and texture corruption. GPU core issues cause geometric distortion, stretched polygons, or full system crashes. If you see visual noise like static or random pixels, the memory is likely the culprit. If 3D objects deform wildly, the core overclock is too aggressive.
Is it safe to increase GPU voltage on a water cooled card?
It is safer than on an air cooled card because water cooling handles the extra heat more effectively. However, you should never exceed your GPU’s recommended maximum voltage. Check your specific model’s safe voltage range before making changes. Long term elevated voltage accelerates wear on the silicon.
How often should I replace thermal paste on a GPU water block?
Most thermal pastes last 2 to 3 years before performance degrades noticeably. If you are running aggressive overclocks with high heat output, consider replacing the paste every 12 to 18 months. Always inspect the thermal pads on VRAM and VRM components at the same time.
Can air bubbles in my water block really cause screen artifacts?
Yes. An air pocket sitting on the GPU die inside the water block acts as a thermal insulator. This creates a hot spot that can push the die temperature high enough to cause instability and artifacts, even if your coolant temperature sensor reads normal. Proper loop bleeding eliminates this problem.

Hi, I’m Sonny Dawson, the creator and voice behind ConvertResizeGen. 👋 I’m a passionate tech enthusiast who loves exploring the latest gadgets, devices, and electronics that shape the way we live and work. Through my website, I share honest, hands-on reviews of trending Amazon products to help you make smarter buying decisions.