How To Fix Electronic Inhaler Spacer Valve Sticking?
A sticking valve on your electronic inhaler spacer can feel like a small problem with a big impact. Every breath matters when you rely on your medication working right.
When the valve sticks, medicine may not reach your lungs the way it should. This can leave you feeling like your treatment just is not doing its job.
The good news? Most valve sticking issues have simple fixes. You do not need to replace your whole device or call a specialist right away.
In a Nutshell
- Clean your spacer often. Dust and medicine residue build up inside the chamber. This buildup makes the valve stick over time.
- Remove the inhaler before cleaning. Take the MDI out of the spacer first. This step protects the valve from damage.
- Check the insertion port. Make sure the port fits your inhaler correctly. A loose or wrong fit can cause valve problems.
- Seal your lips around the mouthpiece. A good seal helps the valve open and close as it should. Air leaks can affect valve movement.
- Avoid taking the valve apart. Never disassemble the valve section unless your manual says to. This mistake often makes sticking worse.
- Follow manufacturer instructions. Some spacers are dishwasher safe. Others need gentle hand washing only.
Understanding How the Spacer Valve Works
A spacer valve works like a bridge between your inhaler and your lungs. When you press your inhaler, it releases medication into the chamber. The valve then opens and closes to control how that medicine moves through the tube and into your airways.
The valve has two main jobs. First, it holds the medicine cloud inside the chamber for a moment. This gives you time to breathe in without rushing. Second, it prevents air from flowing backward when you exhale. This one way flow keeps the medicine moving in the right direction only.
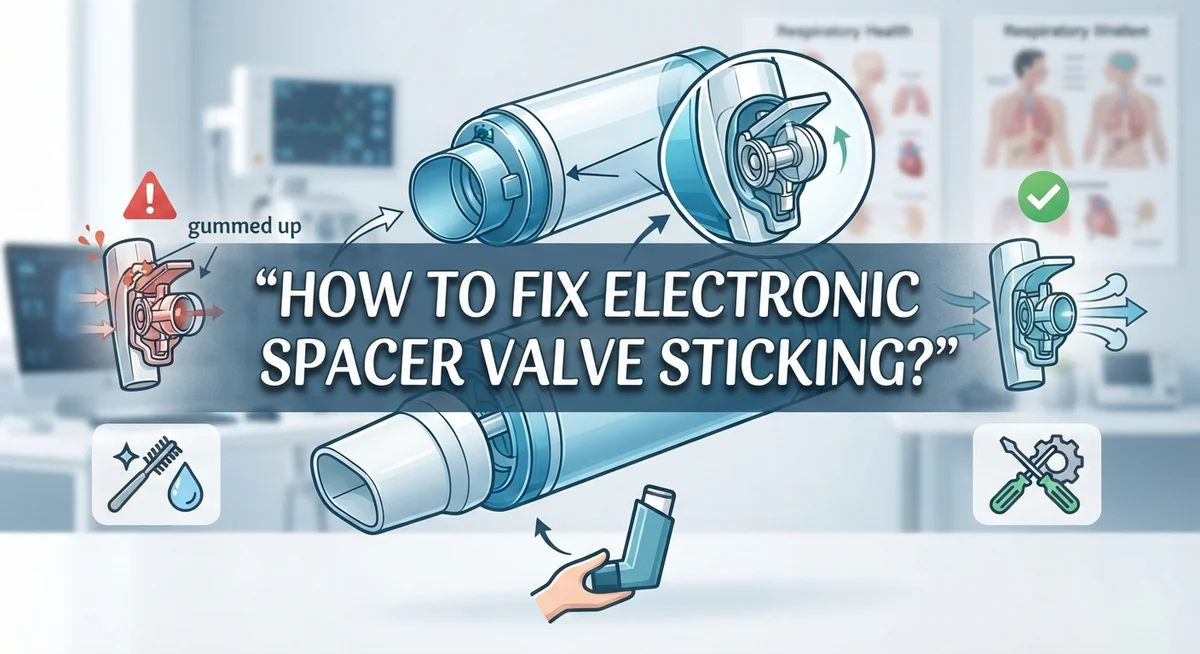
Inside the spacer, you will find a small flapper or ball mechanism. This piece moves up and down as air passes through. When you inhale, the valve opens to let medicine reach your lungs. When you stop breathing in, the valve closes automatically. This design makes sure you get the full dose with each use.
Understanding this process helps you spot problems early. If the valve sticks in the closed position, medicine cannot enter your lungs. If it sticks open, medicine may escape into the air instead of your airways. Either way, you lose medication that you need.
The valve works best when it stays clean and dry. Dust particles, medicine residue, and moisture can build up over time. These deposits make the valve sticky and slow. When particles coat the flapper mechanism, it cannot move freely anymore.
Proper cleaning prevents most valve issues. Regular maintenance keeps the valve moving smoothly. You should also check that your inhaler inserts correctly into the spacer chamber. A loose fit can cause the valve to work poorly. Finally, always seal your lips around the mouthpiece when you use the spacer. A good seal helps the valve function exactly as it should. These basic facts about how your spacer valve works will help you use it correctly and keep it in good condition.
Common Causes of Valve Sticking
Valve sticking happens for several clear reasons. Understanding these causes helps you prevent problems before they start.
Dust and medicine buildup is the most common culprit. Every time you use your spacer, tiny particles of medication remain inside the chamber. Over weeks and months, these particles dry and stick to the valve mechanism. The flapper or ball inside the valve gets coated, making movement difficult.
Moisture trapped inside creates another major issue. If you store your spacer in a damp bathroom or humid environment, water droplets can settle on the valve parts. This moisture mixes with dried medication and forms a sticky paste. The valve then gets stuck in either the open or closed position.
Improper cleaning techniques make sticking worse. When you rinse your spacer but don’t dry it completely, water sits inside the chamber. Some people use soap that leaves a residue. This residue hardens and prevents smooth valve operation.
Incorrect insertion of the inhaler strains the valve. If your MDI doesn’t fit snugly into the spacer port, the connection stays loose. This causes the valve to work harder than it should. Extra stress on the mechanism leads to sticking over time.
Hard water minerals can deposit on valve surfaces. If you clean your spacer with tap water high in minerals, these deposits accumulate. They create a rough texture that interferes with the valve’s smooth movement.
Disassembling the valve section causes damage that leads to sticking. The valve contains delicate springs and small moving parts. Taking these apart, even to clean, can bend or misalign them permanently.
Age and wear affect all spacers eventually. After months or years of daily use, the valve mechanism simply wears down. Parts become less responsive, and sticking becomes more frequent. Replacement becomes necessary at this stage.
Step-by-Step Guide to Cleaning and Freeing a Stuck Valve
Start by reading your spacer’s instruction manual. The manual tells you exactly which parts you can touch and which ones you should leave alone. Different spacer models have different designs, so following the specific guidance matters.
Remove the inhaler first. Take the MDI out of the spacer chamber before you start any cleaning work. This step prevents accidental medication release and keeps the valve mechanism safe.
Check the insertion port where your inhaler connects. Look for visible dust, dried medicine, or debris around the opening. Gently wipe this area with a soft, dry cloth. Do not force anything into the port.
Hold the spacer up to a light source. Look through the mouthpiece end toward the chamber. You should see light passing through. If light is blocked, the valve is stuck in the closed position. This confirms the problem.
Rinse the chamber with warm water. Let water flow gently through the mouthpiece and out the insertion port. This helps loosen dried medication and dust. Do not use hot water, as it can damage plastic components.
Tap the spacer gently against your palm while holding it upside down. This helps dislodge trapped particles. Repeat this tapping motion several times.
Allow the spacer to air dry completely before reassembling. Moisture inside the chamber causes valves to stick, so drying is critical. Stand it upside down on a clean cloth for at least two hours.
Do not take the valve apart. Unless your manual specifically instructs you to disassemble the valve section, leave it intact. Disassembly often causes more damage than it fixes.
Test the valve by gently pressing the inhaler into the spacer. You should feel smooth resistance, not a stuck sensation. If sticking persists after cleaning, the spacer may need replacement.
Proper Drying and Reassembly Techniques
After you clean your spacer and free the stuck valve, reassembly is just as important as the cleaning process itself. Proper reassembly ensures your spacer works correctly and prevents future sticking problems.
Start by checking that every part is completely dry. Moisture is one of the biggest causes of valve sticking. If any water remains inside the chamber or valve area, wait longer before putting pieces back together. You can speed up drying by standing the spacer upright in a warm, dry location for several hours.
Inspect each component before reassembling. Look at the mouthpiece, chamber walls, and the insertion port where your inhaler connects. Make sure no debris, dust, or mineral deposits remain. If you spot any residue, rinse that part again with warm water and let it dry completely.
When you’re ready to reassemble, line up the inhaler insertion port with the chamber opening carefully. Push the inhaler in slowly and firmly until you hear or feel a click. This click tells you the connection is secure. Don’t force it or twist it during insertion, as this can damage the valve mechanism.
Test the valve by listening for a soft clicking or popping sound when you squeeze and release the inhaler. This sound means the valve is moving freely. If you hear nothing or feel resistance, stop and check for remaining moisture or debris.
Store your reassembled spacer in a clean, dry place away from direct sunlight. Keep the protective cap on the mouthpiece if your spacer includes one. This prevents dust from entering the chamber between uses.
Remember that spacers wear out over time. If your spacer continues to have sticking problems after proper cleaning and reassembly, it may be time to replace it with a new one.
Tips for Preventing Future Valve Sticking
Regular cleaning keeps your spacer valve working smoothly. Clean your chamber at least once a week, or more often if you use it daily. Remove the inhaler first, then rinse the spacer with warm water.
Let it air dry completely before putting it back together. Moisture trapped inside causes valve sticking, so never reassemble a wet spacer. Place it upright on a clean towel in a warm room.
Check your manufacturer’s guidelines about dishwashers. Some spacers are dishwasher safe, but others aren’t. Hand washing with warm water works well for most models. Avoid harsh scrubbing that damages the valve mechanism.
Inspect the insertion port regularly. This is where your inhaler connects to the spacer. Dust and medicine residue collect here quickly. Wipe it gently with a soft, dry cloth each time you use your spacer.
Store your spacer in a clean, dry place away from direct sunlight. Heat and humidity create the perfect conditions for valve sticking. A sealed container works better than leaving it on a shelf exposed to air.
Replace disposable parts as your manual recommends. Some spacers have replaceable components that wear out over time. Fresh parts maintain proper valve function.
Handle your spacer with care. Don’t drop it or apply force to the valve section. Rough handling damages internal components that you can’t see.
Keep your inhaler clean too. Wipe the MDI connection point with a dry cloth before inserting it into the spacer. This prevents medicine buildup at the insertion port.
Check your spacer every month for cracks or visible damage. A damaged chamber allows air to escape, making the valve work harder. Replace your spacer if you notice any cracks or loose parts.
Teach yourself and family members proper cleaning steps. Consistent care prevents most valve problems before they start. When everyone follows the same routine, your spacer stays in good working condition for longer.
Mistakes That Make Valve Sticking Worse
Improper cleaning methods damage the valve more than they help. Many people use hot water that’s too hot or scrub aggressively inside the chamber. High temperatures can warp plastic components and make the valve mechanism stick permanently. Scrubbing forcefully pushes residue deeper into the valve instead of removing it.
Using harsh soaps or chemicals creates another major problem. Dish soap leaves a film that coats the valve parts. This film hardens over time and causes the valve to stick even worse. Stick to plain warm water for best results.
Reassembling the spacer while it’s still damp is a common mistake. Moisture trapped inside the chamber causes the valve to swell and jam. You must wait until every part is completely dry before putting the spacer back together.
Disassembling the valve section yourself causes serious damage. The valve has tiny springs and moving parts that are easy to break. Once broken, these parts won’t work again. Only take apart components your manual says you can remove.
Storing your spacer in humid or damp environments makes sticking worse. Bathrooms, kitchens, and basements have too much moisture. This moisture gets inside the chamber and makes the valve mechanism stick. Store your spacer in a cool, dry room instead.
Ignoring small cracks or damage allows problems to spread. A tiny crack lets water inside. This water reaches the valve and causes it to stick. Check your spacer monthly for visible damage.
Forcing the valve open or applying pressure to unstick it backfires. Pushing or bending the spacer breaks the delicate valve mechanism. Gentle tapping and patience work much better than force. Rough handling turns a small stick into permanent damage that requires spacer replacement.
When to Replace the Spacer Instead of Repairing It
Your spacer valve sticking doesn’t always mean you need to fix it. Sometimes replacement is the better choice. Understanding when to replace versus repair saves you time and money.
Age matters most. Spacers typically last two to three years with regular use. Check your manual for the recommended replacement timeline. If your spacer is older than three years, replacing it often makes more sense than troubleshooting a stuck valve.
Look for visible damage on the chamber itself. Cracks, cloudiness, or discoloration mean the spacer is wearing out. A cracked spacer won’t seal properly even if you fix the valve. Replacement becomes necessary at this point.
Test the valve after cleaning attempts. If the valve still sticks after you’ve cleaned it thoroughly and let it dry completely, the internal mechanism may be damaged beyond repair. Persistent sticking suggests internal wear rather than surface buildup.
Check if your spacer model has replaceable valve parts. Some spacers allow you to swap out just the valve section instead of replacing the entire chamber. Your manufacturer’s instructions will specify this option. If valve parts aren’t available for your model, you’ll need a new spacer.
Consider how often you use your inhaler. Frequent daily users may need replacement spacers every 18 to 24 months. Occasional users might get three years from one spacer. Heavy use accelerates wear on the valve mechanism.
Cost and availability matter too. If replacement parts cost nearly as much as a new spacer, buying new makes sense. Check what your insurance covers. Many plans cover spacer replacement without requiring a prescription.
Don’t force a stuck valve repeatedly. Applying pressure damages the internal components further and can make the problem permanent. If gentle cleaning and proper drying don’t work within two attempts, replacement is your best option. A new spacer ensures your medication reaches your lungs effectively.
Final Thoughts
A sticking valve does not have to disrupt your treatment plan. Most sticking problems come from moisture, dust, or debris inside the chamber. Simple cleaning and proper drying solve the issue in many cases.
Your spacer plays a big role in how well your medication works. A valve that sticks can block the full dose from reaching your lungs. This makes your inhaler less effective when you need it most.
Pay attention to how your spacer feels during each use. A smooth, easy valve movement means everything works as it should. Resistance or sticking signals a problem that needs your attention right away.
Talk to your doctor or pharmacist if cleaning does not fix the sticking. They can check your technique and confirm your spacer works with your inhaler type. They may also suggest a different device if problems continue.
Good habits protect your spacer over time. Clean it after regular use, dry it fully, and store it properly. These small steps prevent most sticking problems before they start.
Never ignore a sticking valve and hope it fixes itself. A blocked or stuck valve means less medication reaches your airways. This puts your breathing health at risk during flare ups.
Trust your instincts about your equipment. If your spacer feels wrong or looks damaged, take action right away. Waiting too long turns a small fix into a bigger problem.
Your inhaler and spacer work as a team. Keeping both clean and functional helps you breathe easier every day. A little care now saves you from bigger issues later.
Stay consistent with maintenance, watch for warning signs, and reach out for help when needed. Your breathing health depends on equipment that works right every single time you use it.
Frequently Asked Questions
Why does my spacer valve stick in the first place?
Spacer valves stick because moisture builds up inside the chamber. When you use your inhaler, warm breath enters the spacer. This moisture settles on the valve components and dries there over time. Dust and residue from medication powder also collect on the valve. Regular cleaning prevents this buildup, but many people skip this step. If you store your spacer in a bathroom or damp area, sticking gets worse faster.
How do I clean my spacer the right way?
Start by removing the MDI from your spacer. Rinse the chamber with warm water only. Use your fingers to gently wipe the inside surfaces. Let all parts air dry completely before reassembling. Some spacer models are dishwasher safe, but check your manufacturer’s instructions first. Never use soap, chemicals, or harsh cleaners unless your instructions say it’s safe. Do not take apart the valve section yourself. Once everything is completely dry, reattach your MDI and test the valve.
What should I do if cleaning doesn’t work?
Test your spacer one more time after it fully dries. If the valve still sticks, contact your pharmacist or doctor for advice. They can check if your spacer needs replacement parts or if buying a new one makes sense. Do not force the valve open or apply pressure to it. Forcing causes permanent damage.
How often should I clean my spacer?
Clean your spacer after each use or at least three times per week. This stops moisture and powder from hardening inside the chamber. Regular cleaning keeps your valve moving smoothly and your medication working well.

Hi, I’m Sonny Dawson, the creator and voice behind ConvertResizeGen. 👋 I’m a passionate tech enthusiast who loves exploring the latest gadgets, devices, and electronics that shape the way we live and work. Through my website, I share honest, hands-on reviews of trending Amazon products to help you make smarter buying decisions.